
Quick guide
Feature
The app automates back-in-stock notifications, letting customers subscribe to sold-out products and get instant email alerts when inventory returns. It seamlessly integrates with your store, helps recover missed sales, and keeps shoppers engaged without any manual effort.
Requirement: To enable back in stock synchronisation, the user must be logged into their account on every device where they want their back in stock to stay updated.
Step 1
Enable the app on the theme you need. We recommend enabling the add-on on an unpublished theme first.
To activate the extension:
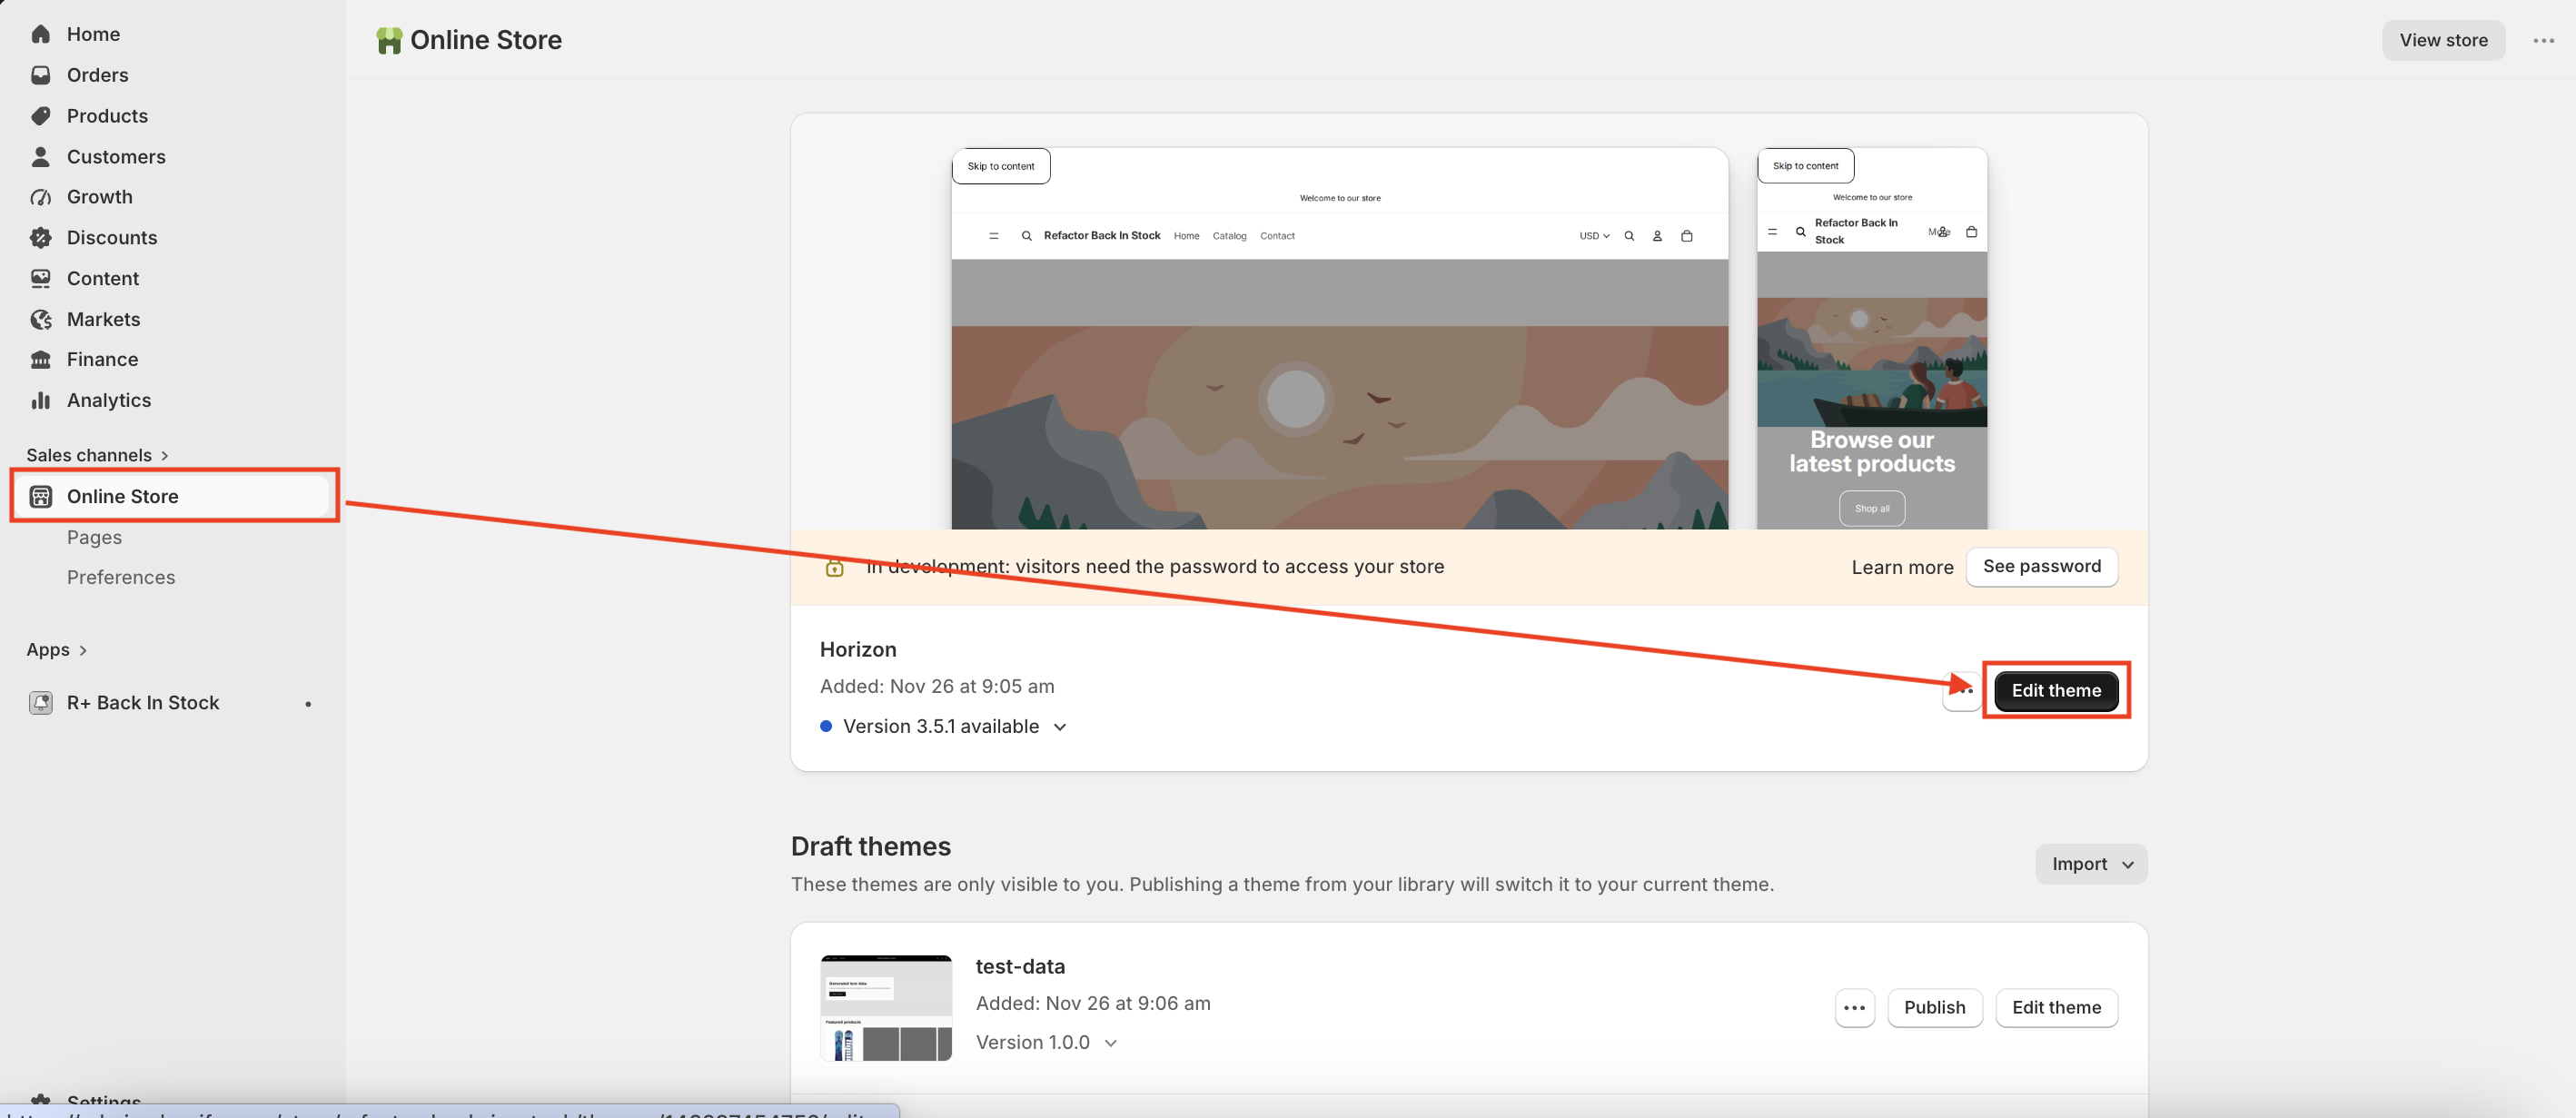
- In your Shopify admin, go to Online Store → Themes.
-
Find the theme you want to edit and click Edit theme.
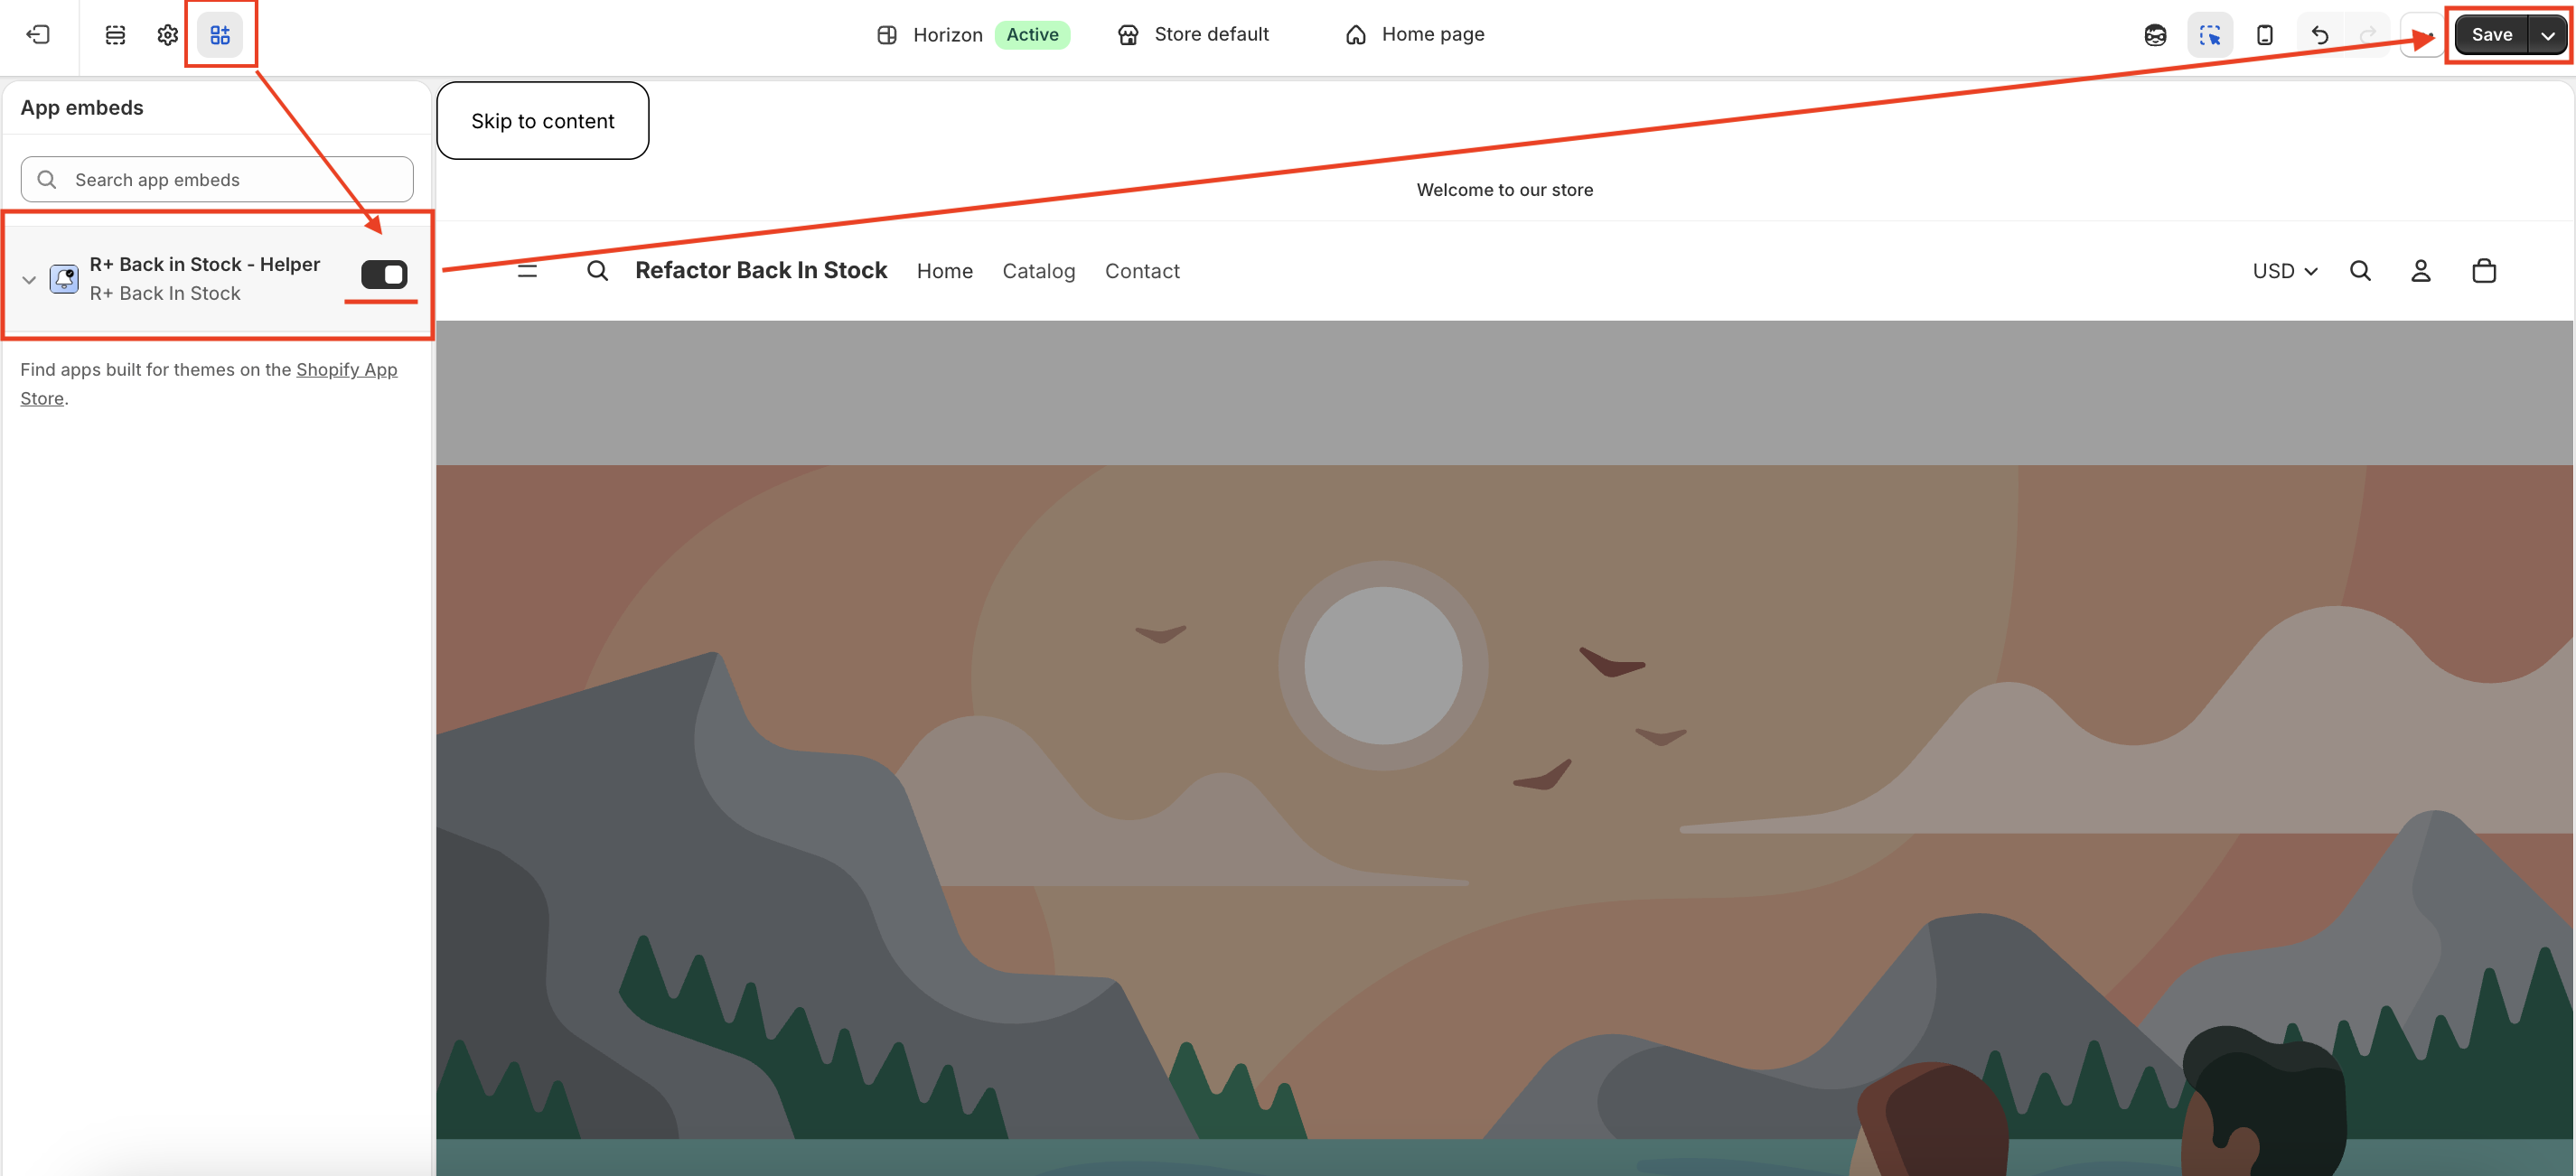
- In the sidebar, click the App embeds icon (the puzzle piece icon in the left sidebar).
- Find R+ Back in Stock - Helper in the list and enable it.
-
Click Save.
Step 2
-
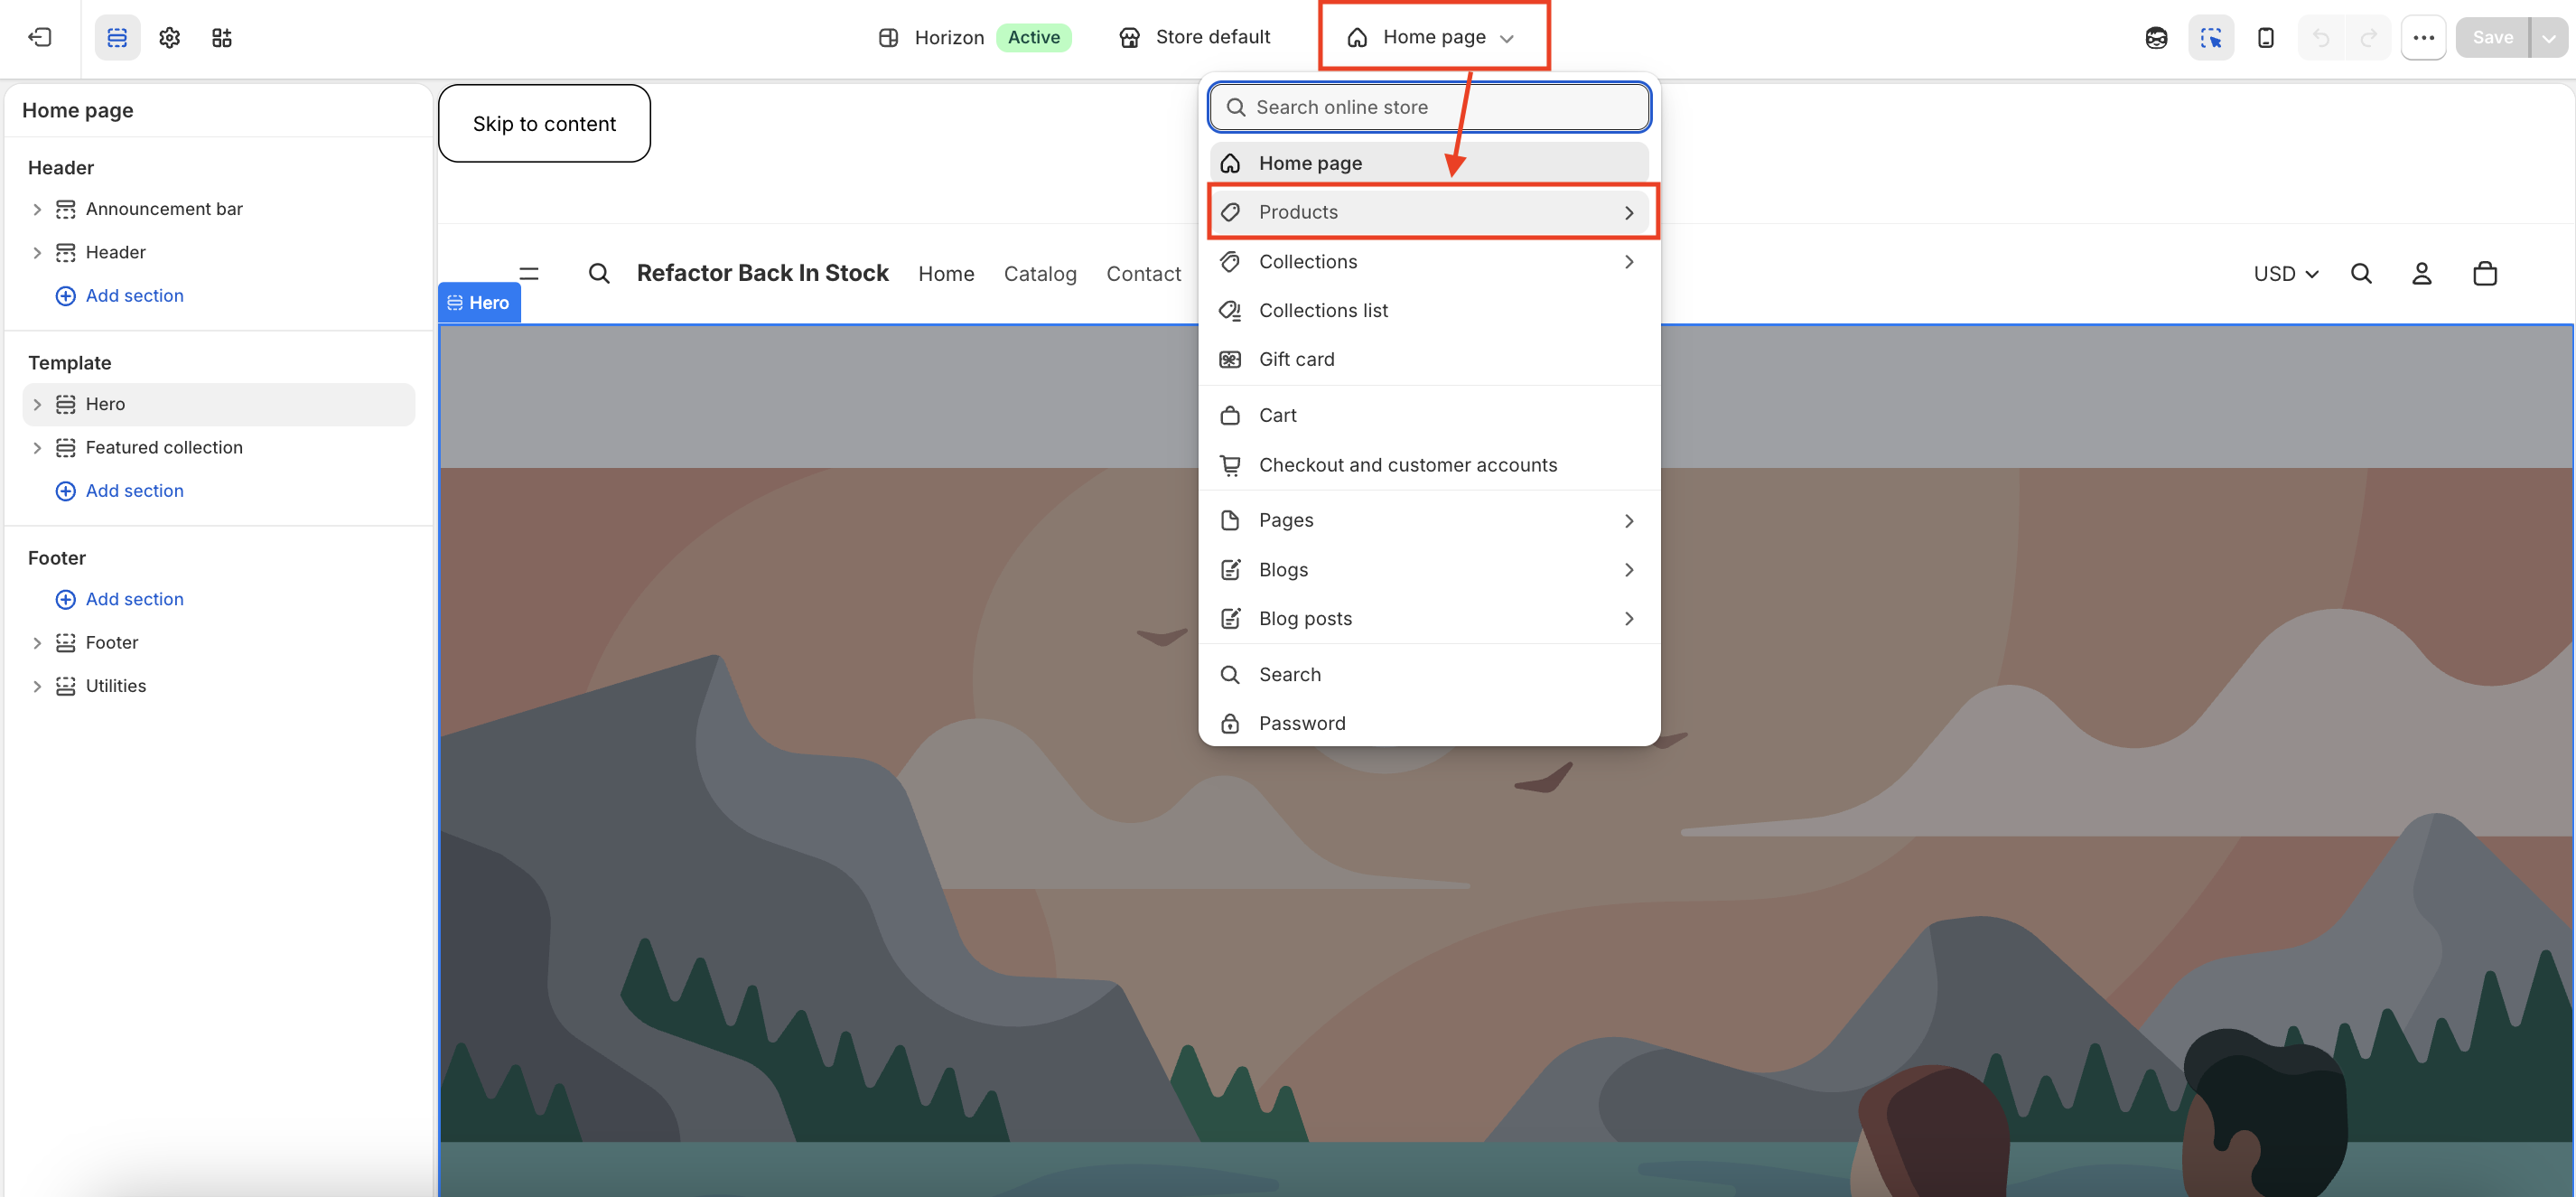
Go to Online Store → Themes, and click Edit theme on your active theme.
-
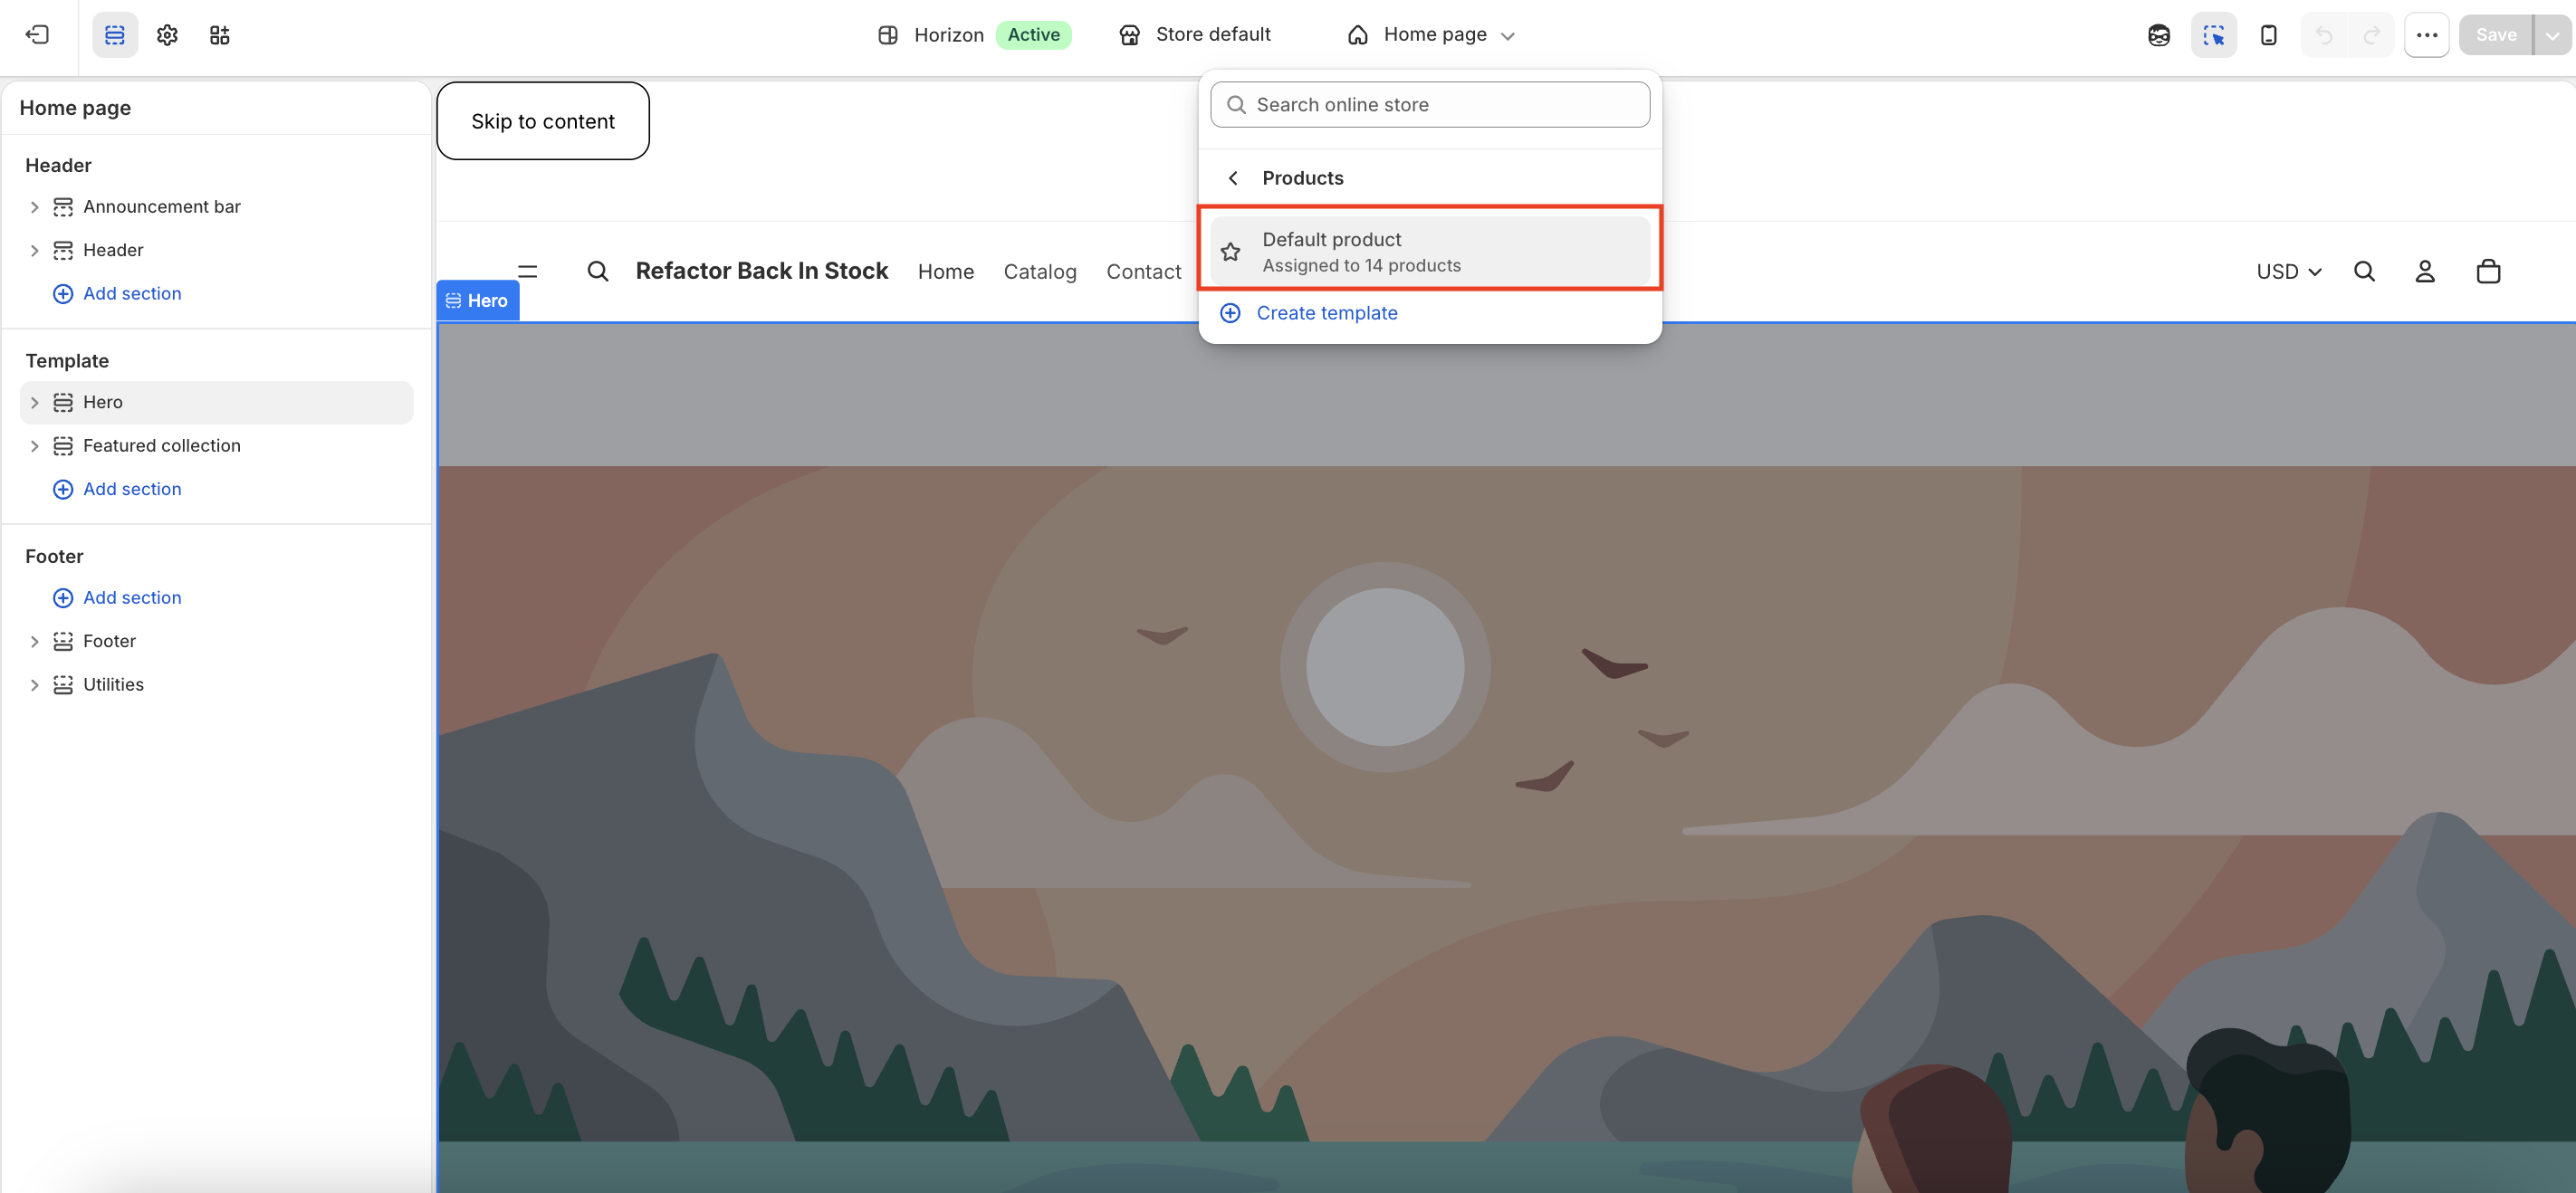
Open the page selector at the top, then go to Products and choose your Product template.
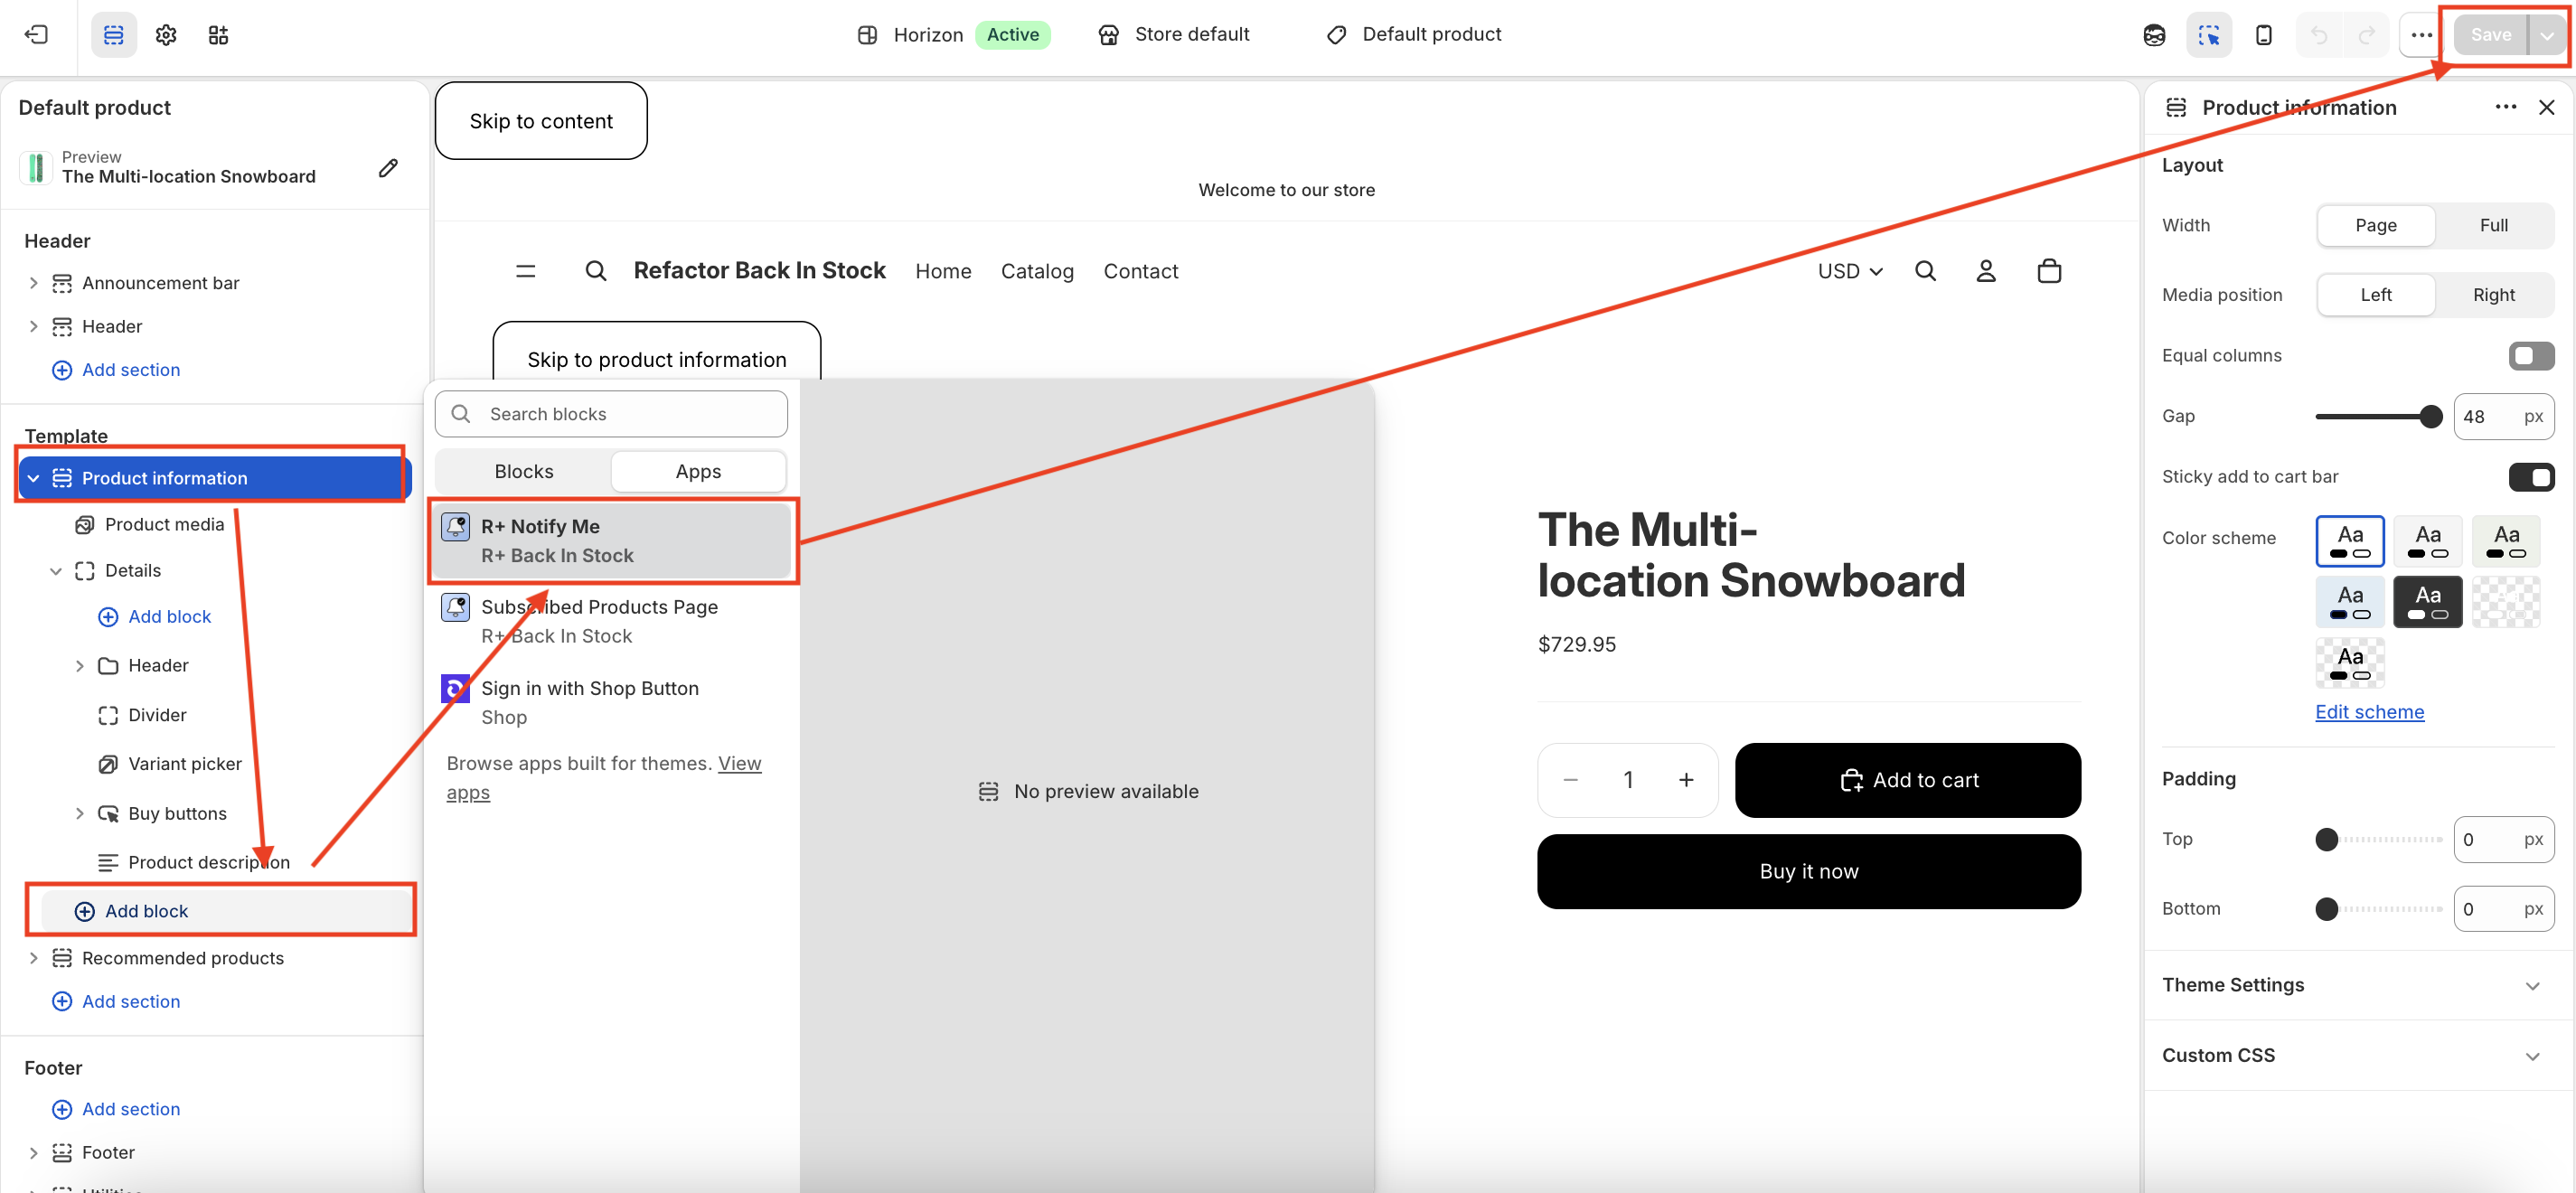
- On the Product page, open the Main product section (for example, Product Information).
- Click Add block.
- In the modal window, open the Apps section and select R+ Notify Me block.
- Choose the desired position of the block (above or below other blocks).
-
Click Save to apply your changes.
Step 3
Go to the Product page of the product that is out of stock and click the “Notify me when available” button.

Step 4
Enter your details to subscribe for updates on the selected product or variant.

Step 5
Once the product is back in stock, you will receive an email notifying you.

Adding the Subscribed Products page
If your store uses old Shopify Customer Accounts you can add the Subscribed Products page as part of the customers account.
Important! If your store uses Shopify Customer Accounts (New) please check this article.
To add the page:
- In your Shopify admin, go to Online Store → Themes.
-
Find the theme you want to edit and click Edit theme.
-
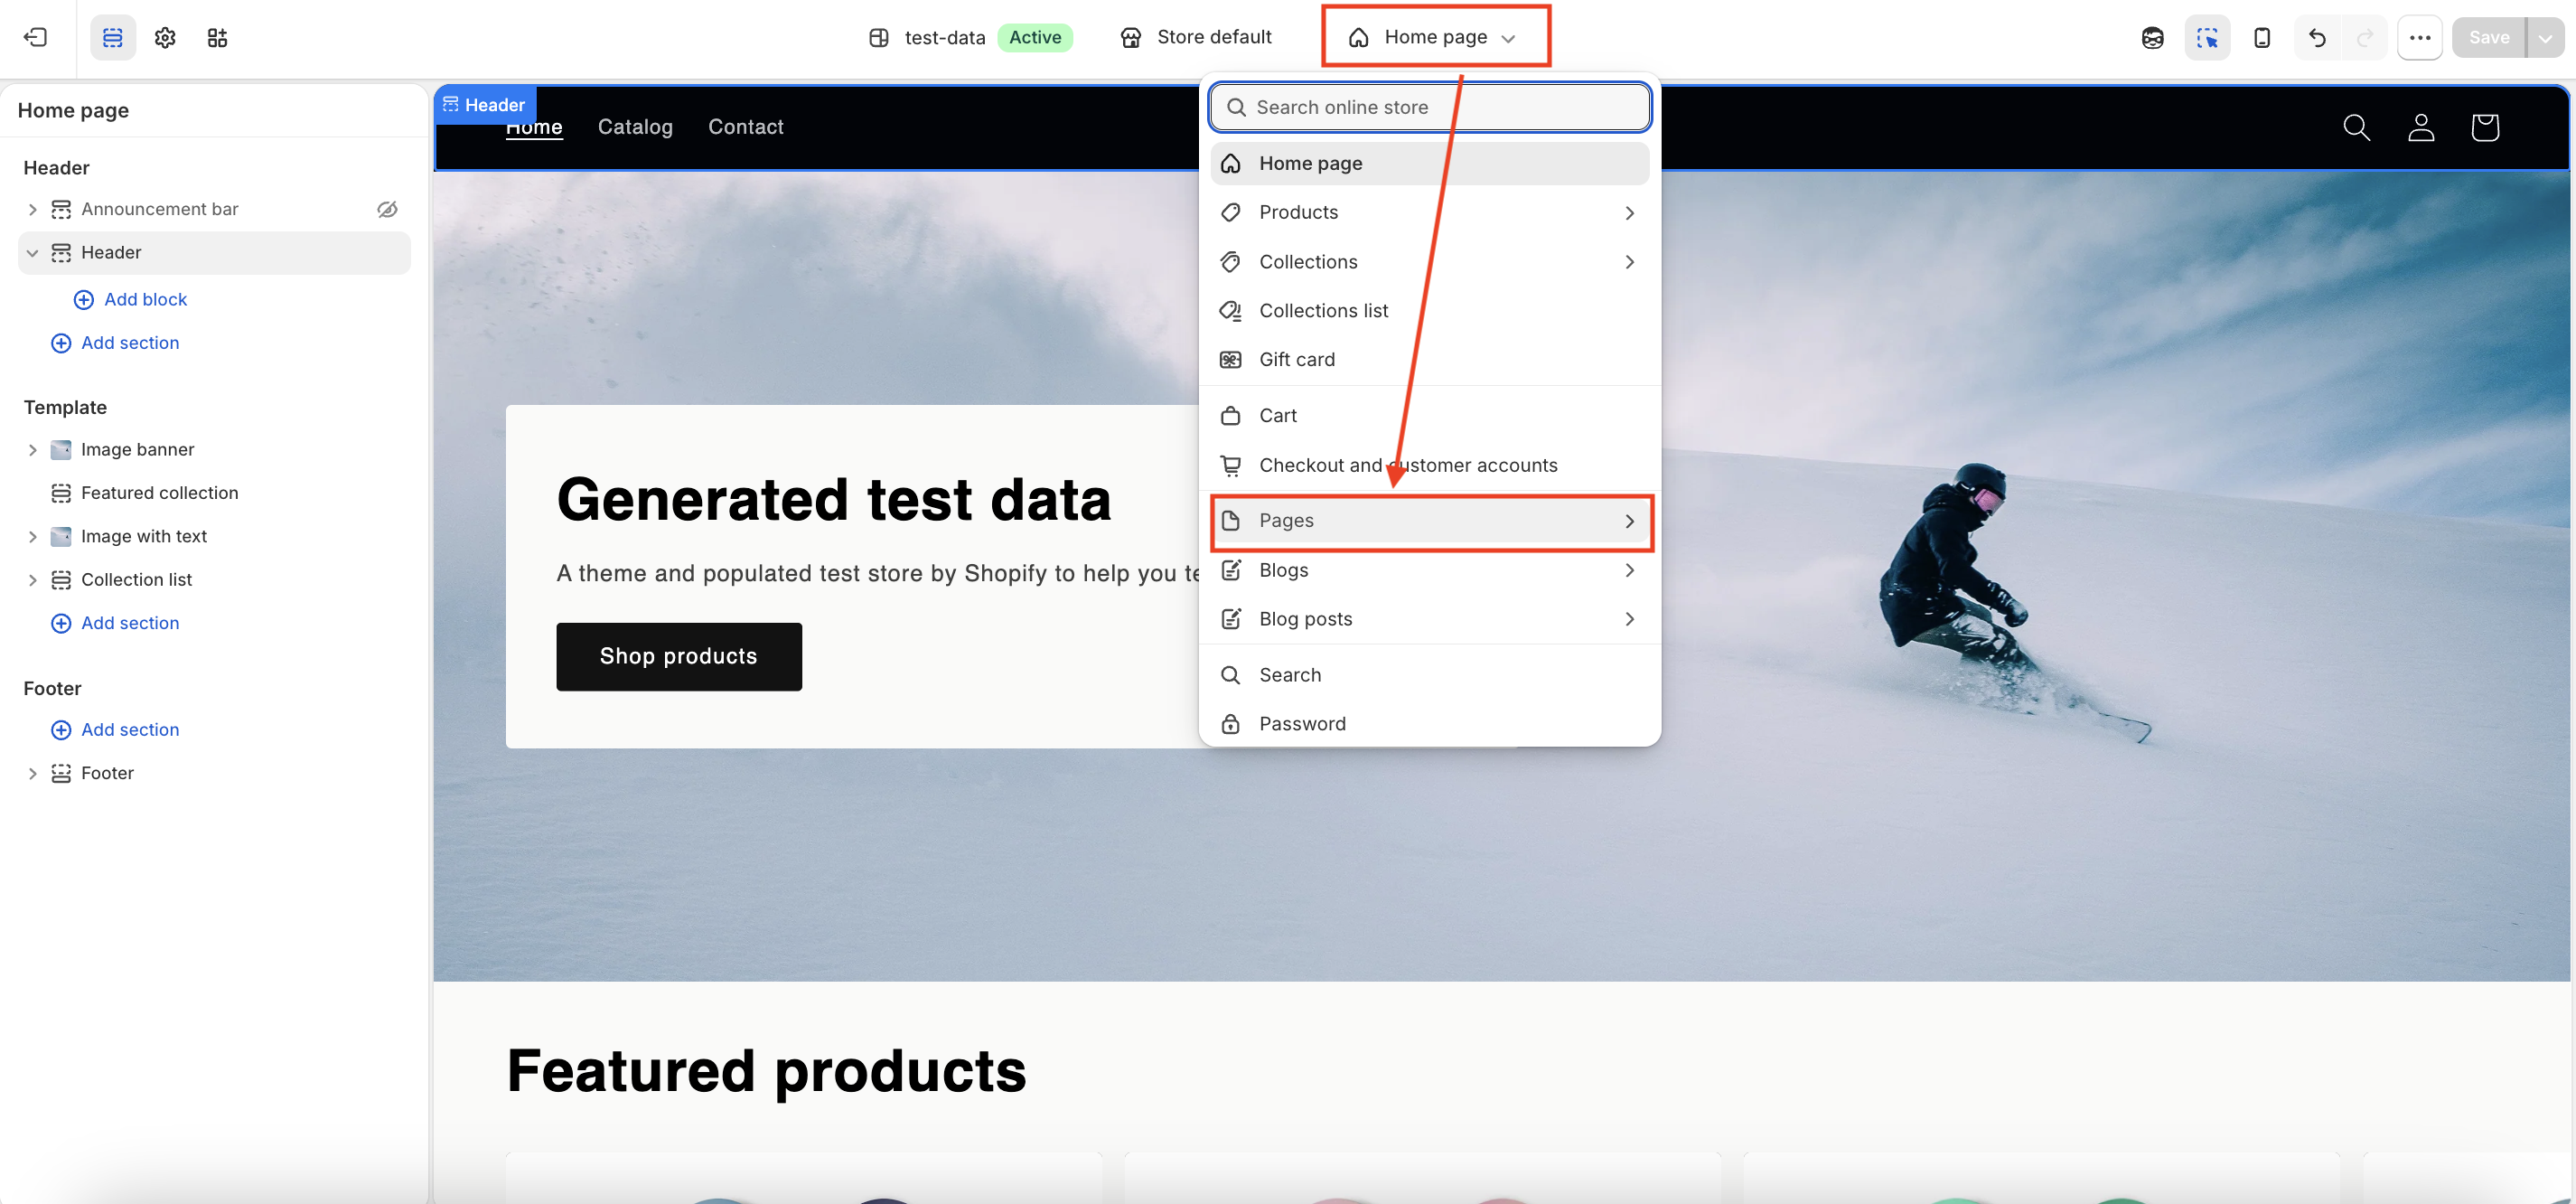
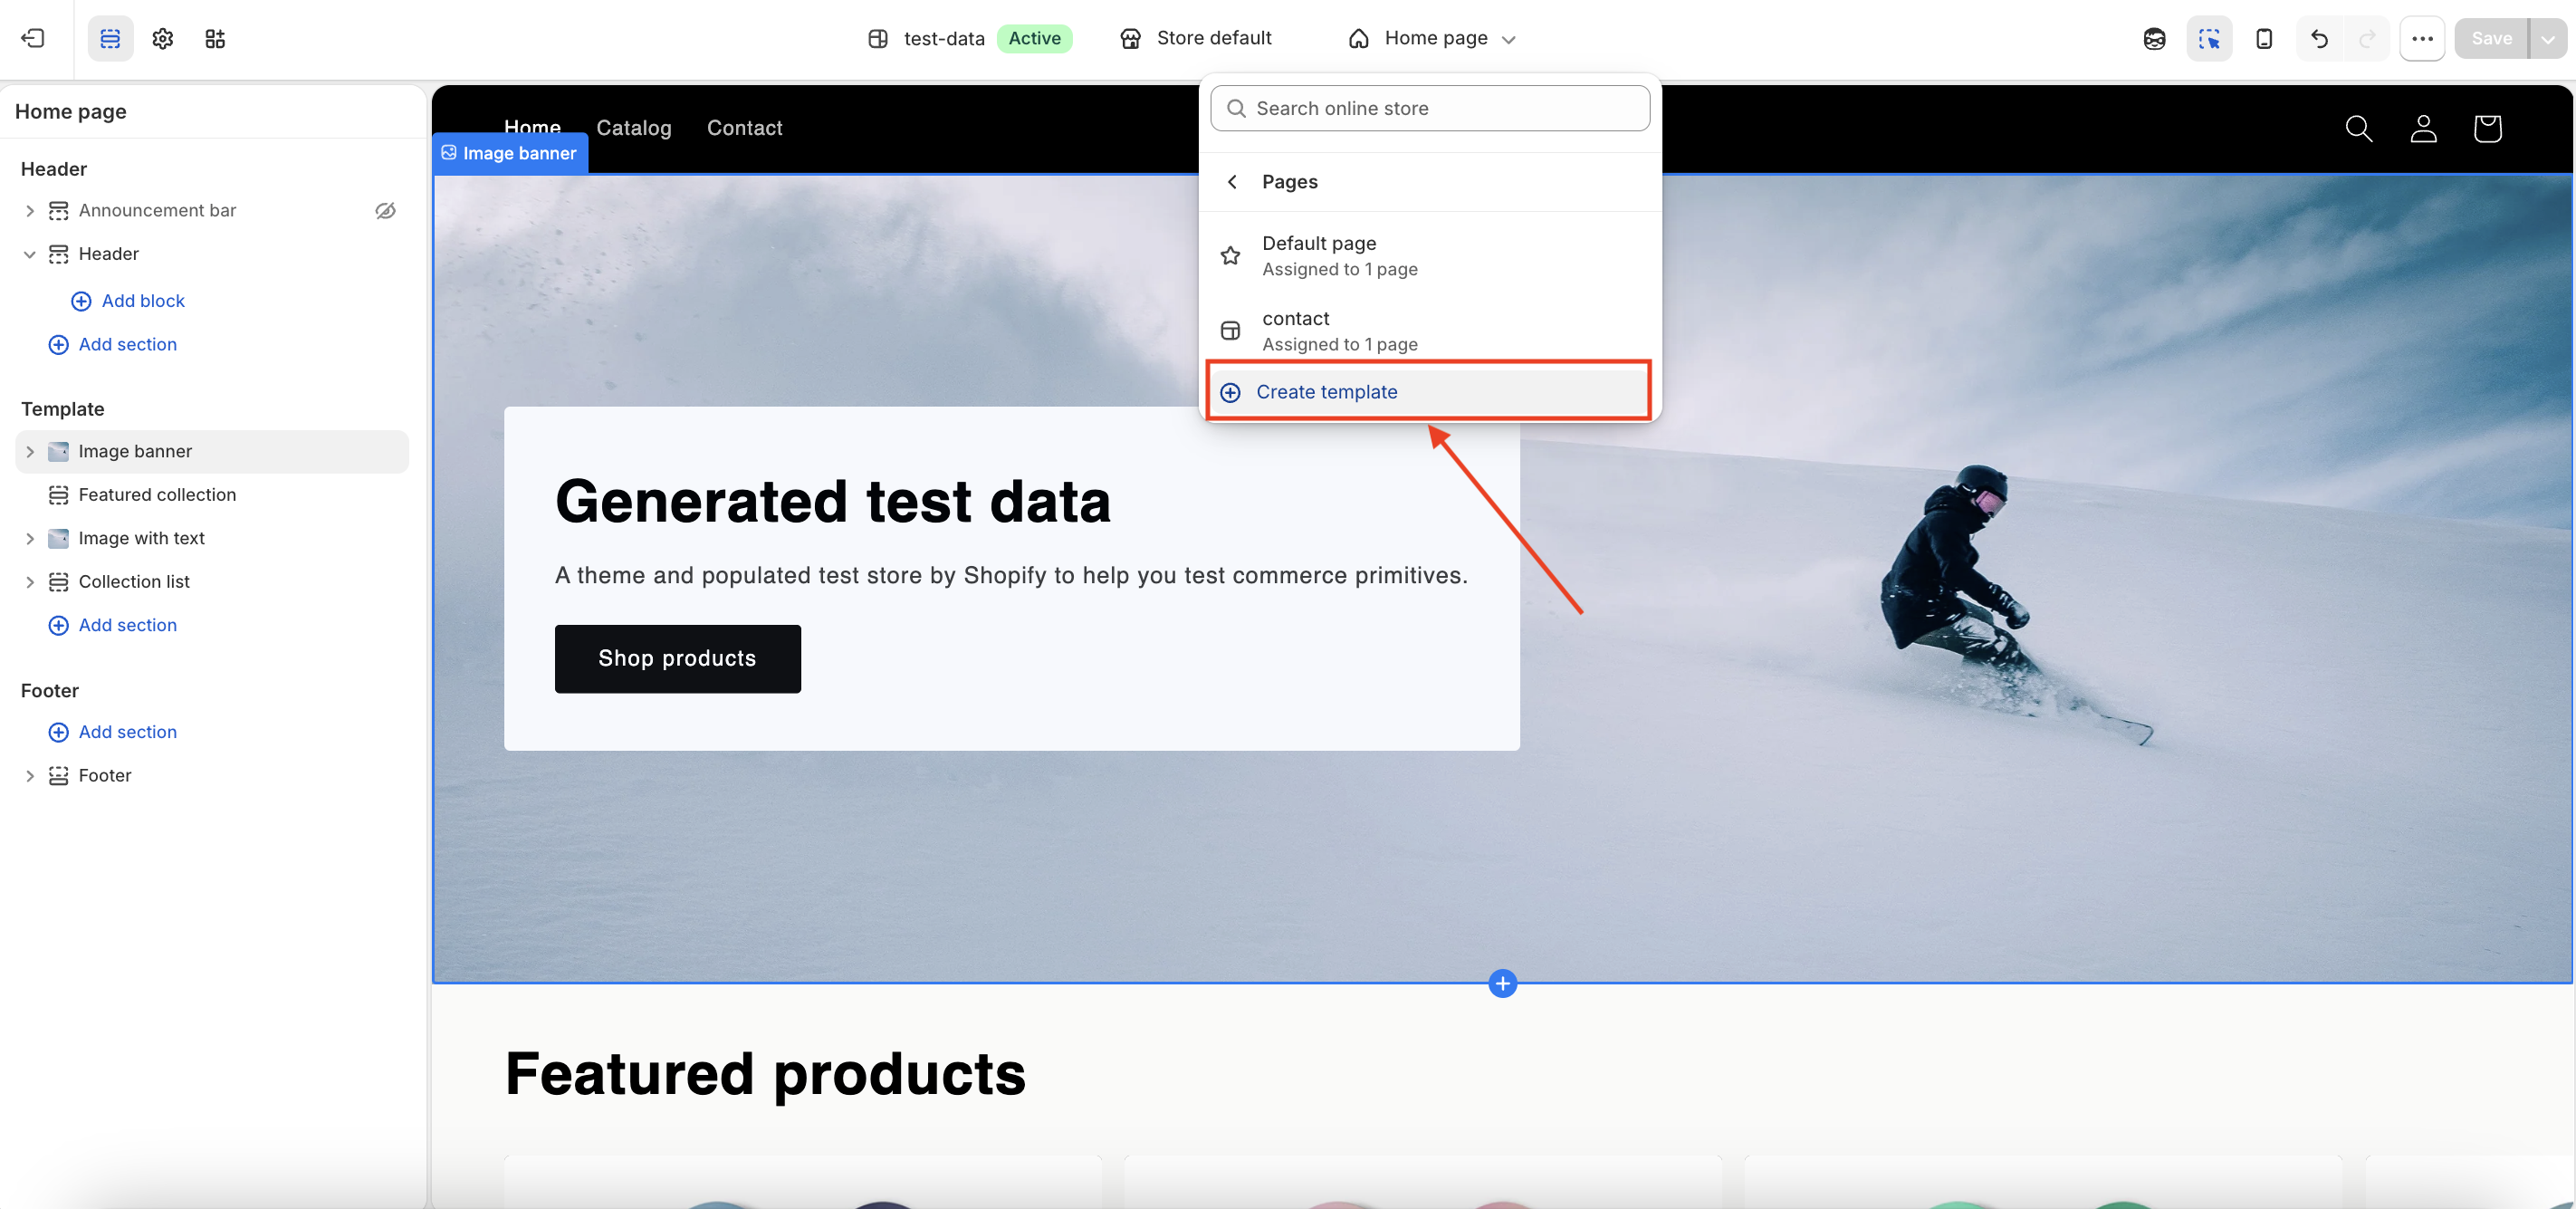
Open the page selector at the top, then go to Pages and click Create template.
-
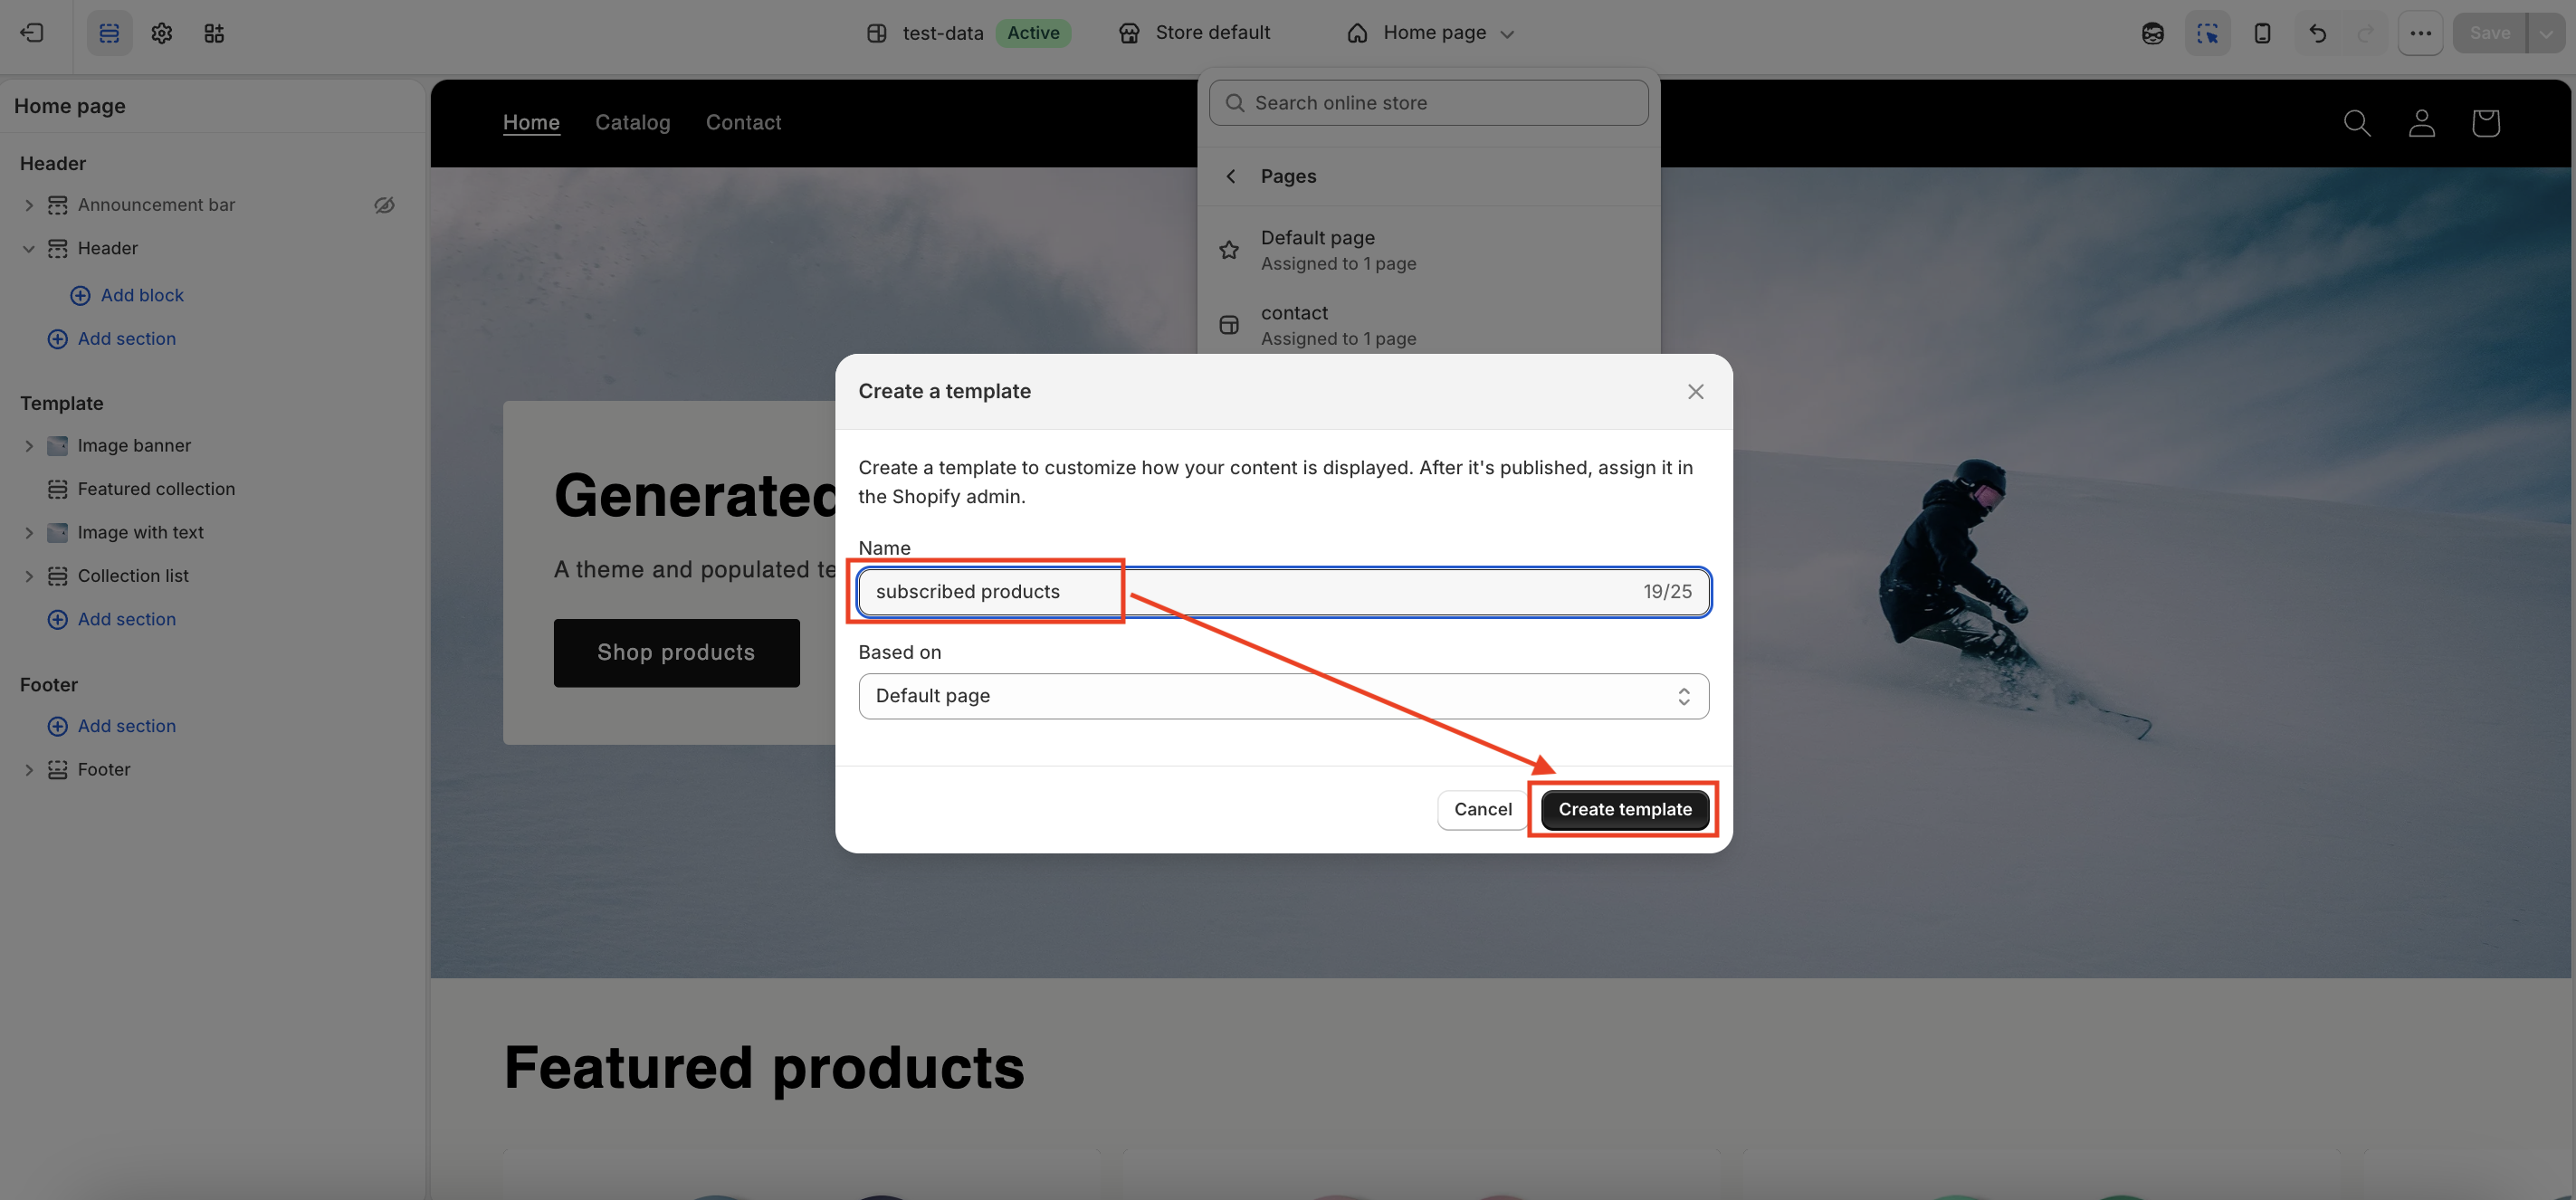
Enter the template name (for example, Subscribed Products) and click Create template.
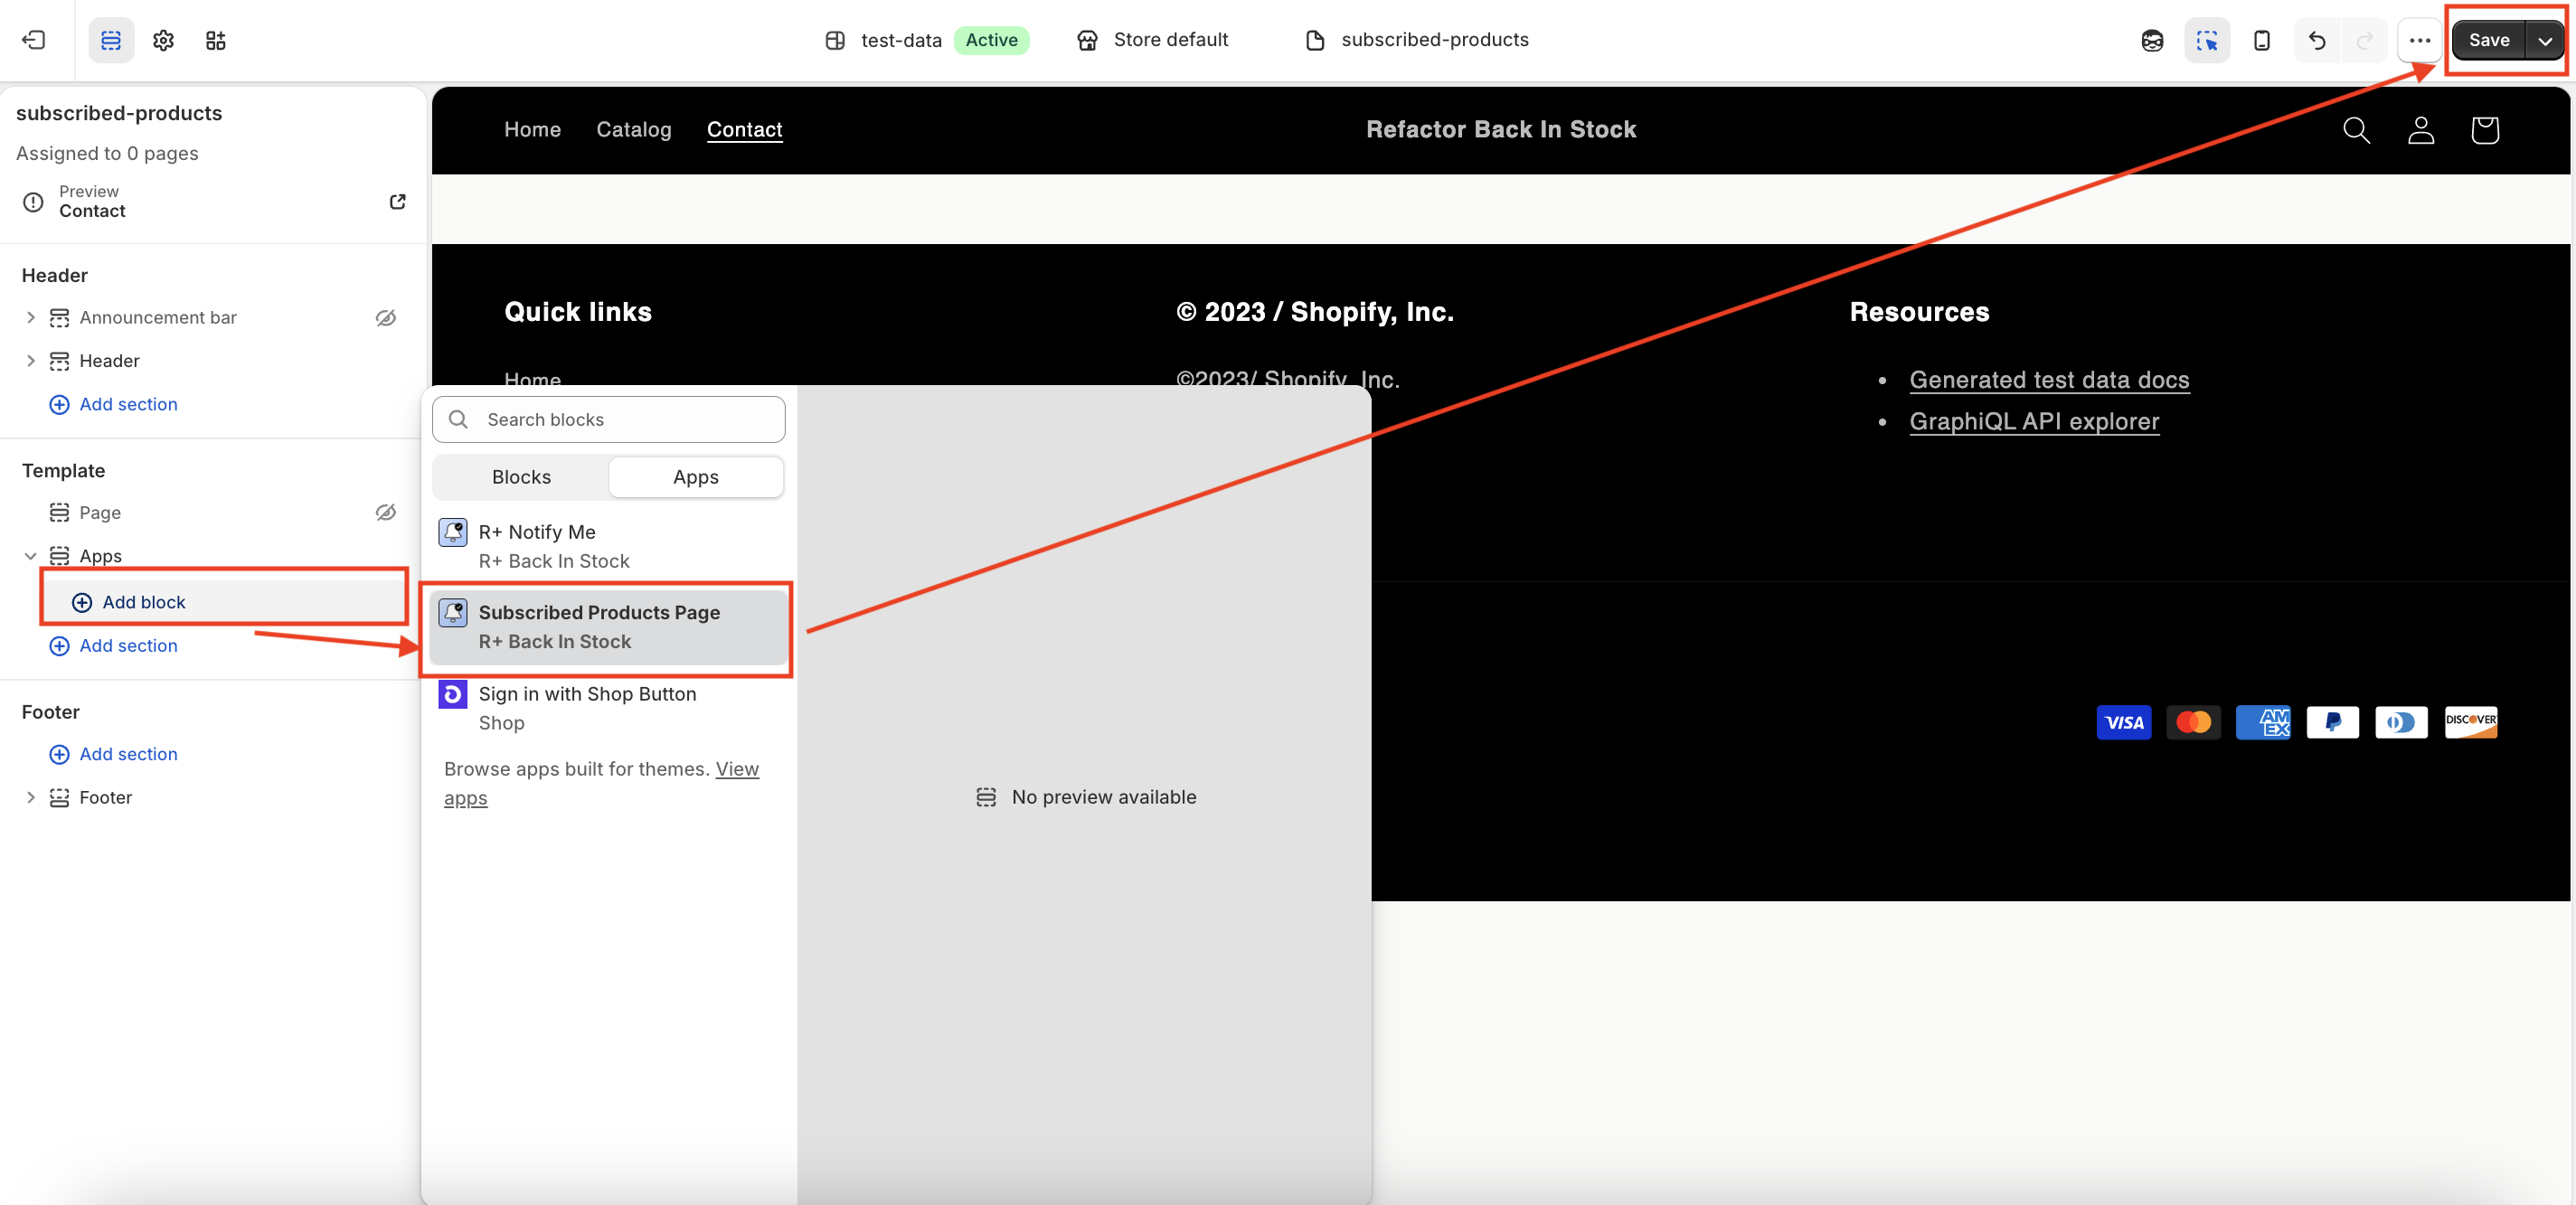
- In the template editor, click Add section in the left sidebar.
- Find and select Subscribed Products Page from the list of available blocks.
-
Click Save.
-
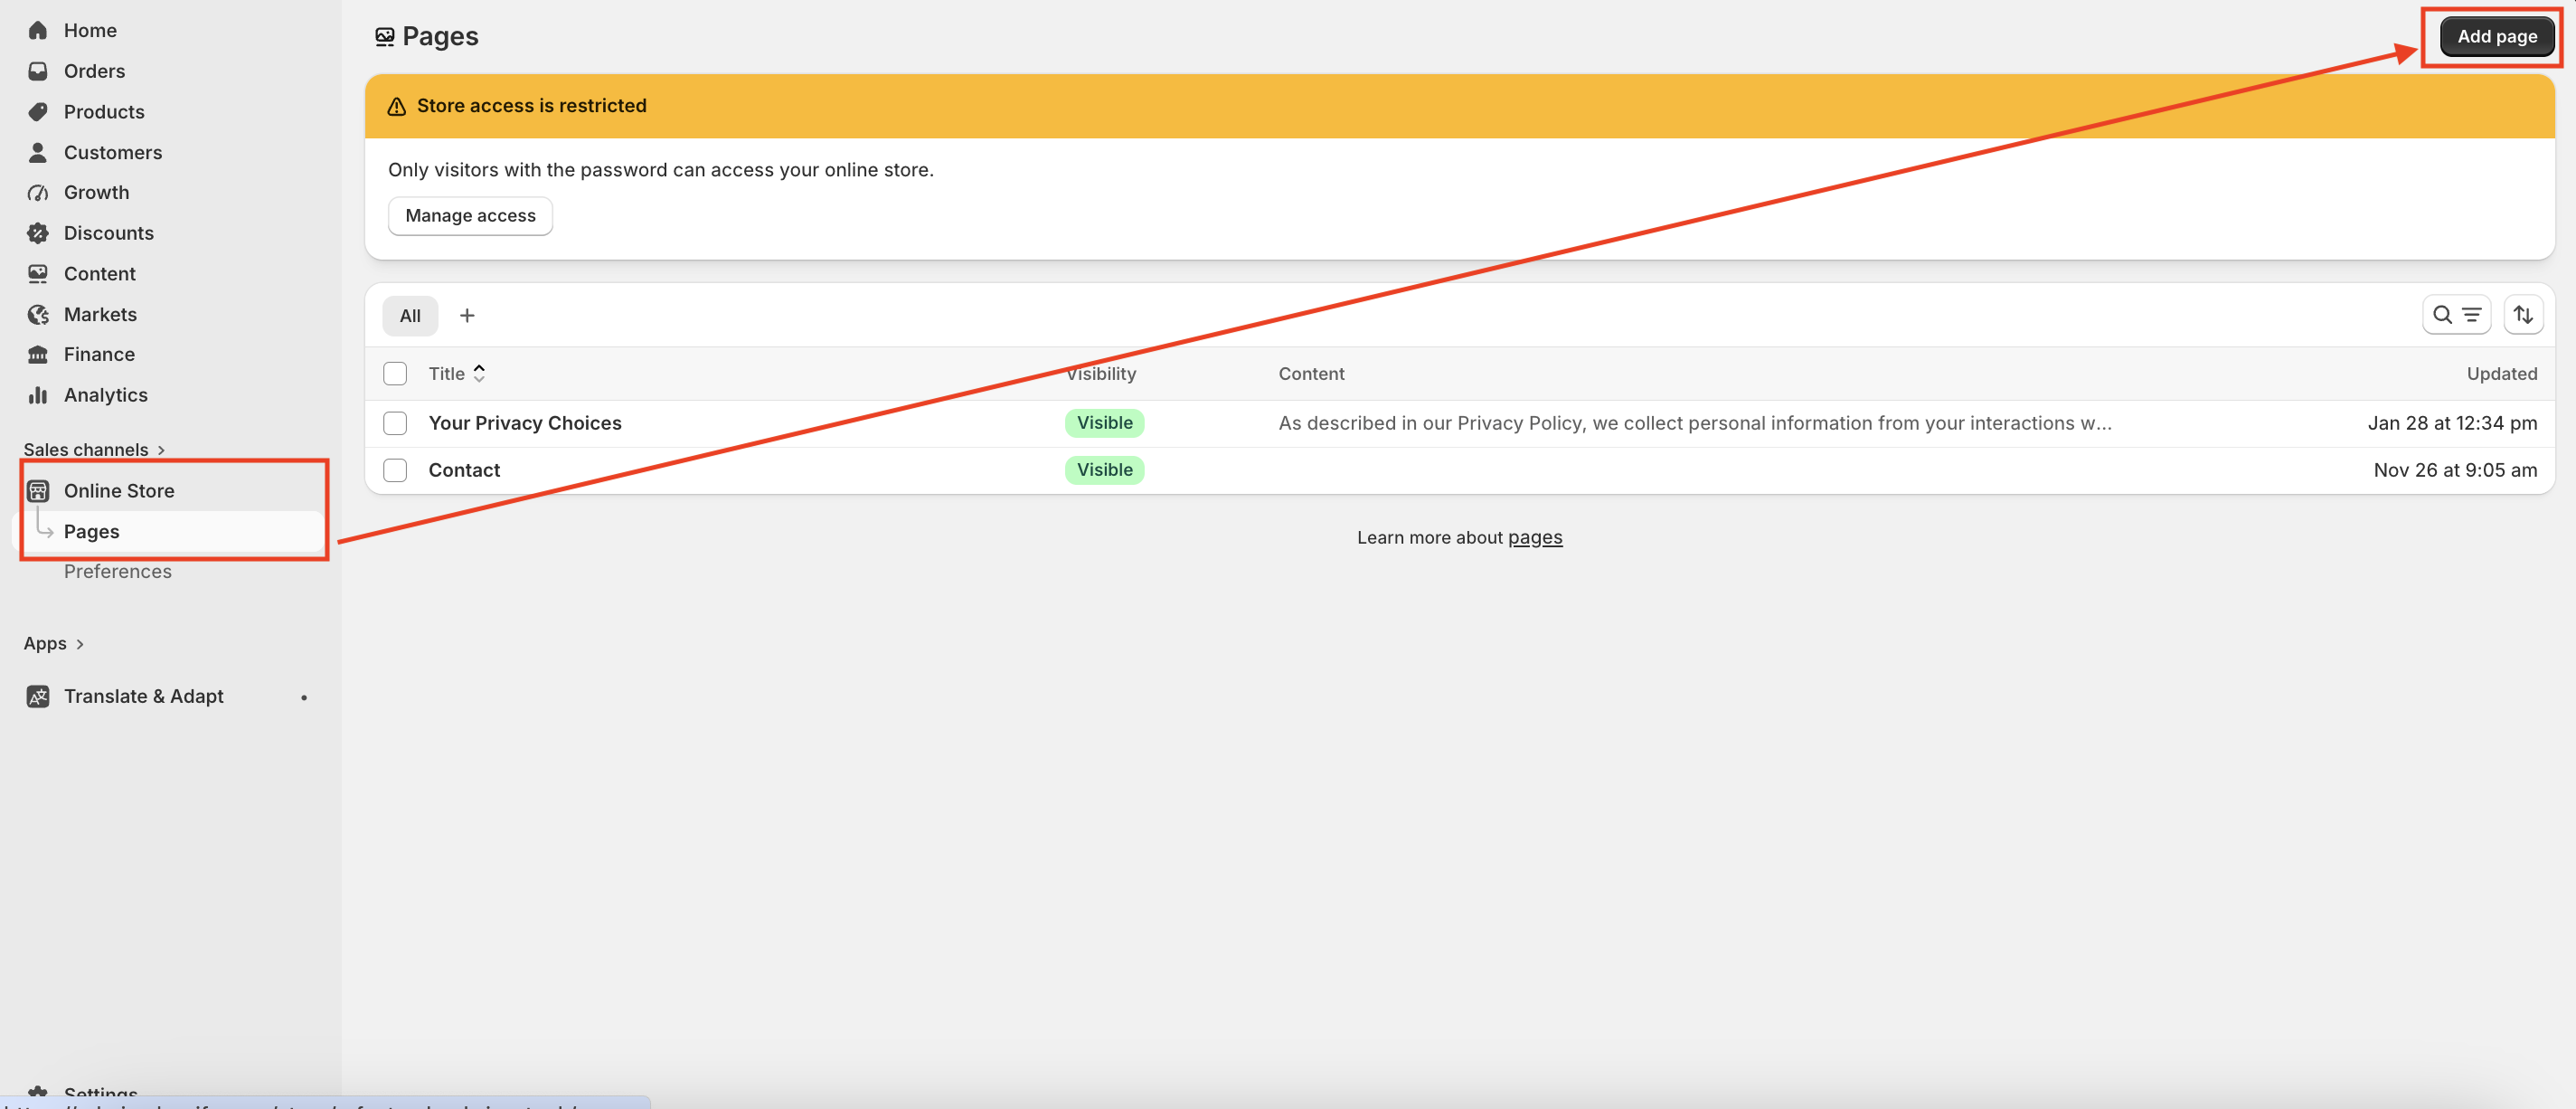
Go to Online Store → Pages and click Add page in the top-right corner.
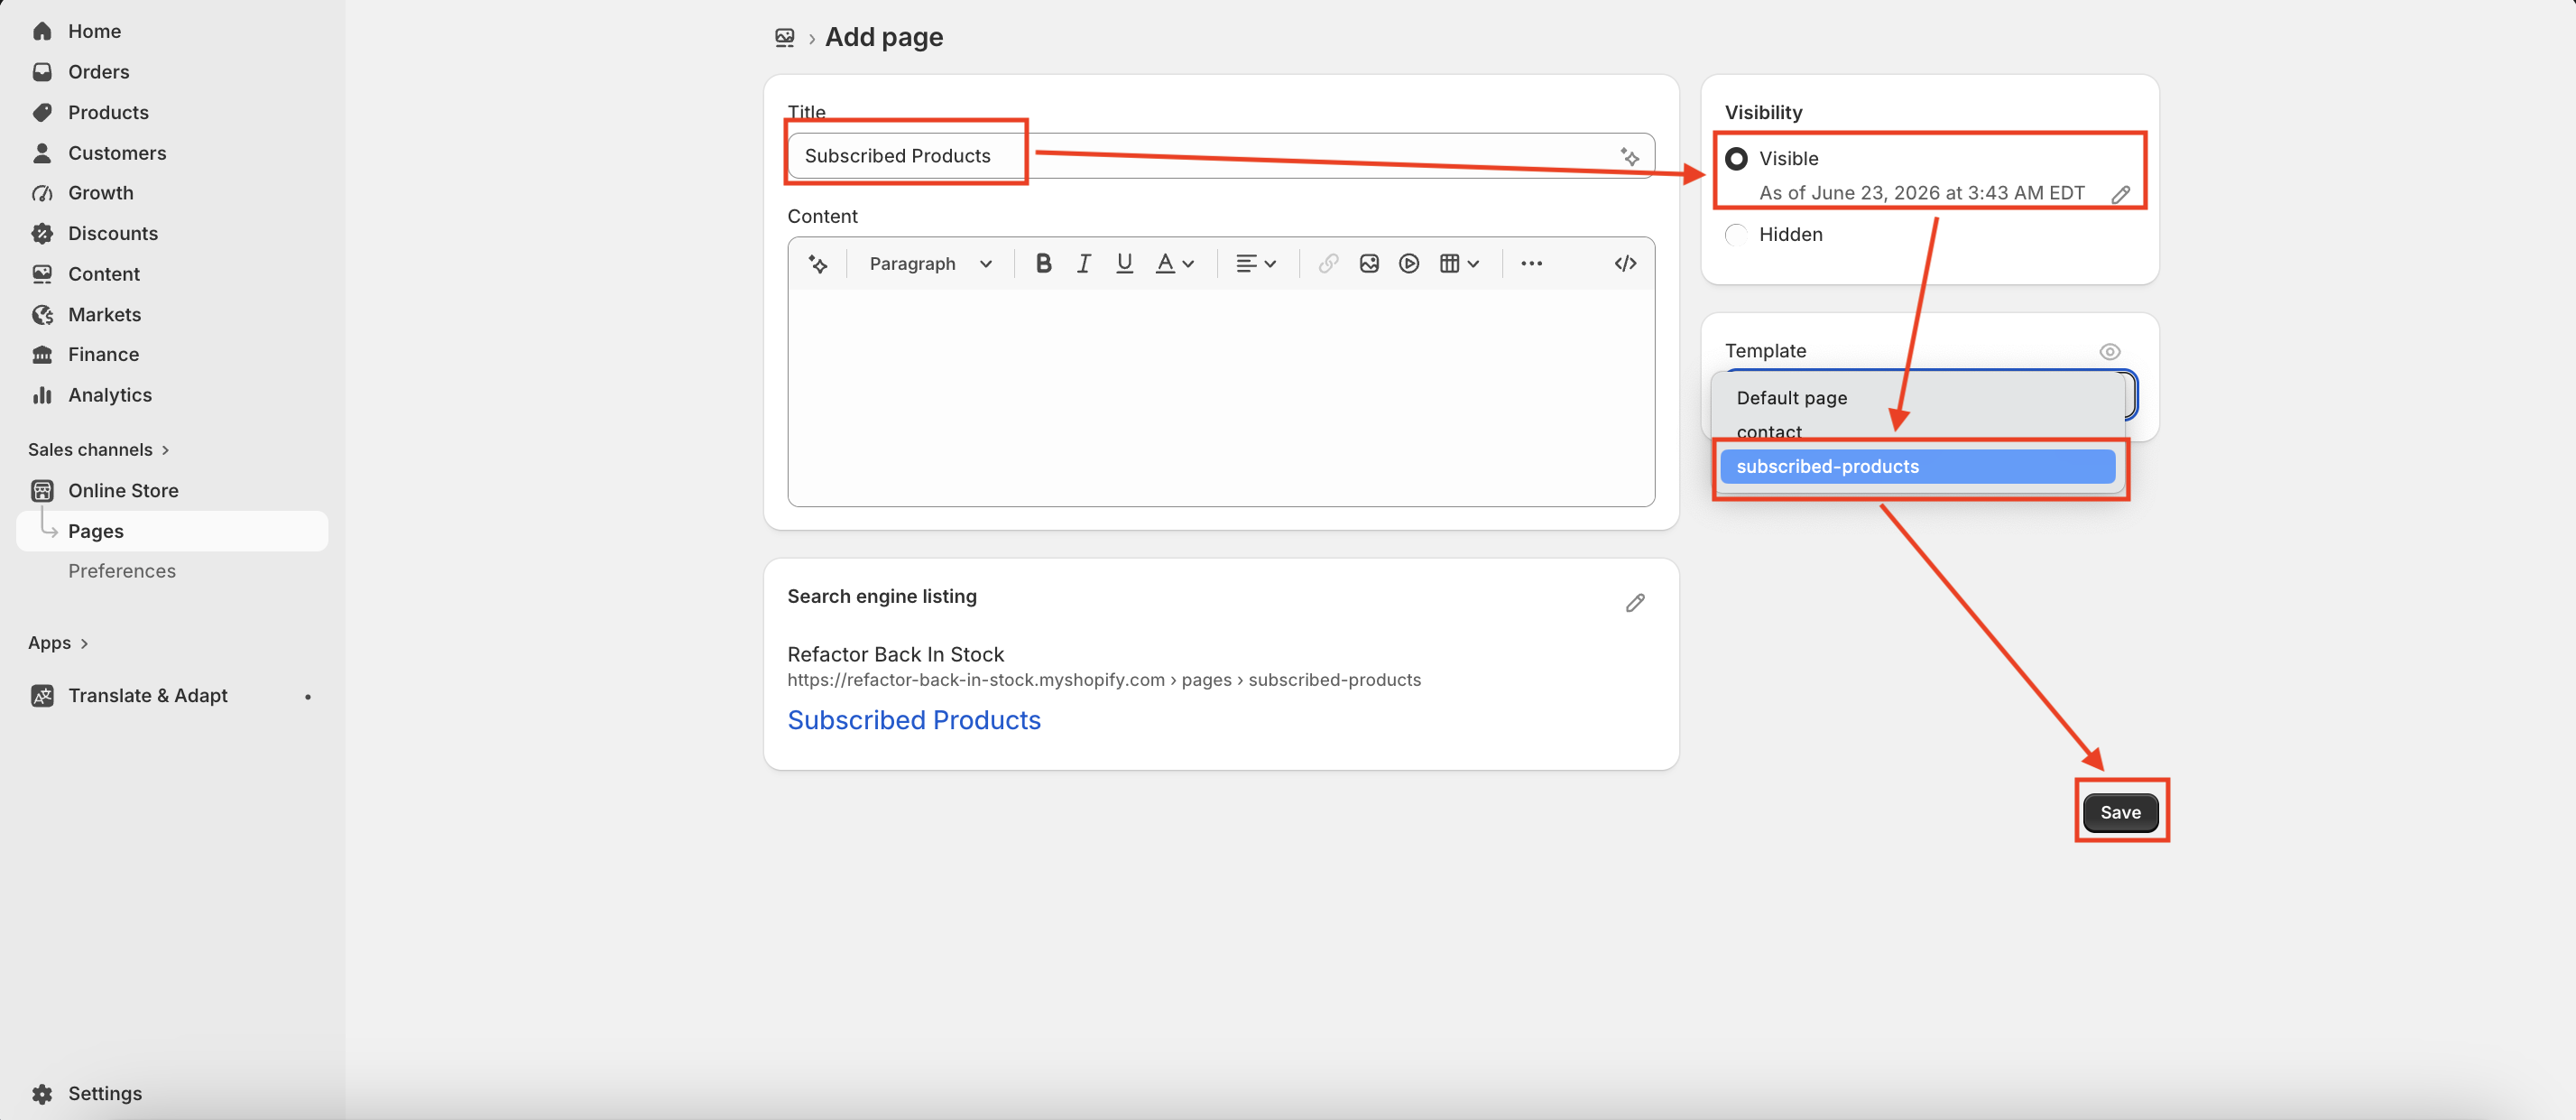
- Enter the page name (for example, Subscribed Products).
- Set the page visibility to Visible.
- Under Theme template, choose the Wishlist template you created earlier.
-
Click Save.
Encountering an error or something not working?
Contact us anytime at support@refactorplus.com or use this link to send us an email.
Do you need help?
If you have any questions or run into issues, please contact us — we’re happy to help.