Customer Accounts (New) — Favorite Stores Block & Page: Settings & Customisation Guide
This guide walks you through adding and configuring the R+ Favorite Stores block and page in your Shopify Customer Accounts. Both the block and the full-page version share the same customisation settings, which are described in the reference table below.
If you have the Legacy Customer Accounts enabled on your store, you can add Favorite Stores to your customer accounts as regular page. Please, check this article.
Adding the Favorite Stores Block
The Favorite Stores block appears inside the customer's account profile page and shows the stores they have saved.
- Go to your store's Admin panel and open Settings.
-
Navigate to Customer Accounts → Configurations → Customize.
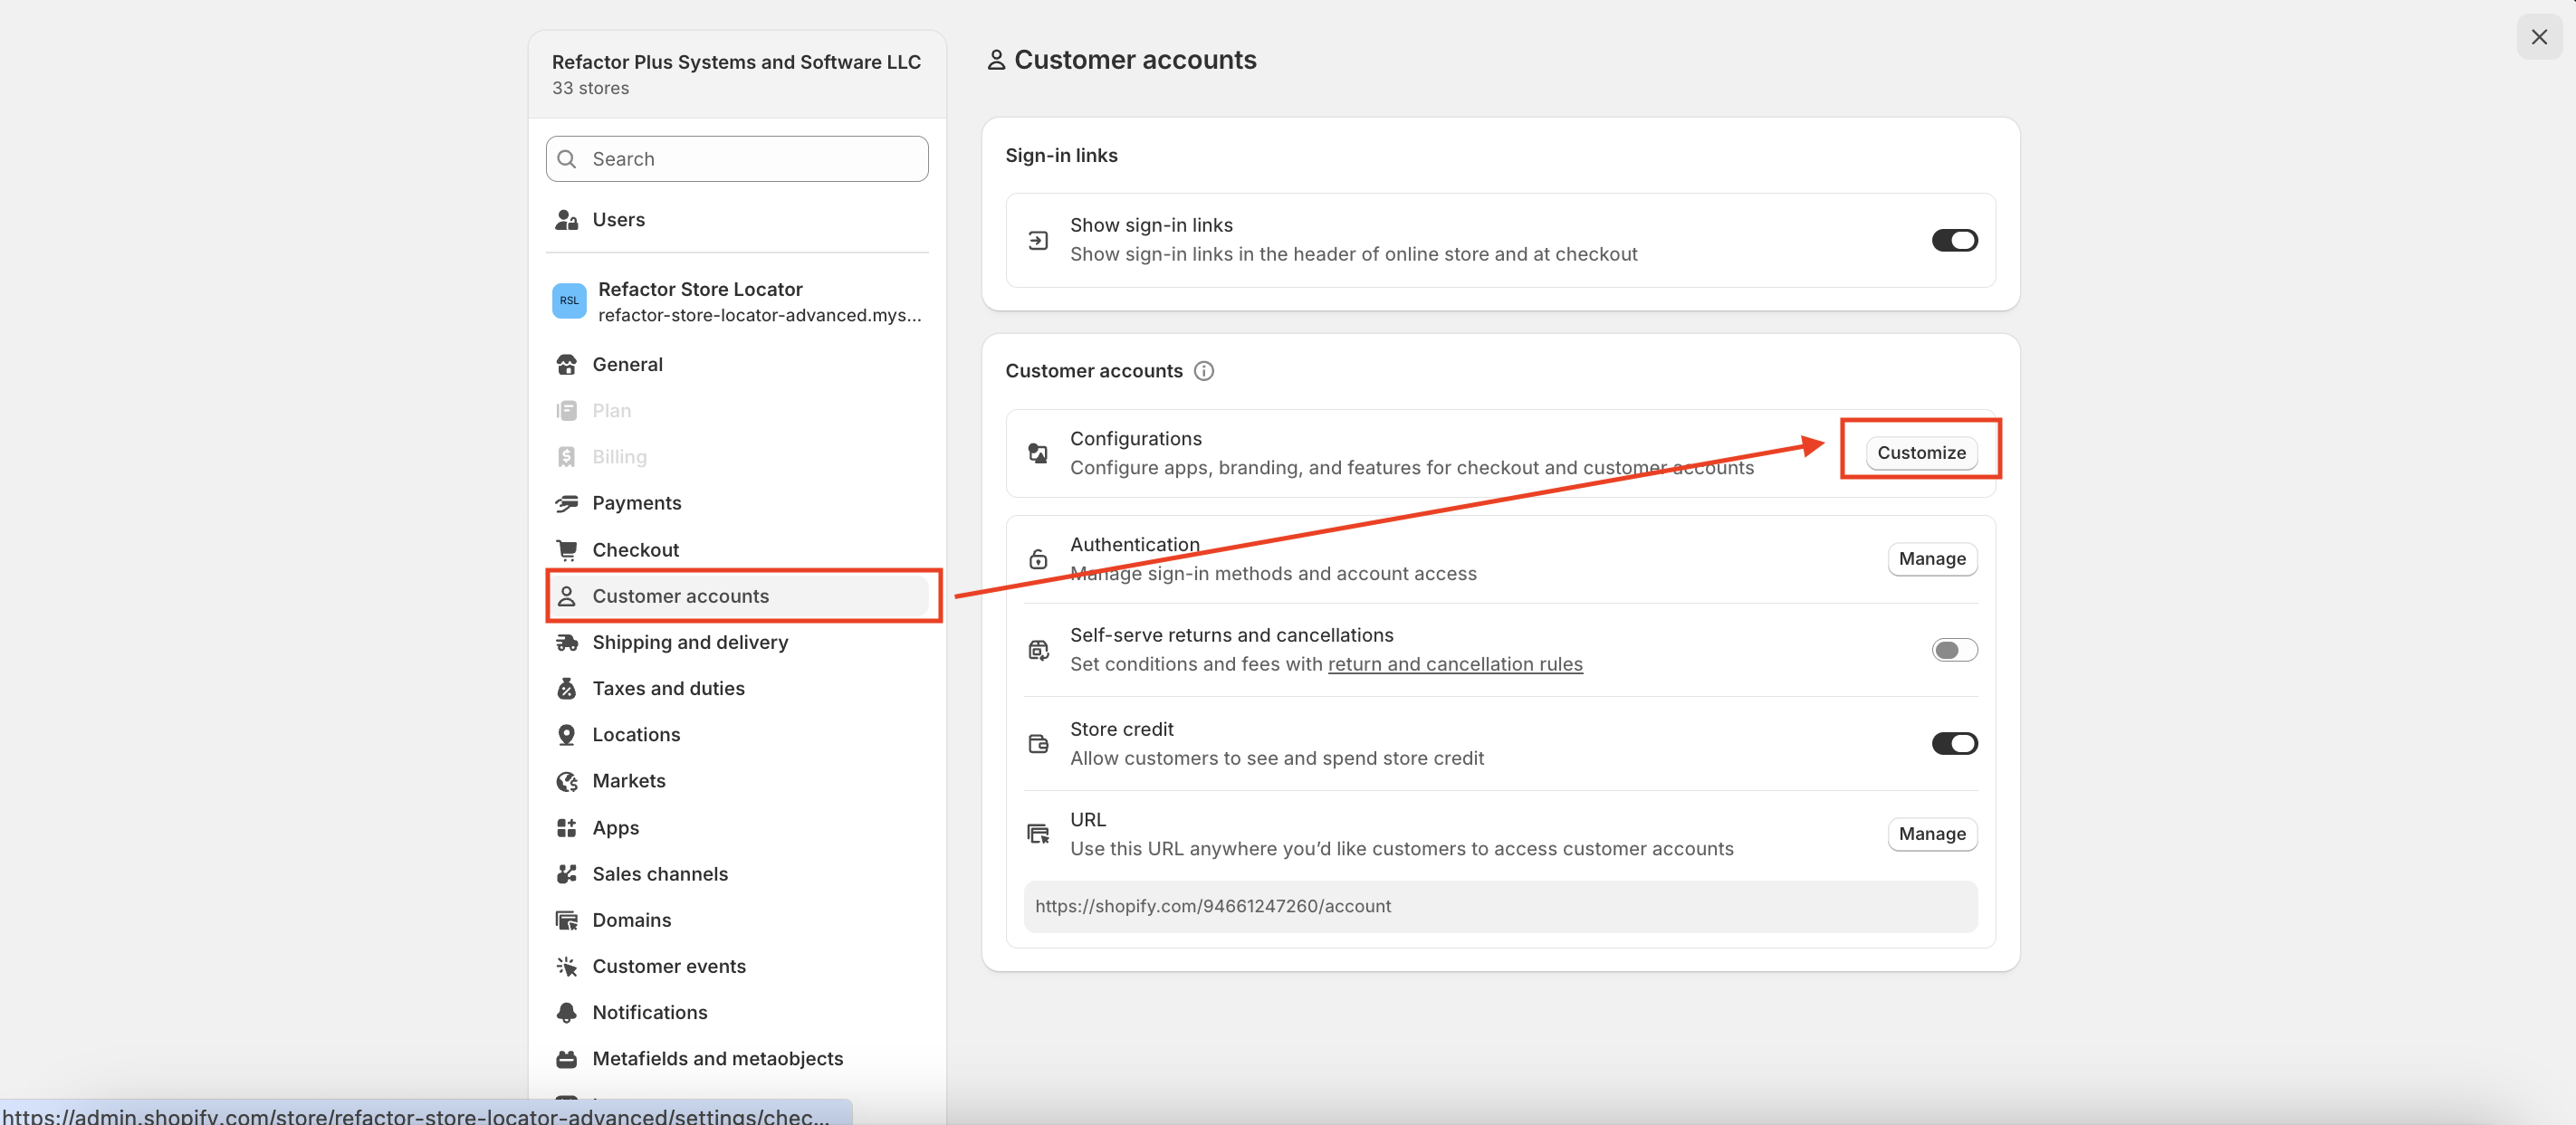
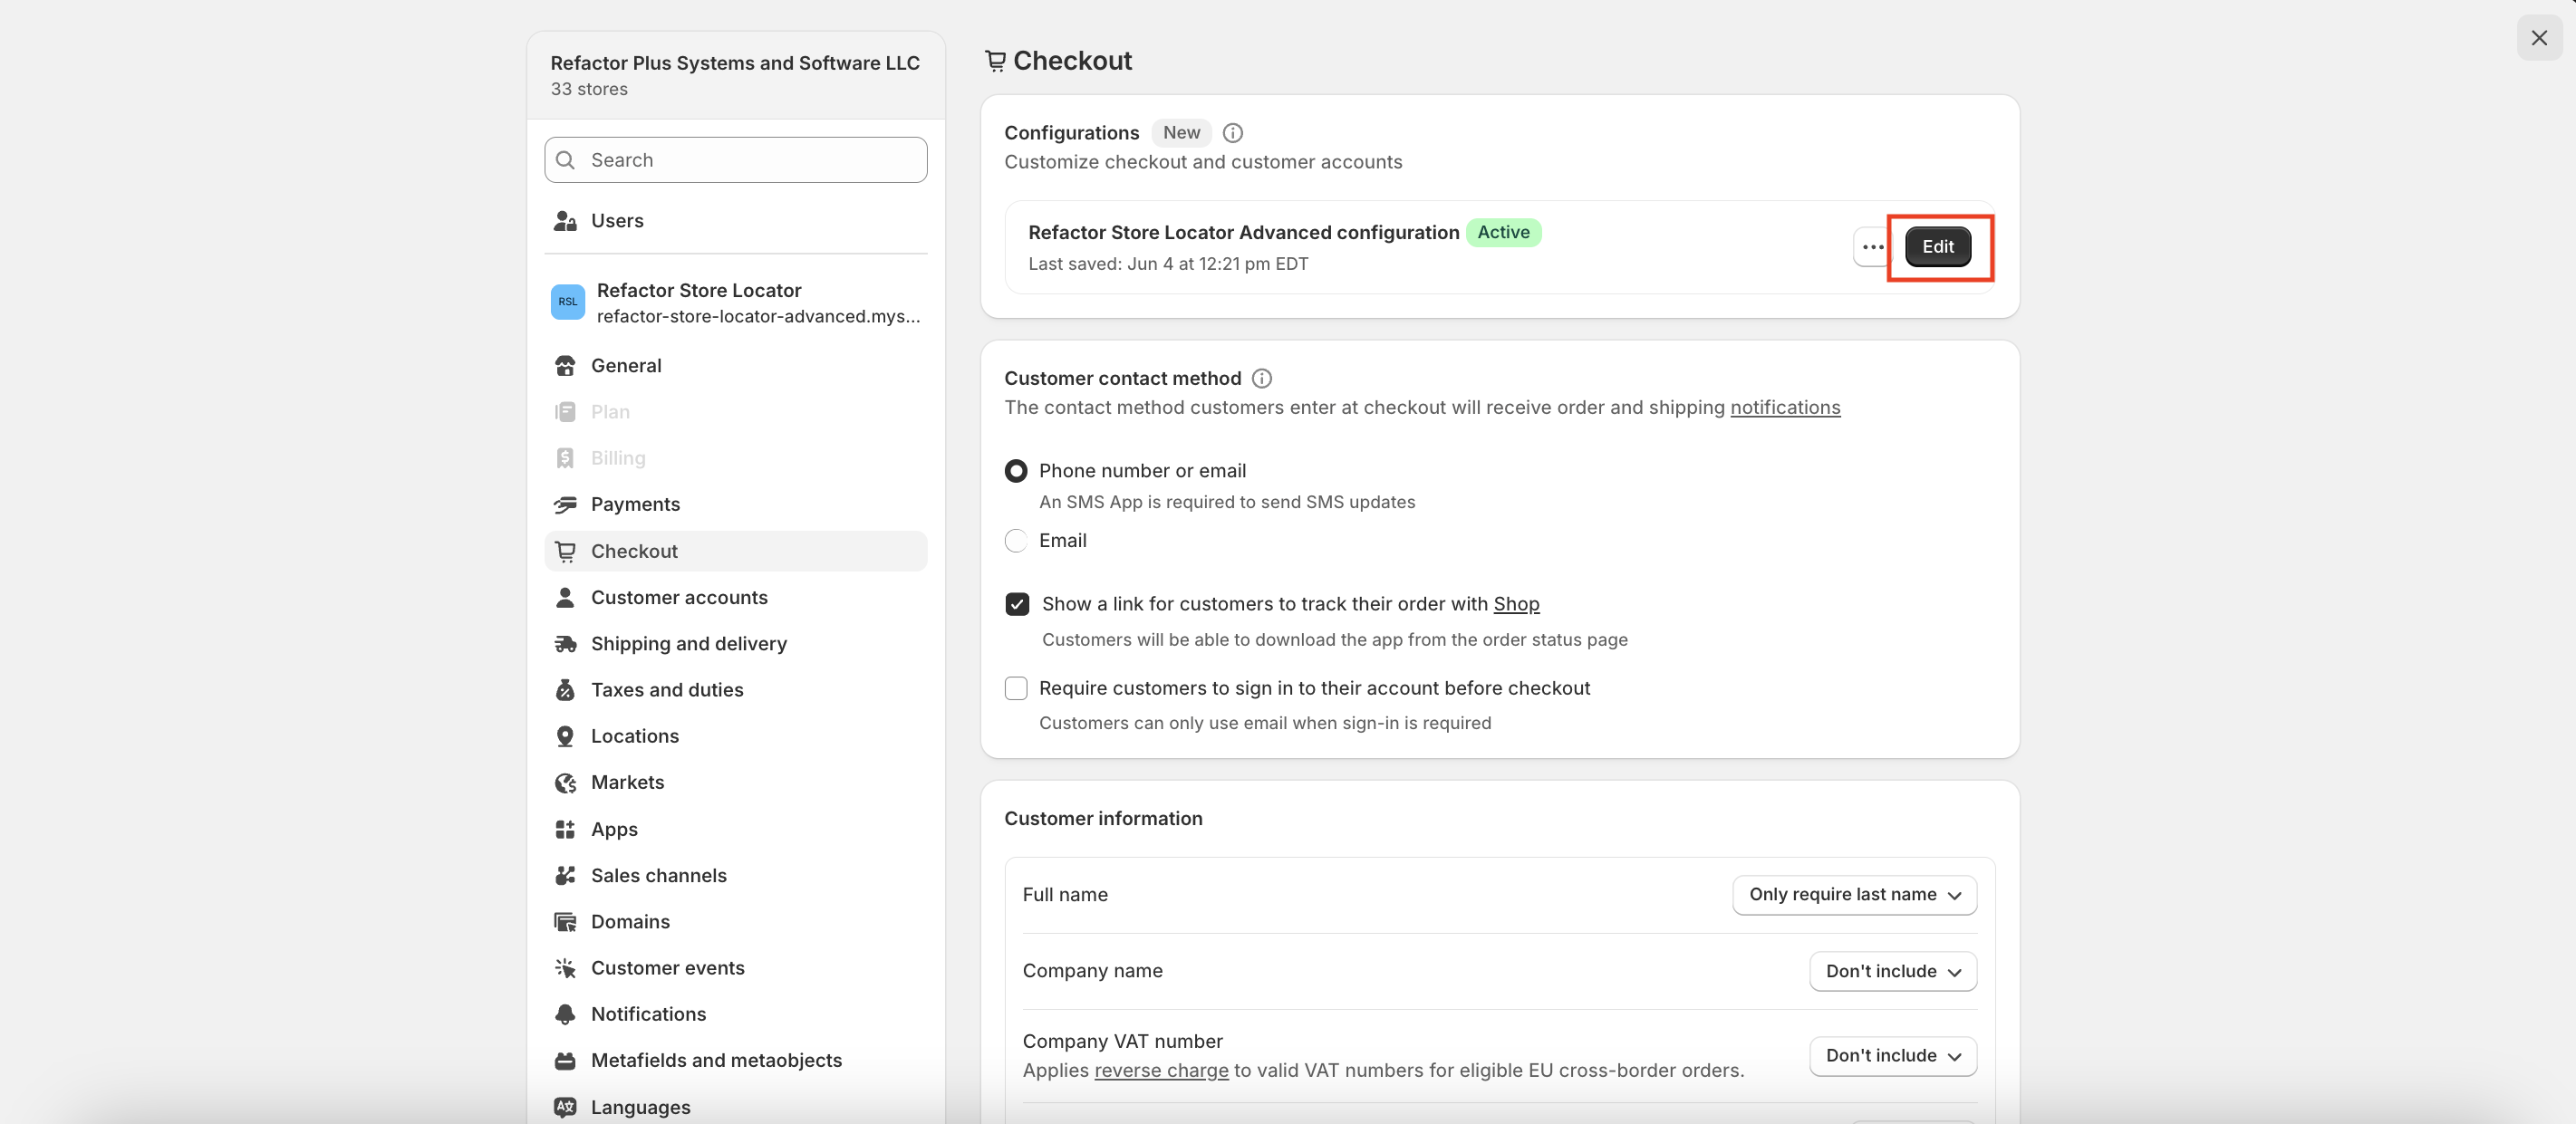
-
Select the Configuration you want to customise and click Edit.
-
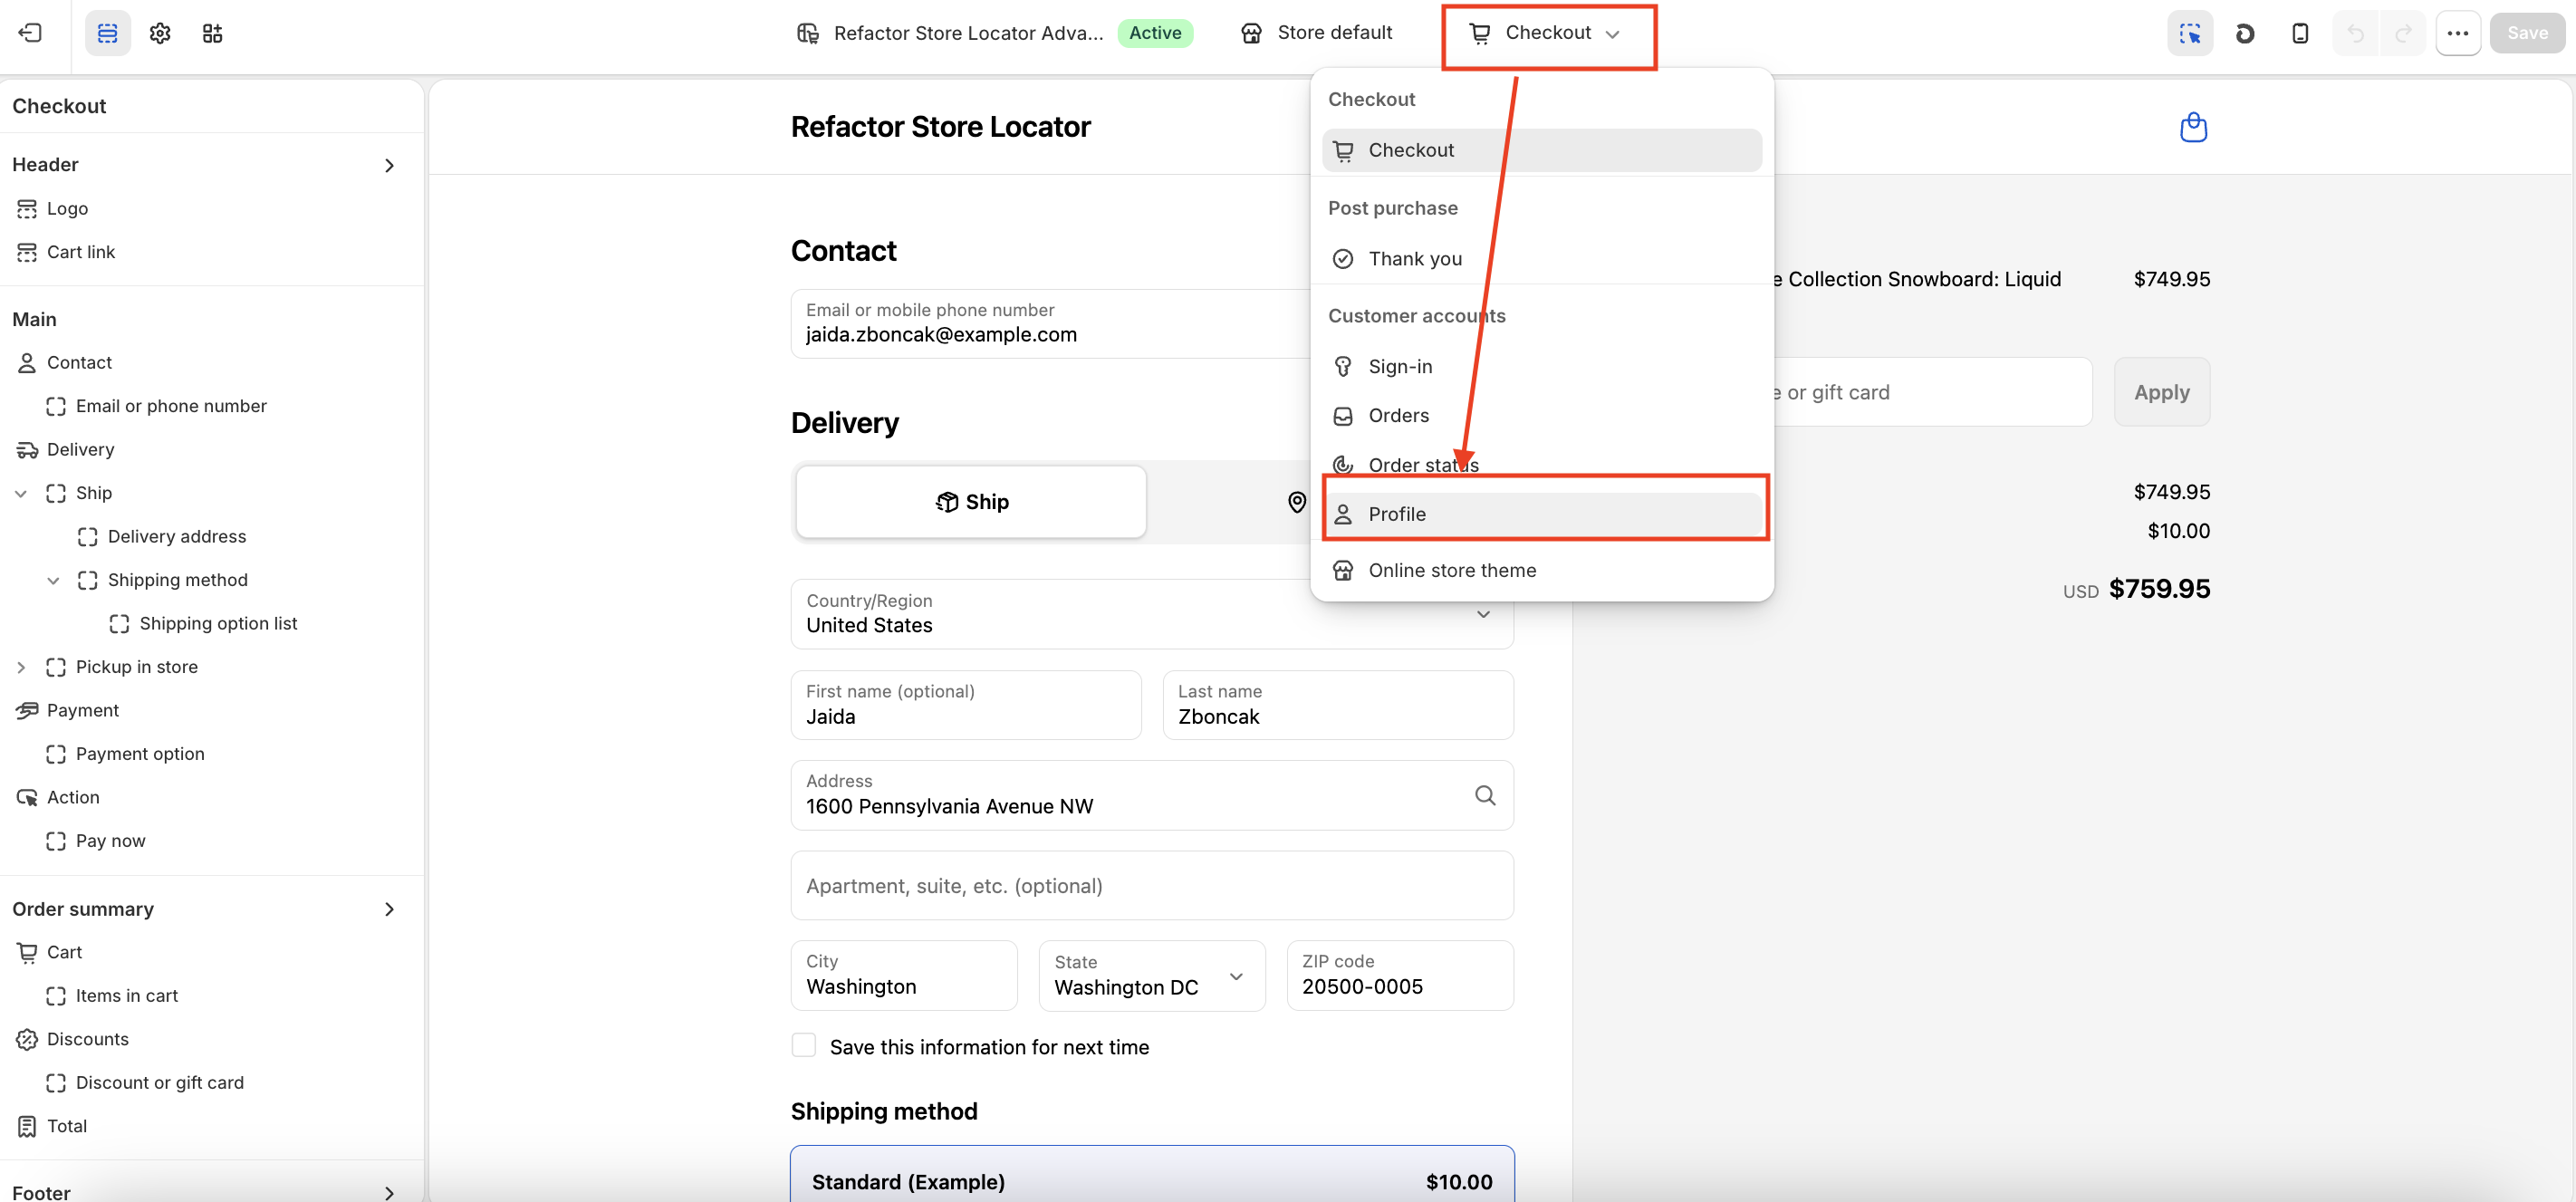
When the customiser opens, use the dropdown at the top to choose Customer Accounts → Profile.
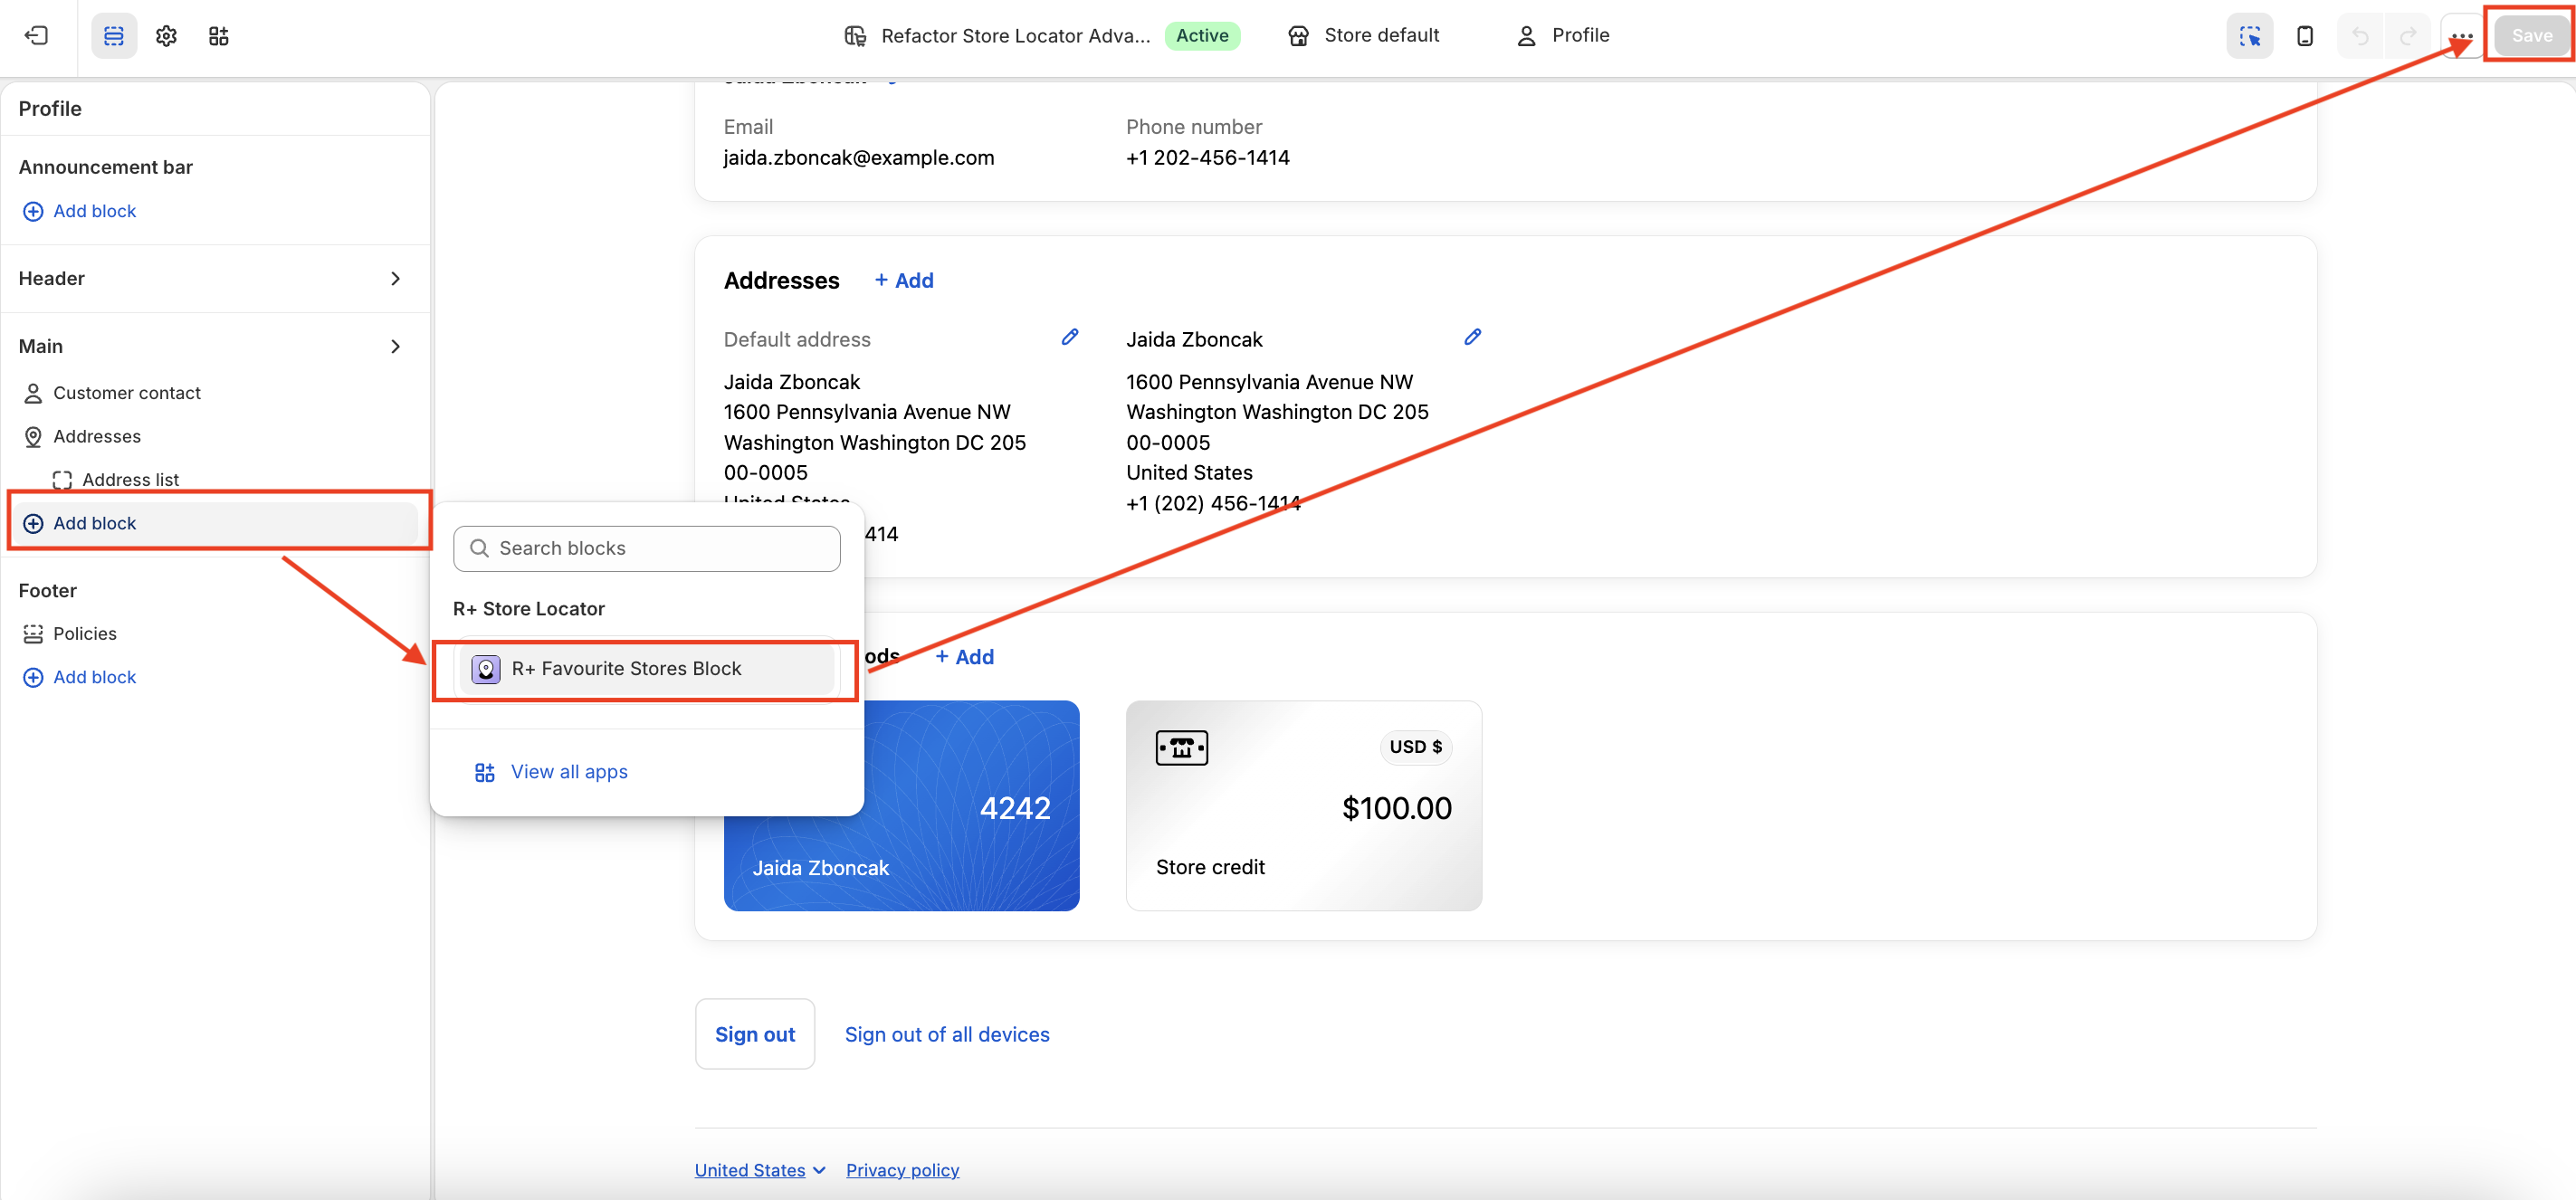
- Click Add Block and select R+ Favorite Stores Block.
-
Click Save.


Adding the Favorite Stores Page
The Favorite Stores page is a dedicated account page where customers can view and manage all their saved stores. It has the same customisation options as the block.
- In your Admin, go to the Apps tab.
- Find R+ Favorite Store Page in the list.
- Click the + button next to it.
- Under Add page to, choose Accounts.
-
Click Save.
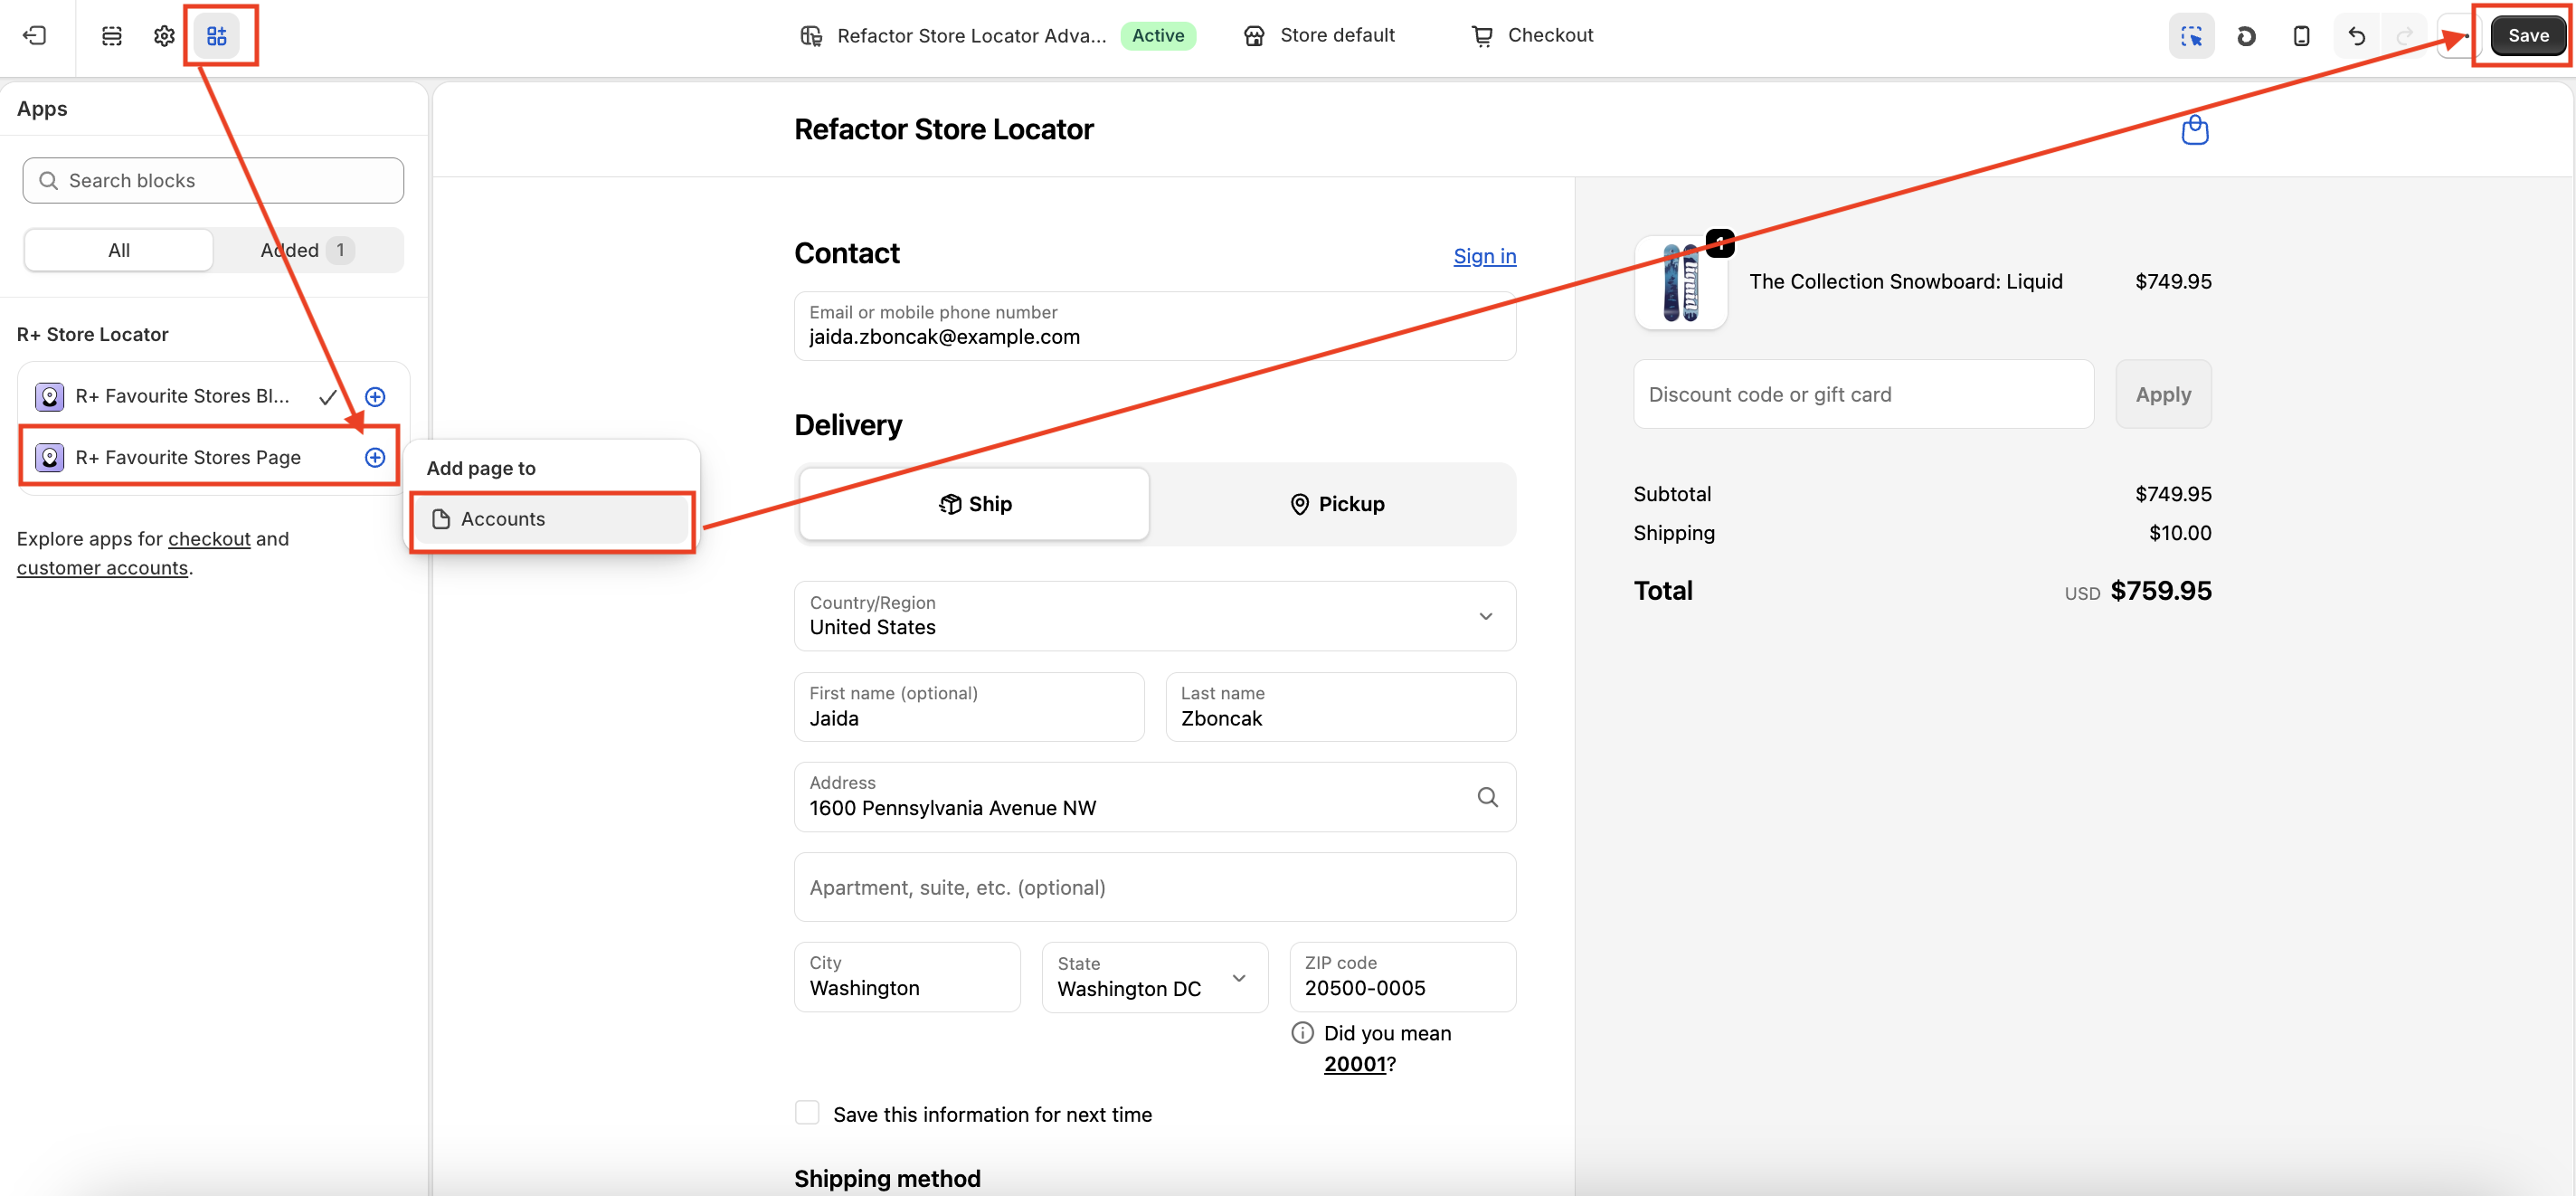
-
A button labeled Add to menu will appear above — click it.
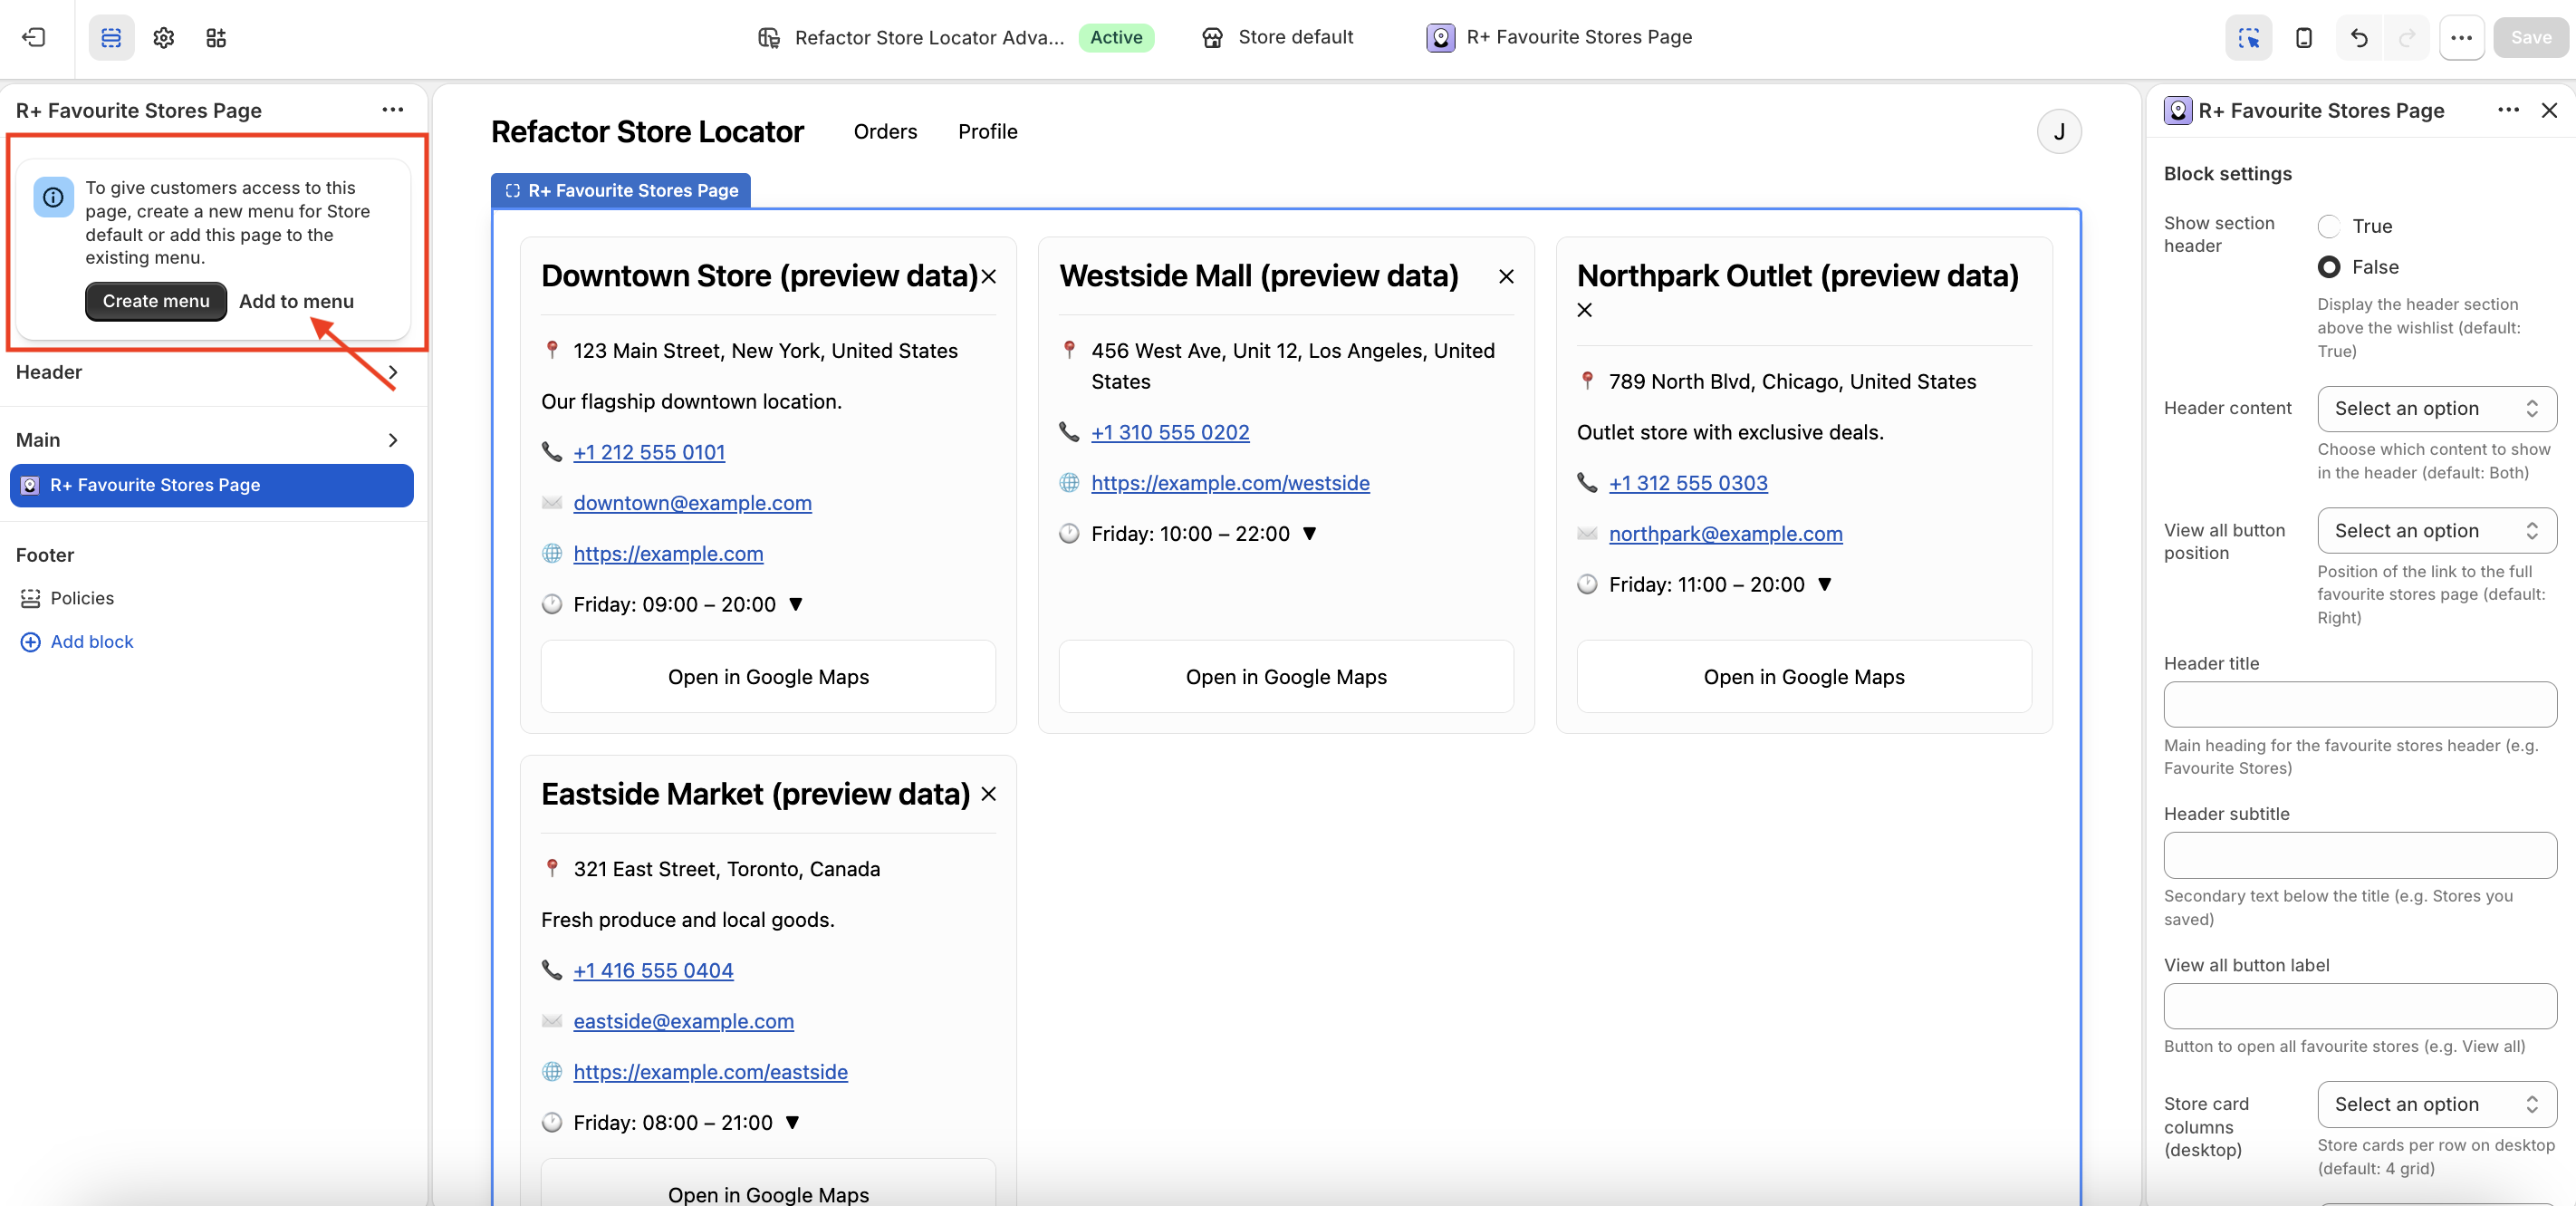
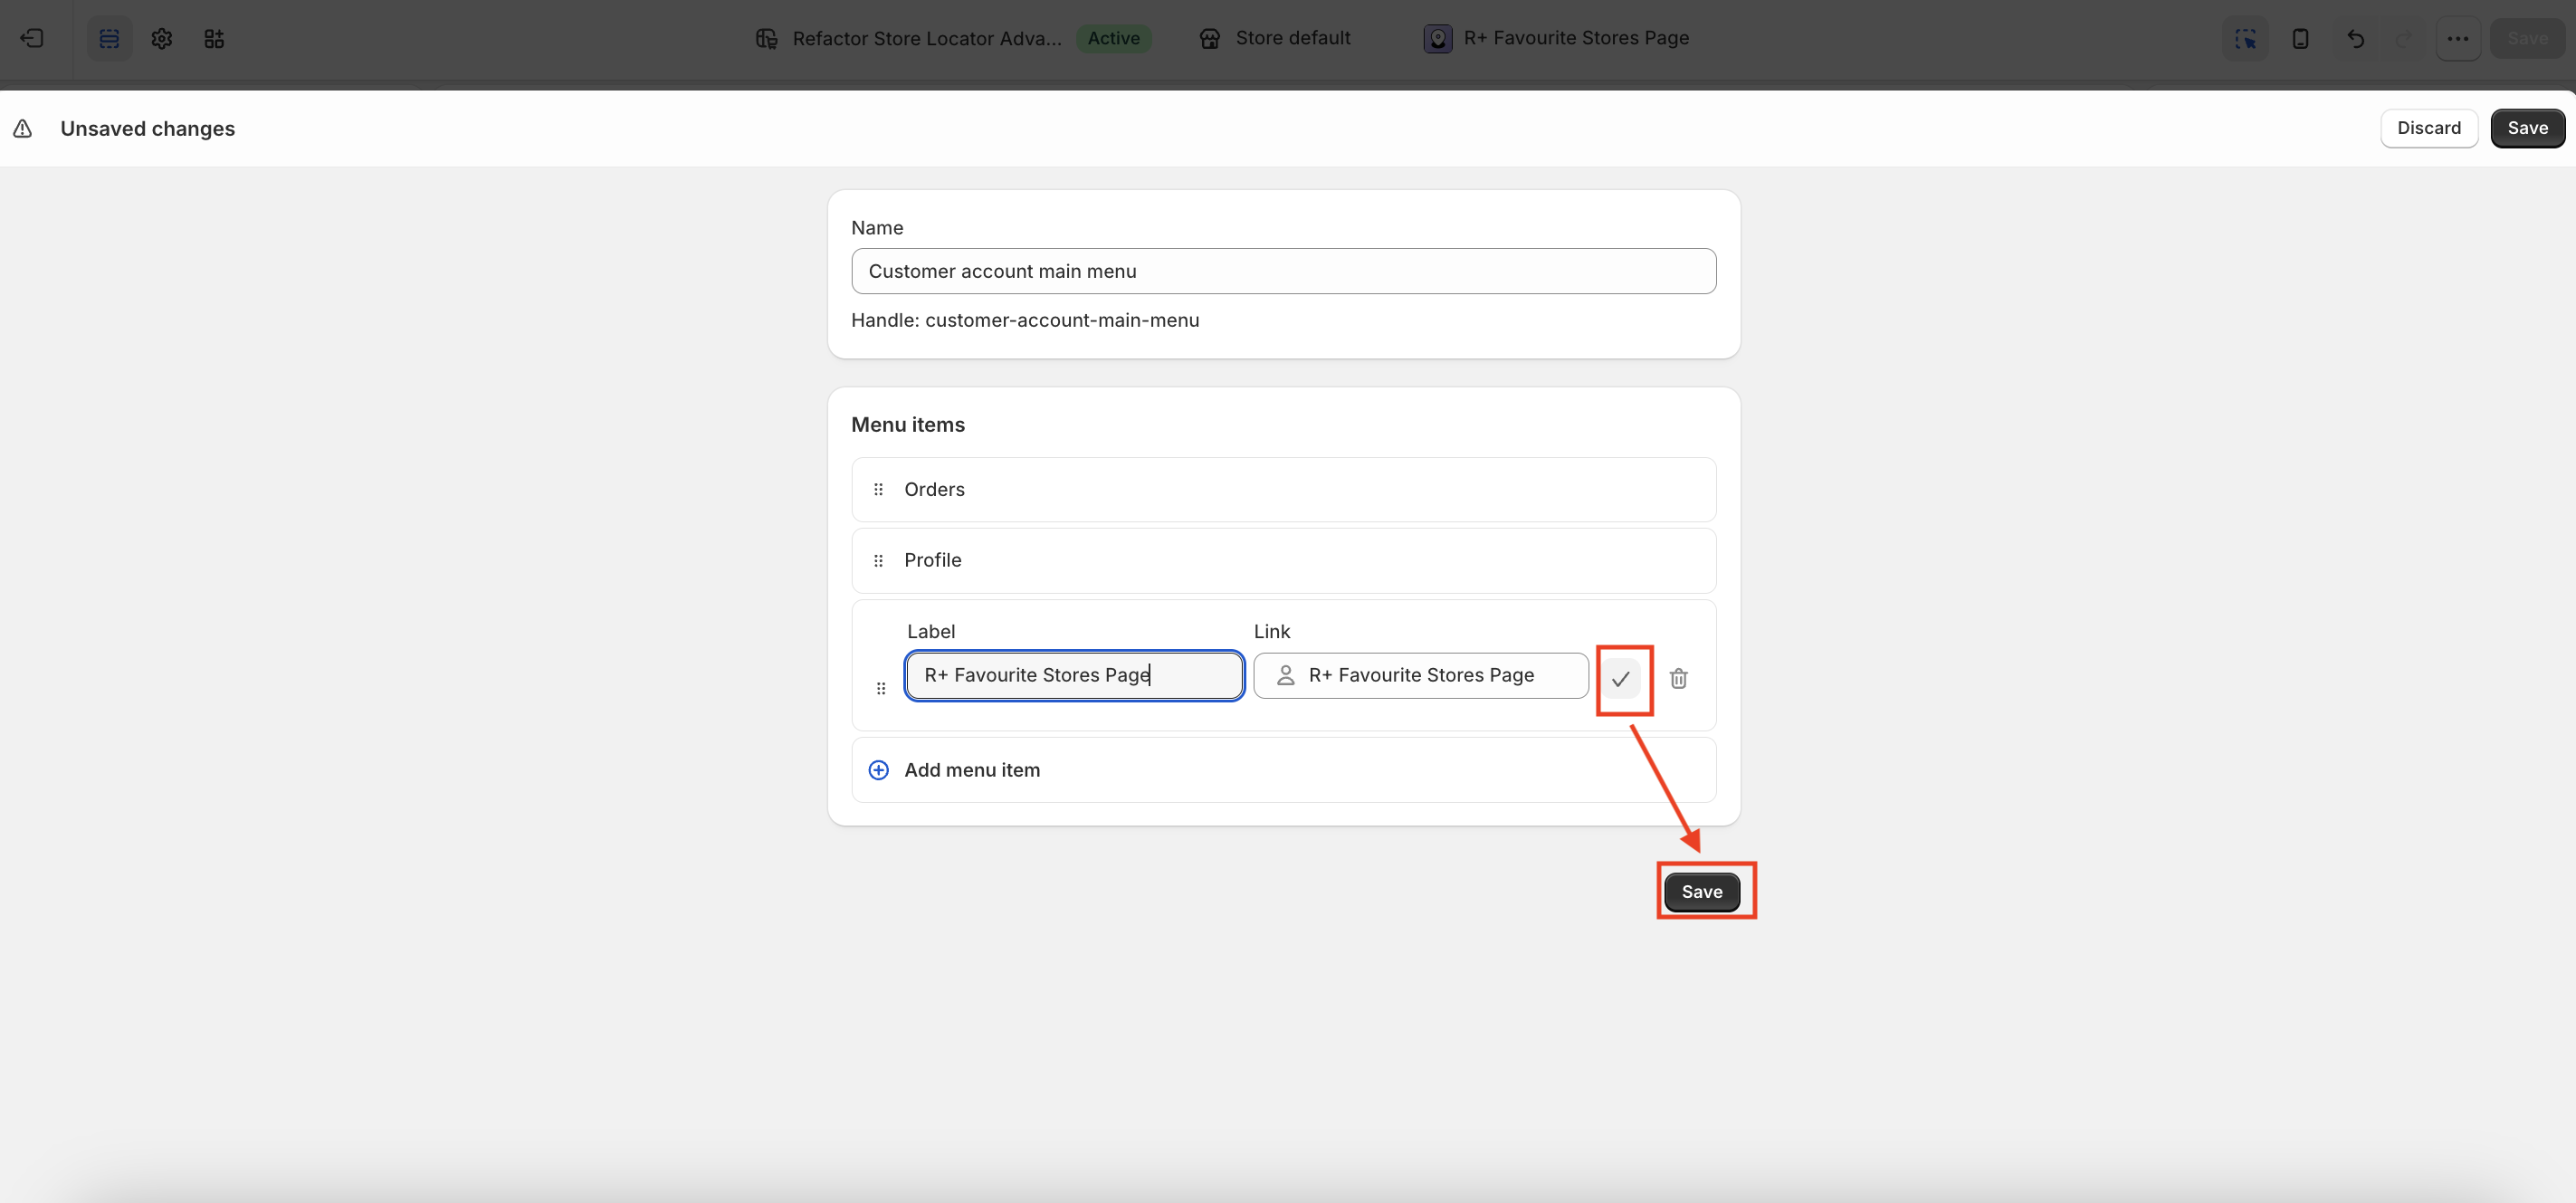
- You will be redirected to the menu editor, where the new page is already listed.
- Click the checkmark (✓) next to the page to add it as a menu item.
-
Click Save.


Customising the Favorite Stores Block (and Page)
After adding the block or page, select it in the customiser to access its settings. All options are available in the right-hand panel.
Header Settings
| Setting | What it does |
|---|---|
| Show section header | Toggles the entire header area on or off. When disabled, the title and subtitle are hidden regardless of other settings. Default: enabled. |
| Header content | Controls what appears in the header. Options: Both (title + subtitle), Title Only, Subtitle Only, None. |
| Header title | The main heading displayed above the store list. Example: "Favorite Stores". Falls back to the default locale text if left empty. |
| Header subtitle | Secondary text shown below the title. Example: "Stores you saved". Falls back to the default locale text if left empty. |
| View all button label | Label for the button that expands or links to all saved stores. Example: "View all". |
| View all button position | Controls where the View All button is placed horizontally. Options: Left, Center, Right, Hidden. Choosing Hidden removes the button entirely. Default: Right. |
Store Card Grid Settings
| Setting | What it does |
|---|---|
| Store card columns (desktop) | Number of store cards displayed per row on desktop screens. Options: 2 grid, 3 grid, 4 grid. On mobile, cards always display in a single column. Default: 4 grid. |
| Content alignment | Aligns the content inside each store card. Options: Left, Center, Right. Default: Left. |
Google Maps Settings
| Setting | What it does |
|---|---|
| Open in Google Maps link style | Determines whether the map link looks like a plain text link or a full button. Options: Link, Button. Default: Button. |
| Google Maps link label | Custom label for the map link or button. Example: "Open in Google Maps". Falls back to the default locale text if left empty. |
Empty State
| Setting | What it does |
|---|---|
| Empty state message | Text shown when the customer has no saved stores yet. Example: "You have no favorite stores yet." Falls back to the default locale text if left empty. |
Notes
- Text fields (title, subtitle, labels, empty state message) always fall back to your store's default locale translations if left blank — you only need to fill them in if you want to override the default wording.
- The block and the full-page version share identical settings, so changes made to one do not affect the other; each needs to be configured separately.
- In the theme editor preview, sample store cards are displayed so you can see how your layout settings will look before going live.
Do you need help?
If you have any questions or run into issues, please contact us — we’re happy to help.