
Store Locator block Setup Guide
Intro: Help customers easily find your physical store locations. The R+ Store Locator block displays an interactive map and a searchable list of stores, allowing users to find locations by city, ZIP code, or address. Each location can include important details such as address, contact information, business hours, and directions, making it simple for customers to plan their visit.
When used together with Custom Locations and the Store Availability block, it enhances the shopping experience by letting shoppers know exactly where a product is available and how much is in stock.
Shopify themes are divided into Online Store 2.0 (new) and Legacy (older) themes. If you're using a Legacy theme, you won't be able to add app blocks through the theme customiser.
How to add the Store Locator Block to Your Site for Online Store 2.0 (new) themes
Before using the Store Locator functionality, you need to add the block to a page template and optionally configure its appearance.
Step 1: Add the Store Locator Block to a Page Template
-
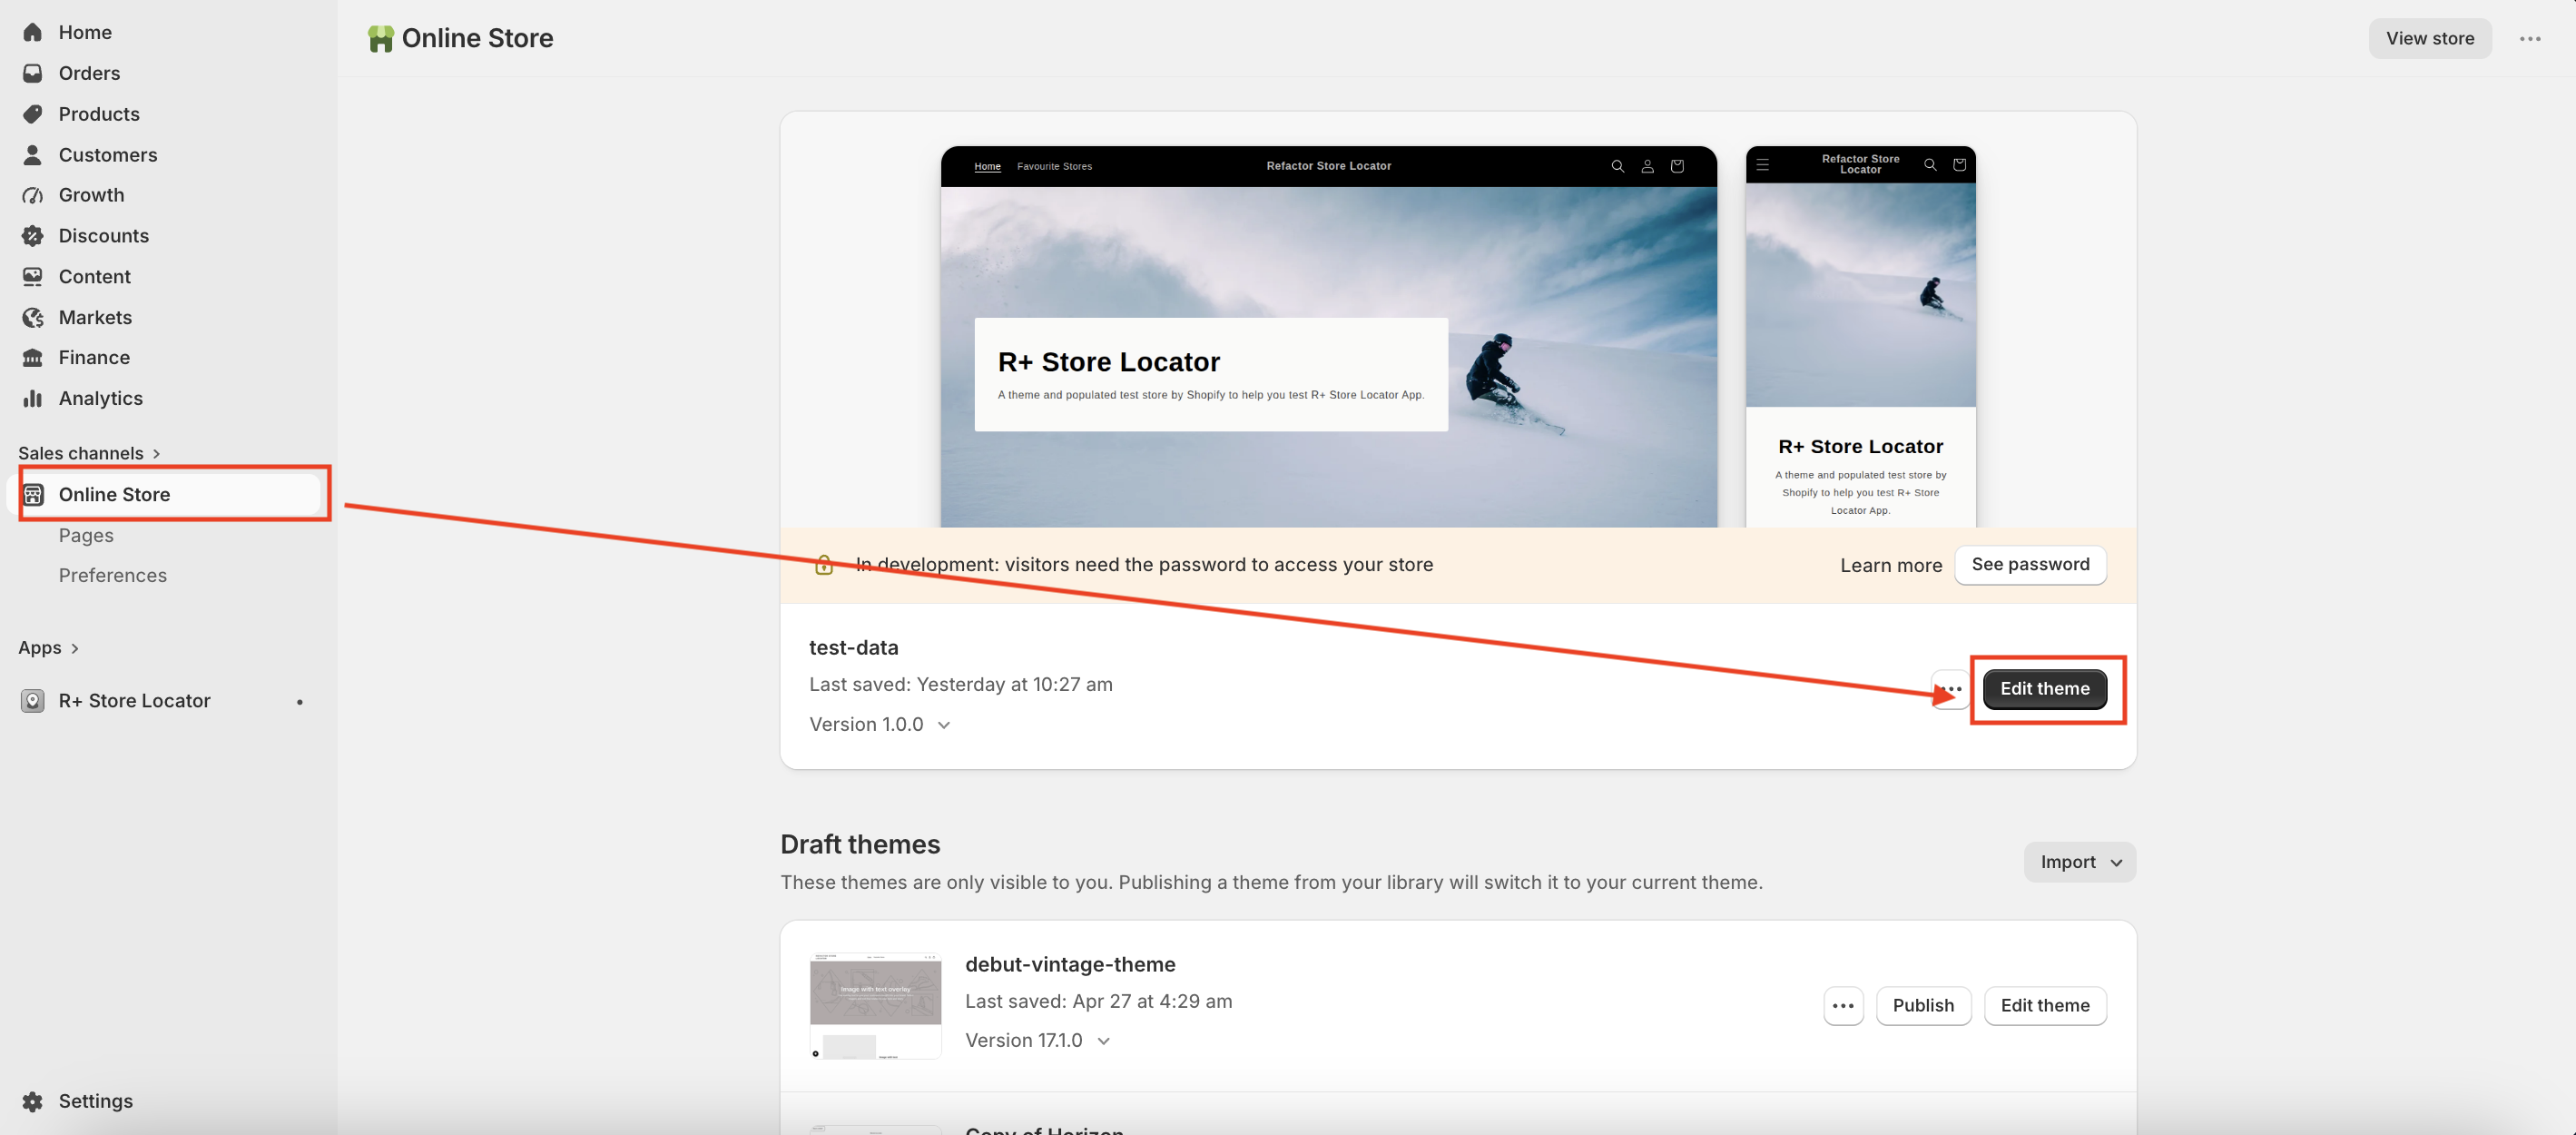
Go to Online Store → Themes, and click Edit theme on your active theme.
-
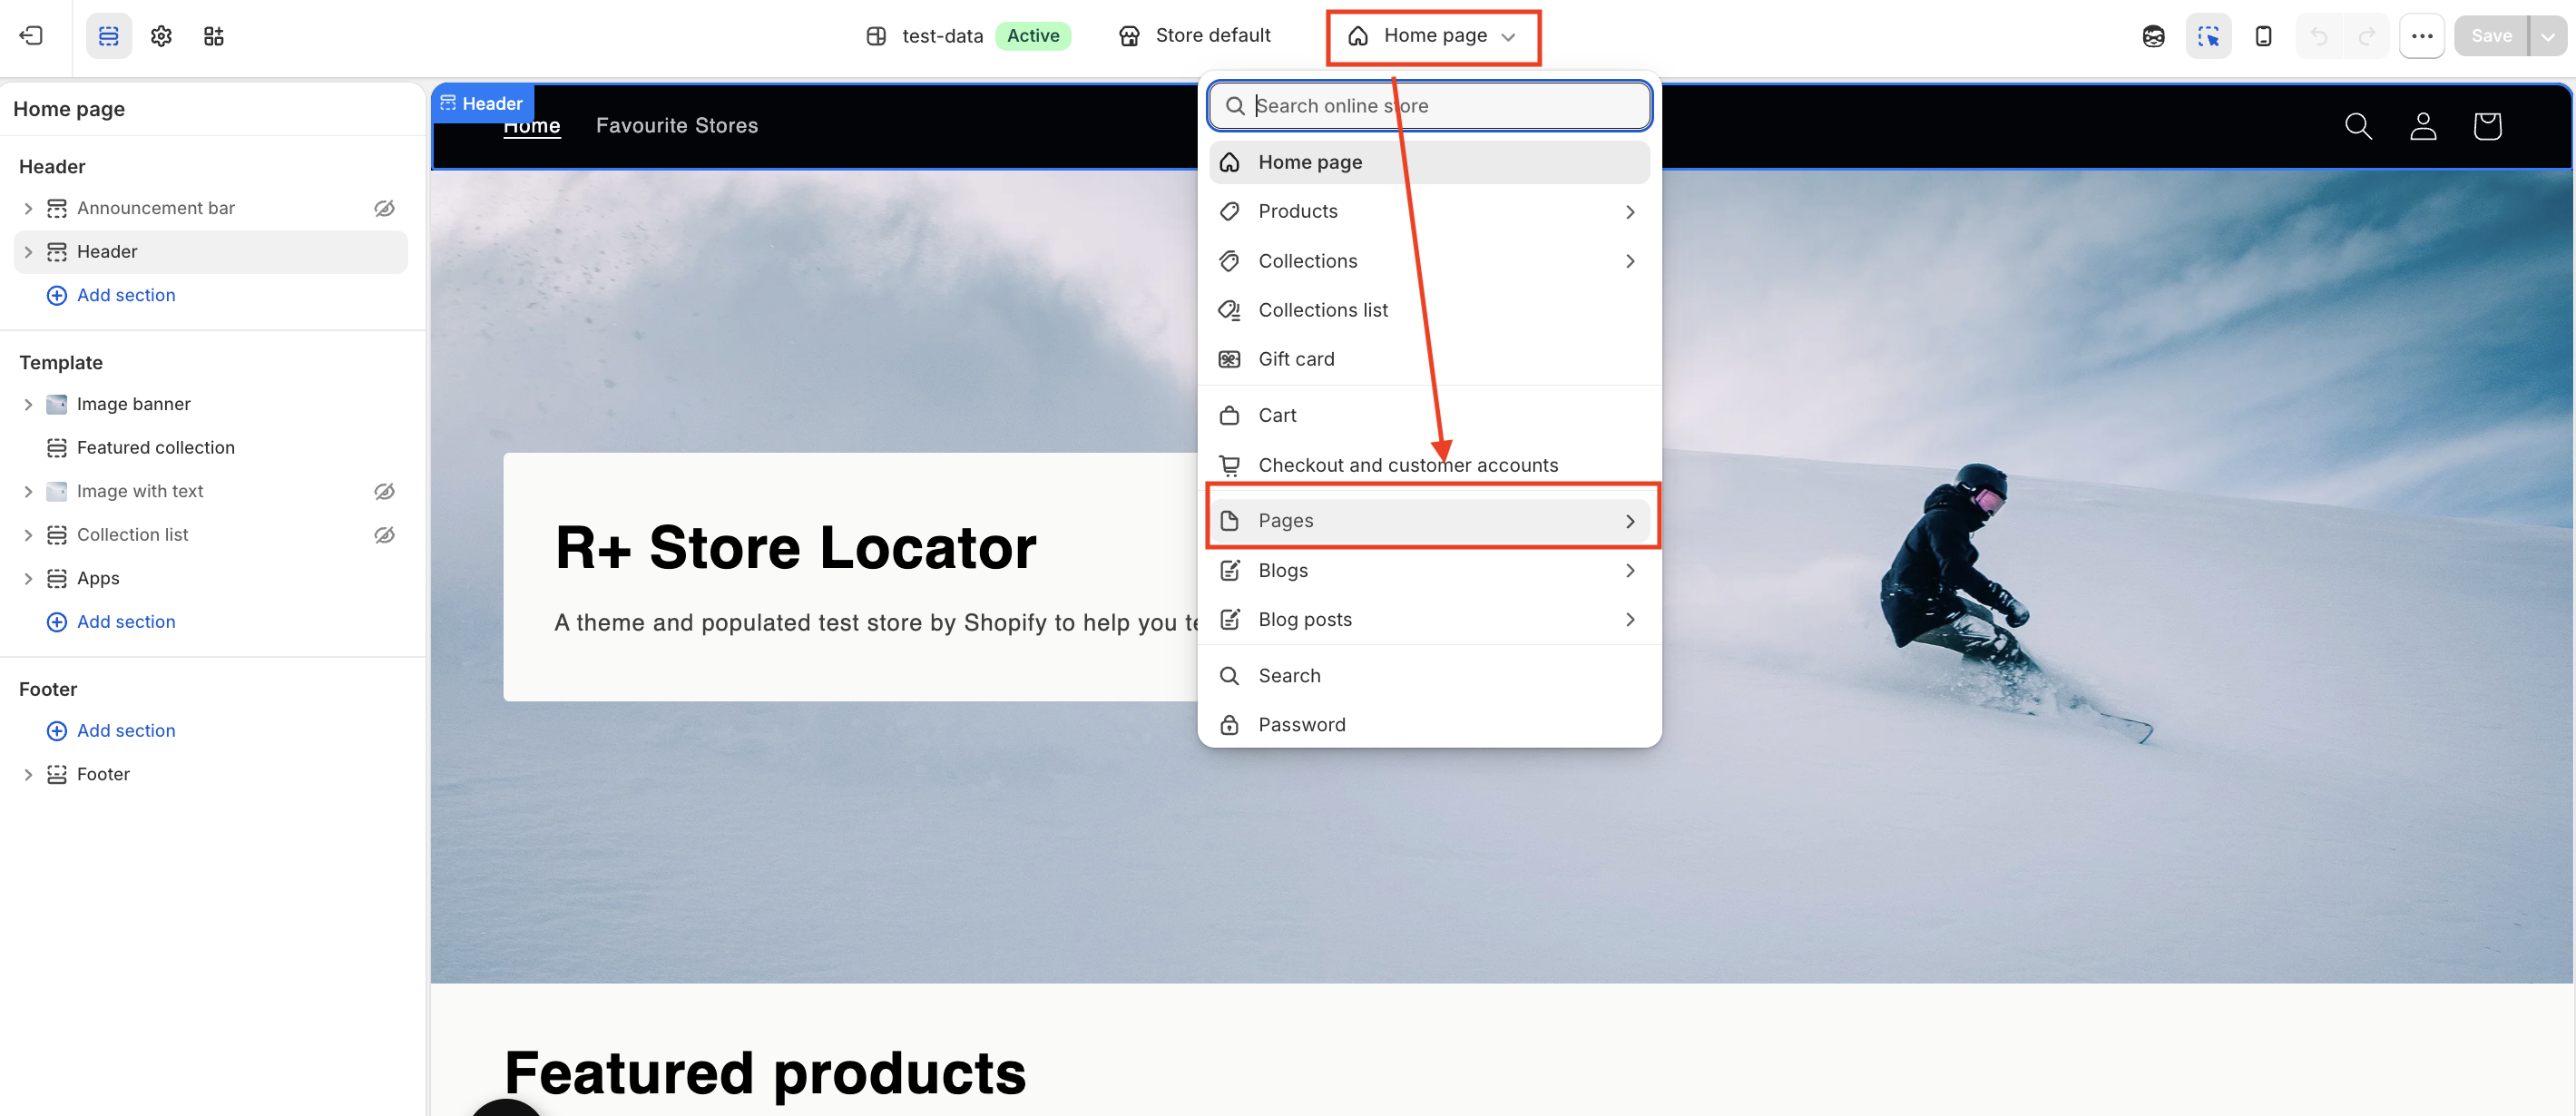
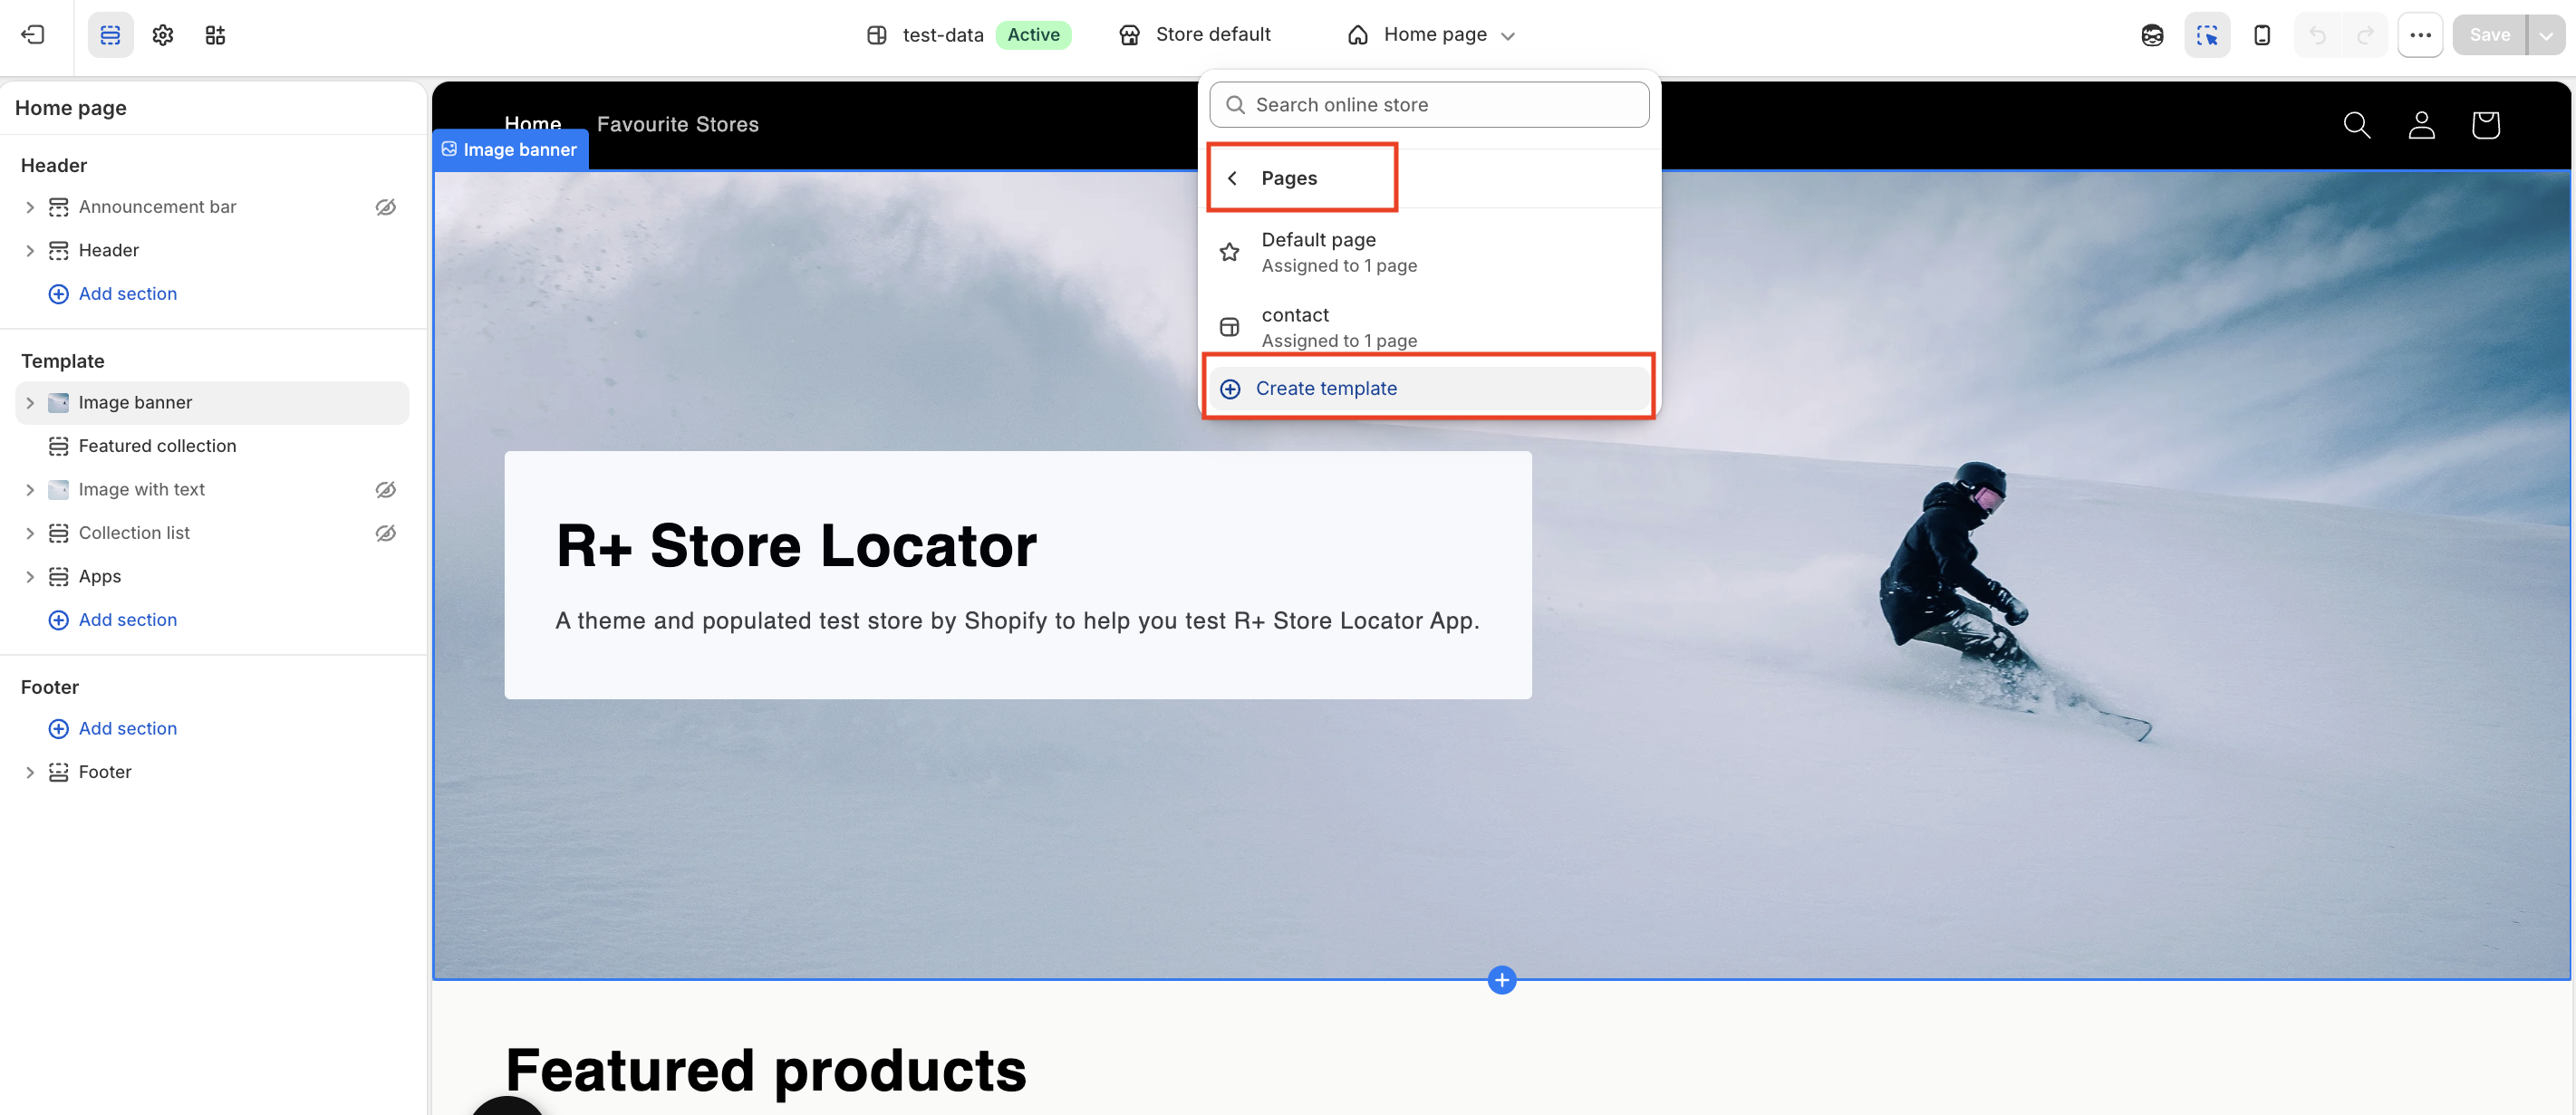
Open the page selector at the top, then go to Pages and click Create template.
-
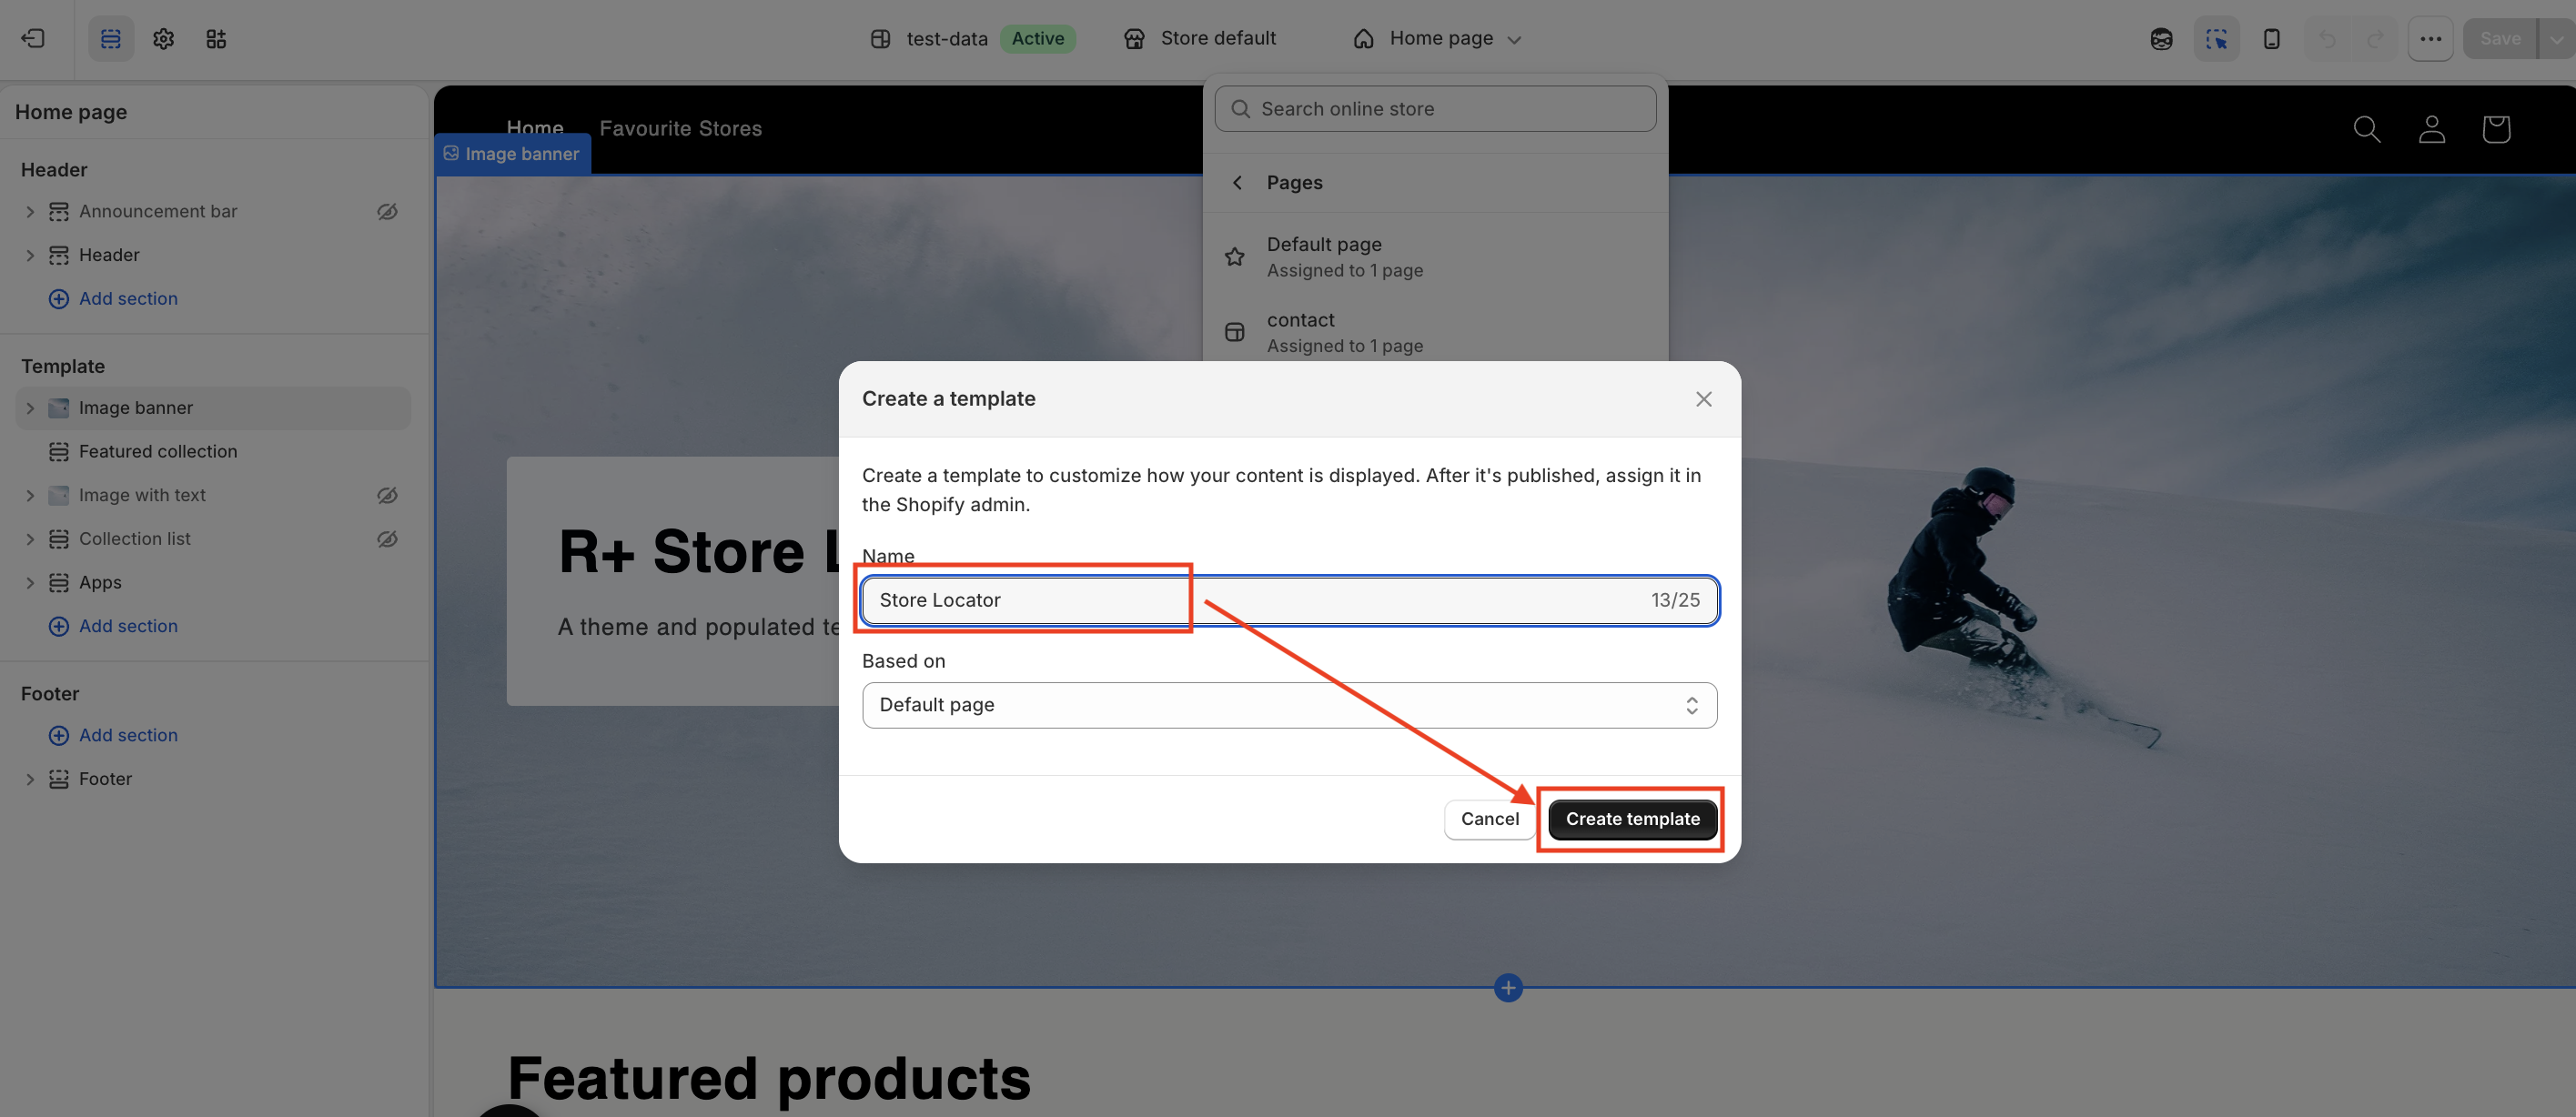
Enter the template name (for example, Store Locator) and click Create template.
- Click Add section and select R+ Store Locator.
-
Click Save.
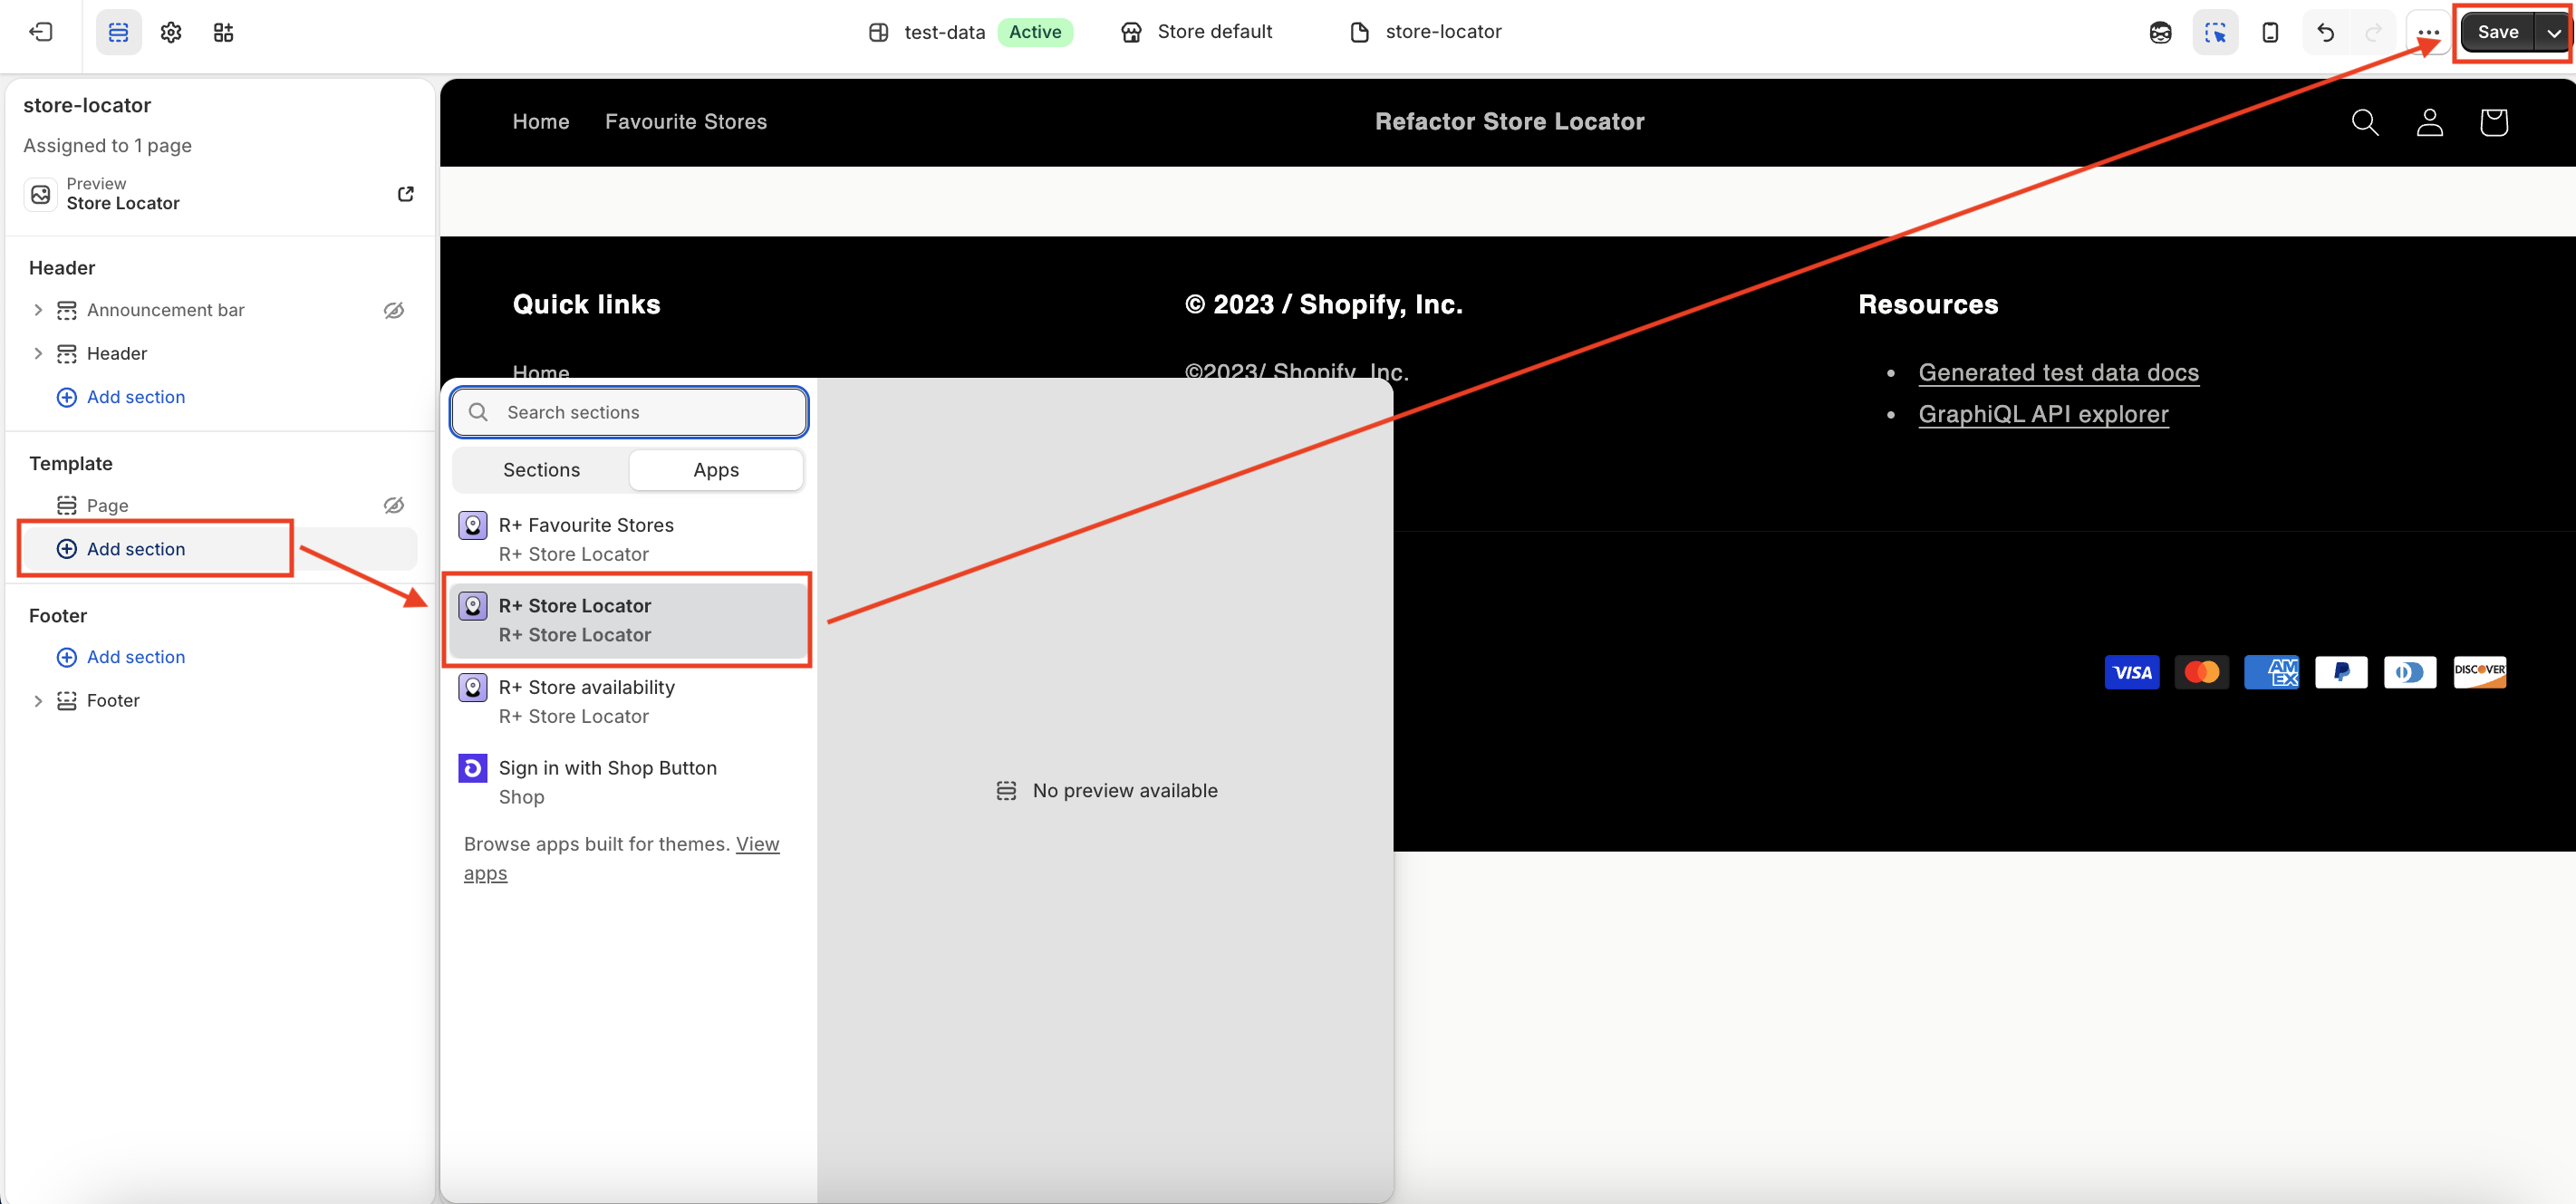
Next, create a page using this template:
-
Go to Online Store → Pages and click Add page in the top-right corner.
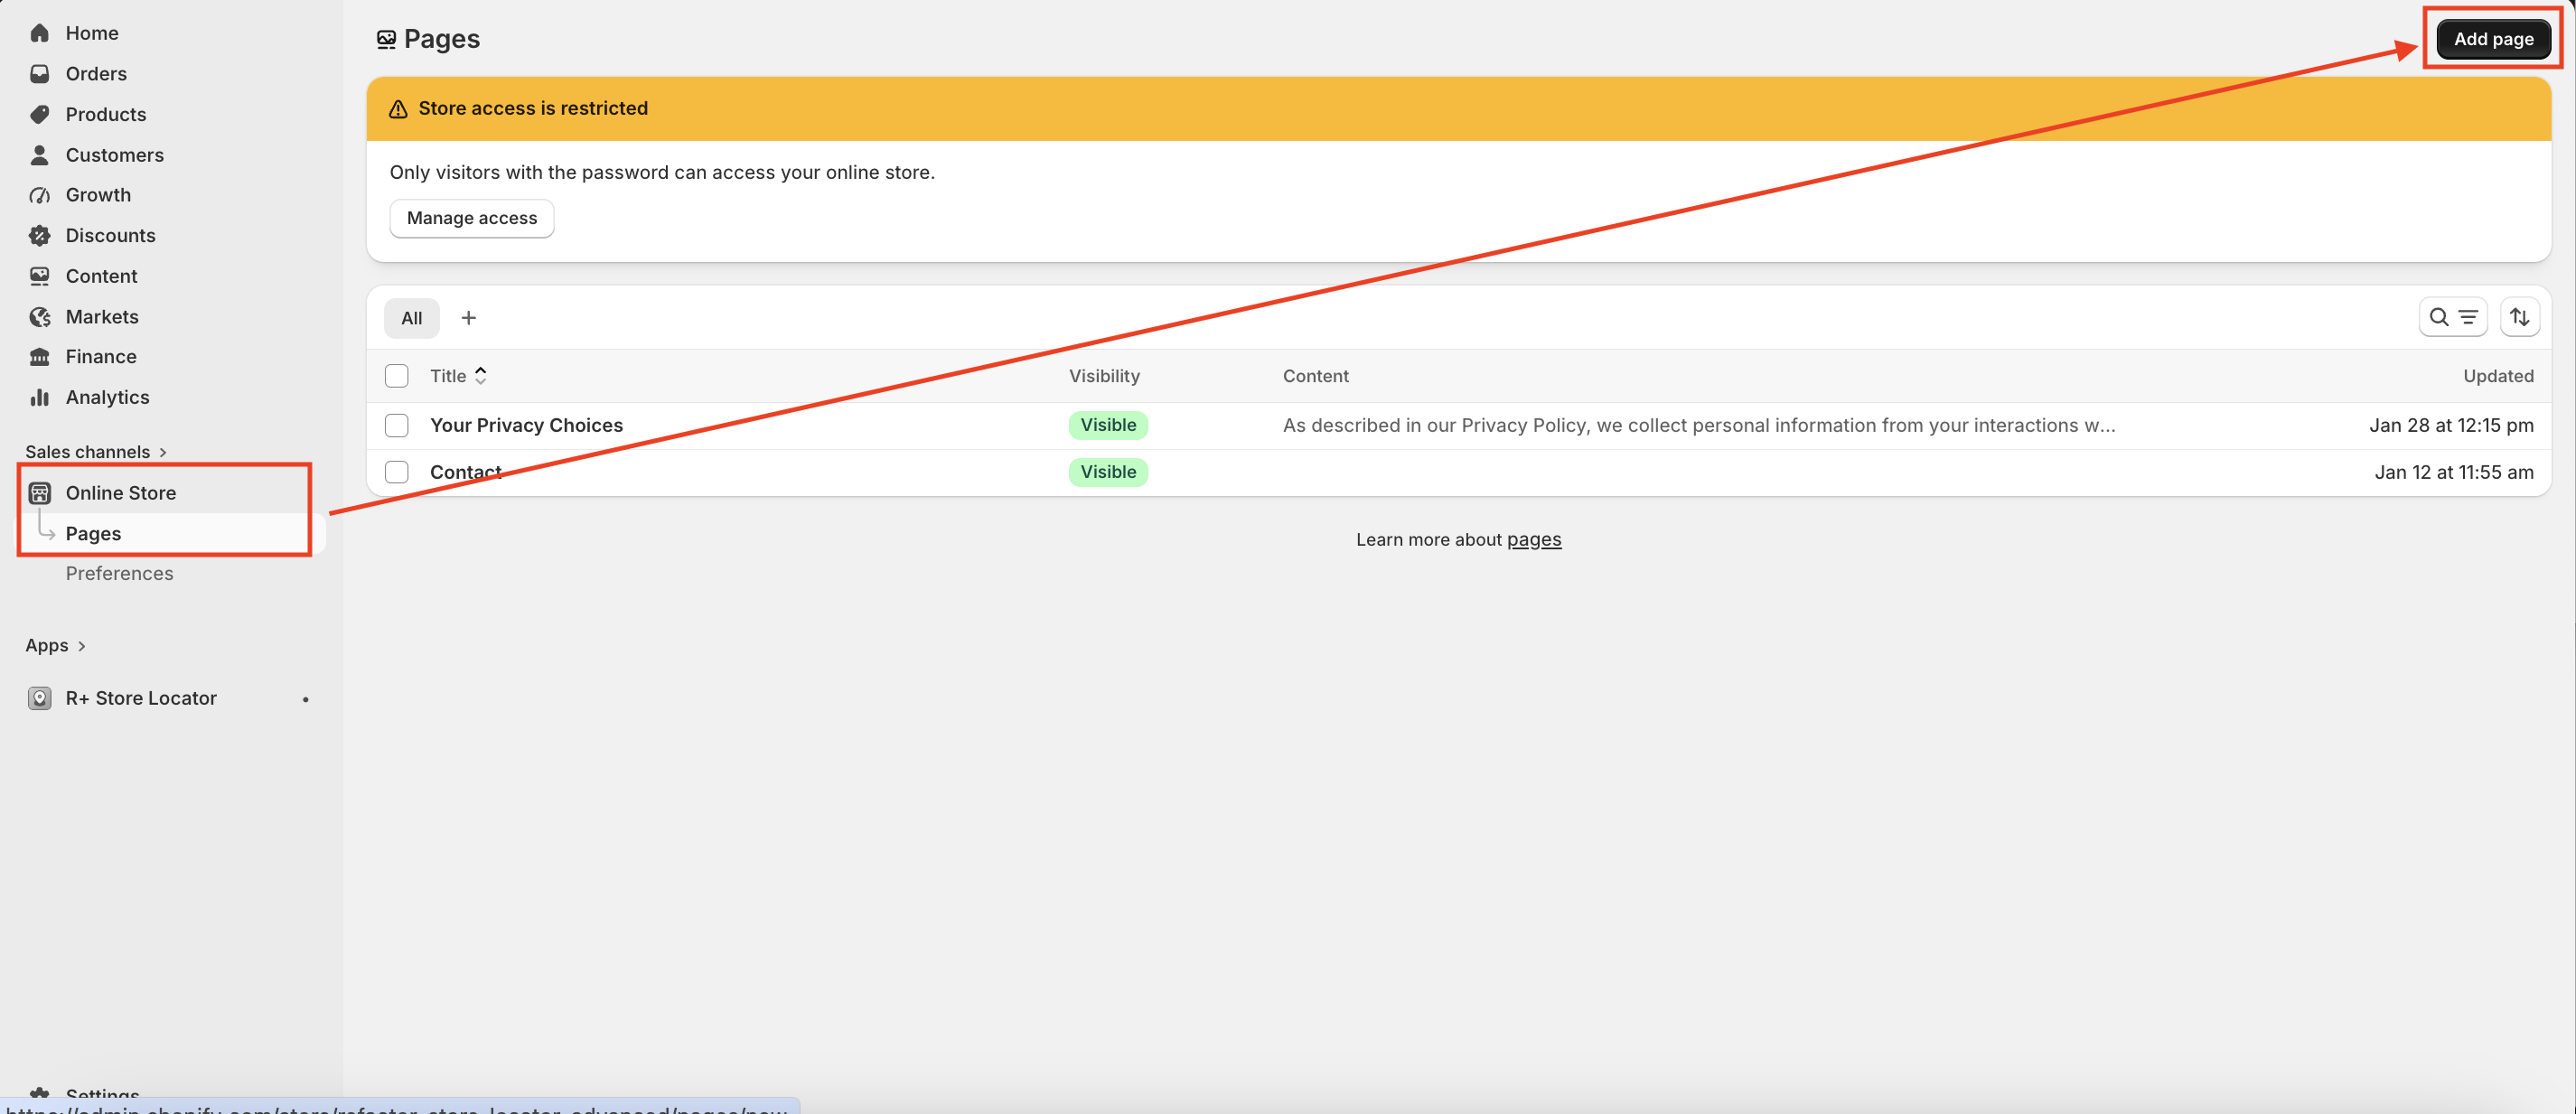
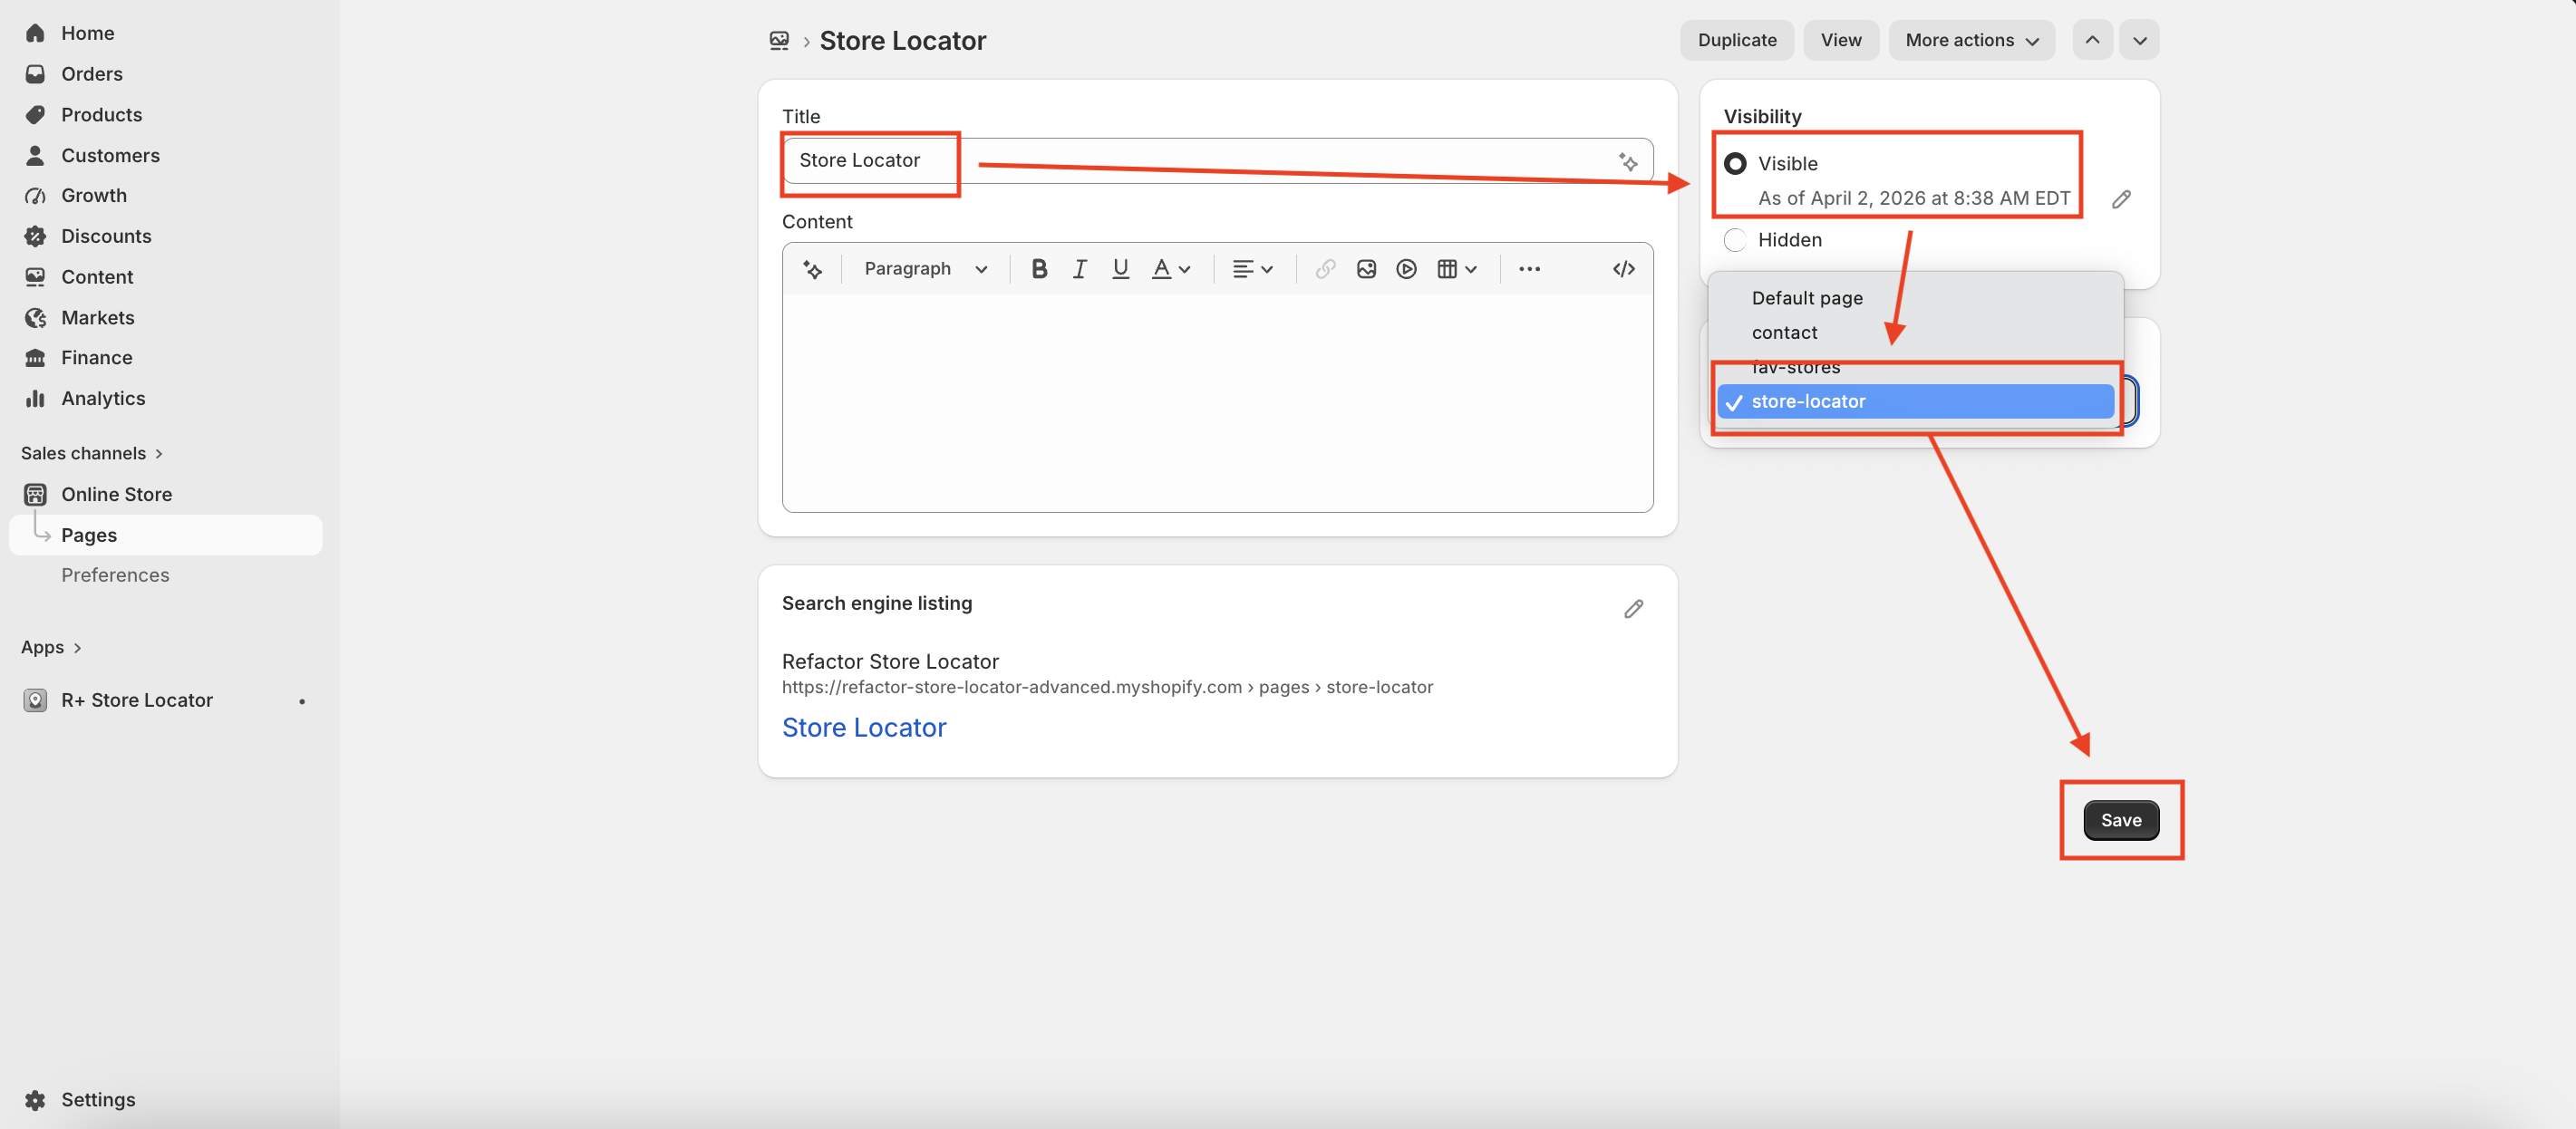
- Enter the page name (for example, Store Locator).
- Set the page visibility to Visible.
- Choose the store-locator template you created in the previous steps.
-
Click Save.
How to add the Store Locator Block to Your Site for Legacy (older) themes
To support Legacy themes, we provide the R+ Store Locator Embed block, which is added to the online store and can be opened using a floating button.
To enable the app in your theme:
-
Select the theme you want to apply and click Edit theme.
- In the customizer, go to App Embeds (the puzzle piece icon in the left sidebar).
- Enable the R+ Store Locator Embed embed block.
-
Click Save in the upper-right corner.
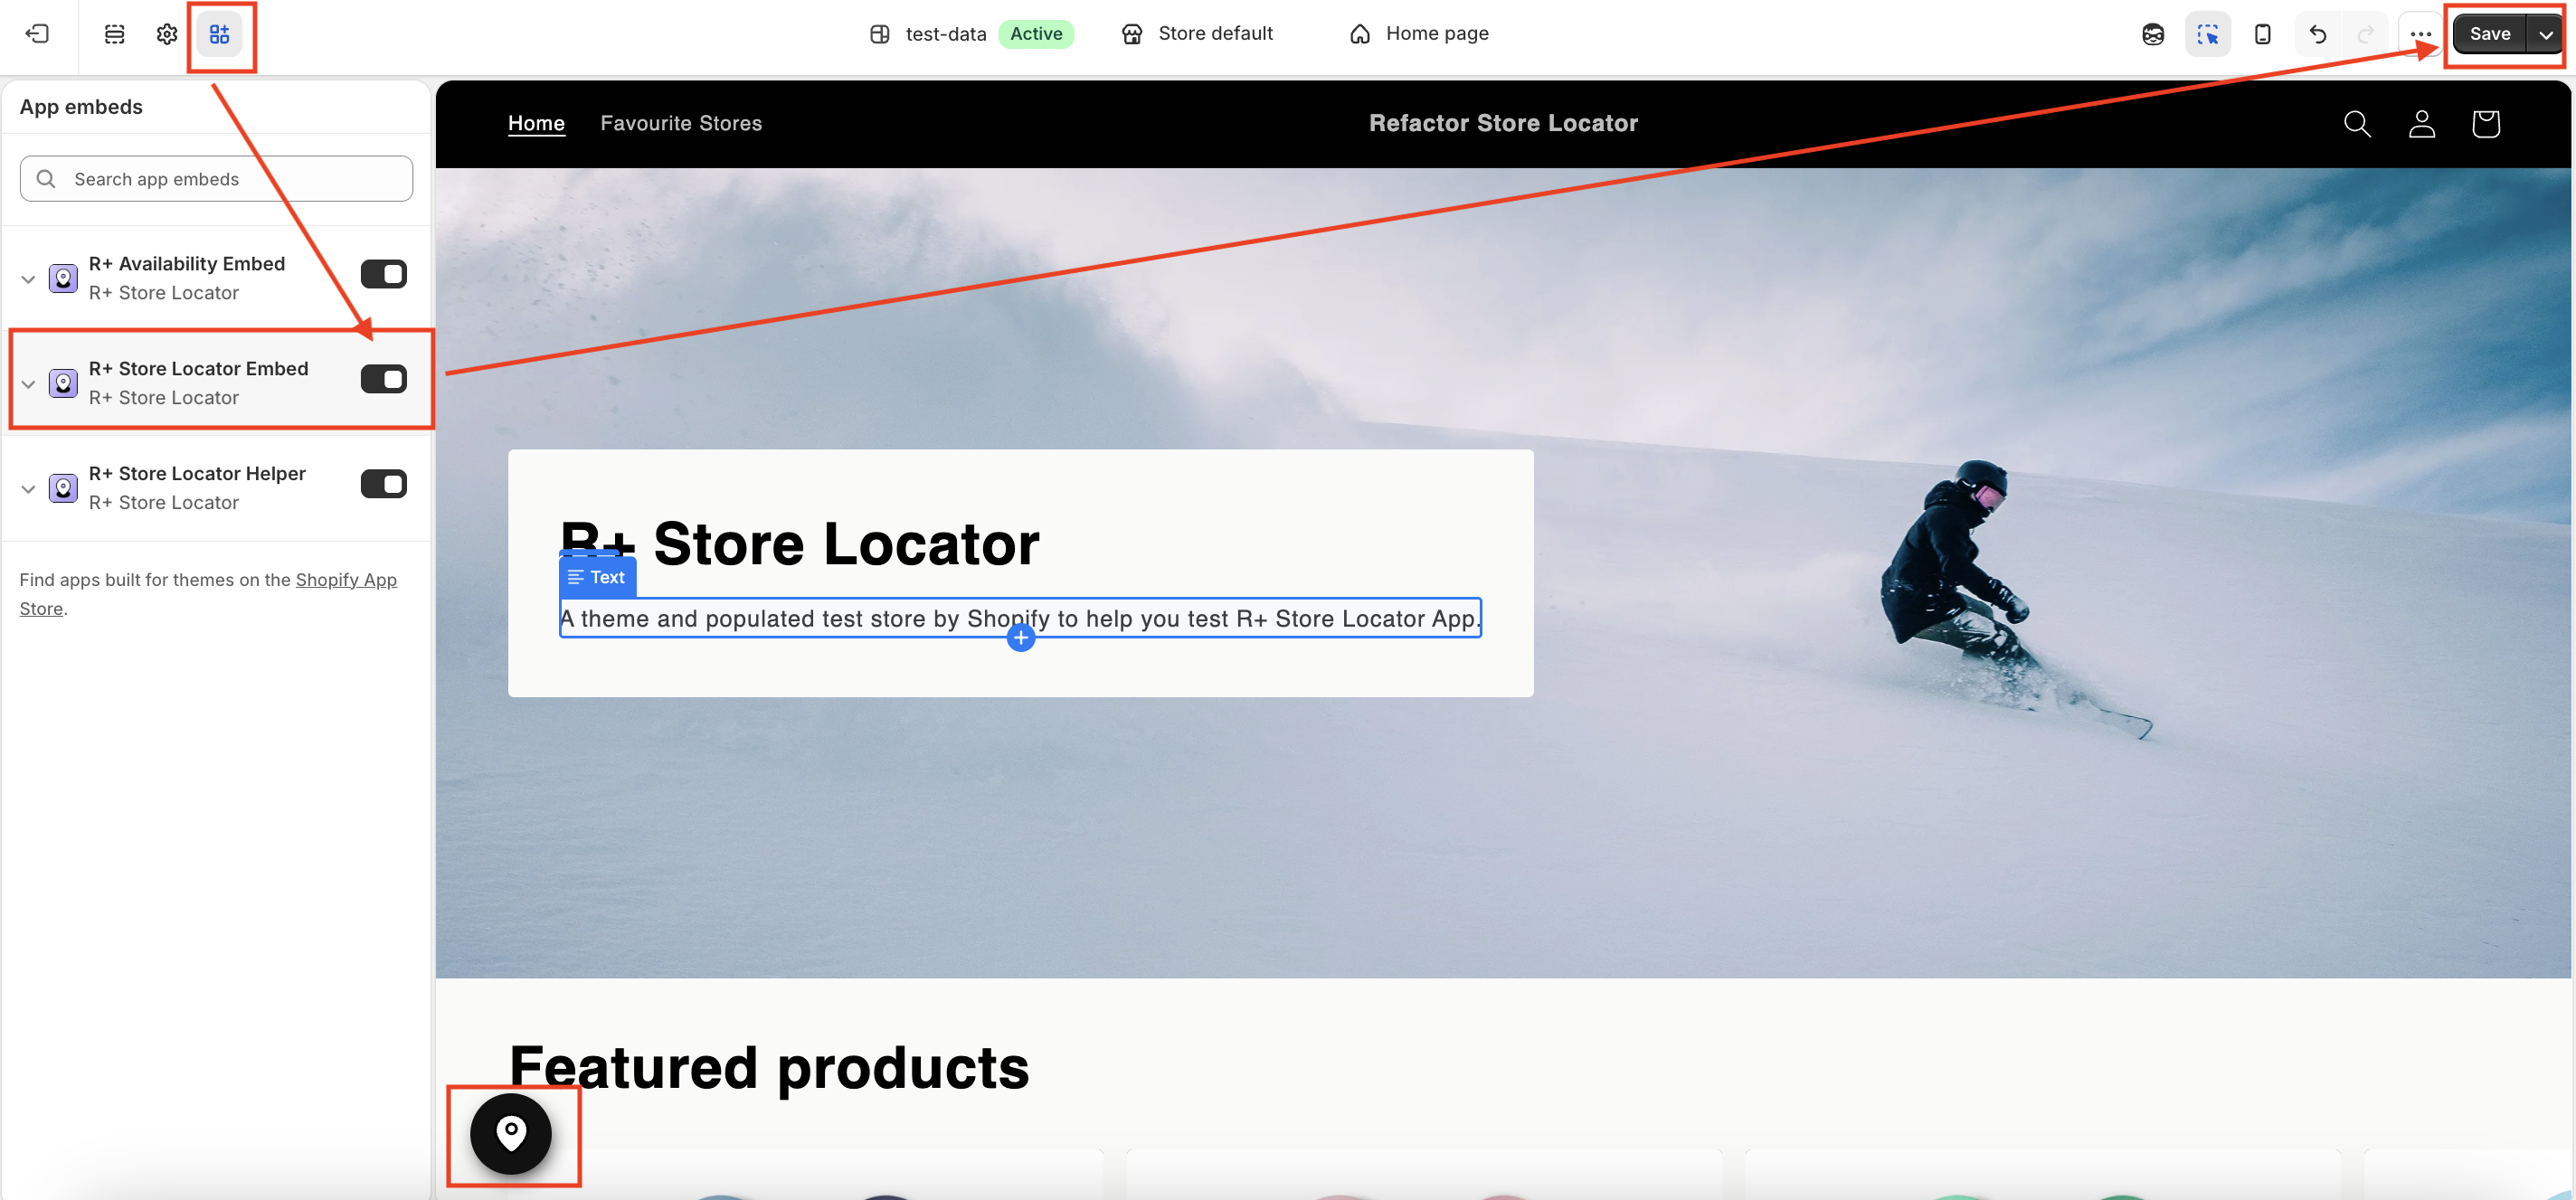
You’ll also find customisation settings for the floating button and modal, allowing you to adjust the appearance of the Store Locator feature to match your store’s design.
Step 2: Customise the Store Locator Block
After selecting the R+ Store Locator block, the customisation settings will open. Here you can configure the following options:
Section Settings
- Distance Options — Comma-separated list of distance values, e.g. 10,25,50,100.
- Distance Unit — Select kilometers or miles.
- Add Container — Enable this option to limit the content width on large screens. If disabled, the section will display in full width.
- Max Width — Set the maximum width of the section when the container is enabled.
- Section Margins (Desktop and Mobile) — Adjust the top and bottom spacing separately for desktop and mobile devices.
- Colors — Customise background and text colors.
- Page Layout — Choose the layout that best fits your store design.
Title Settings (Desktop and Mobile)
Customise the title text, font style, size, and color separately for desktop and mobile devices.
Primary and Secondary buttons settings
Configure the appearance of buttons used in store items, including styles, colors, and typography.
Step 3: Add the Store Locator Link to Your Menu
You can add a link to your Store Locator page in your header or footer menu. Follow the steps below:
-
Go to Online Store → Content → Menus and select the menu where you'd like to add the link (for example, Main menu or Footer menu).
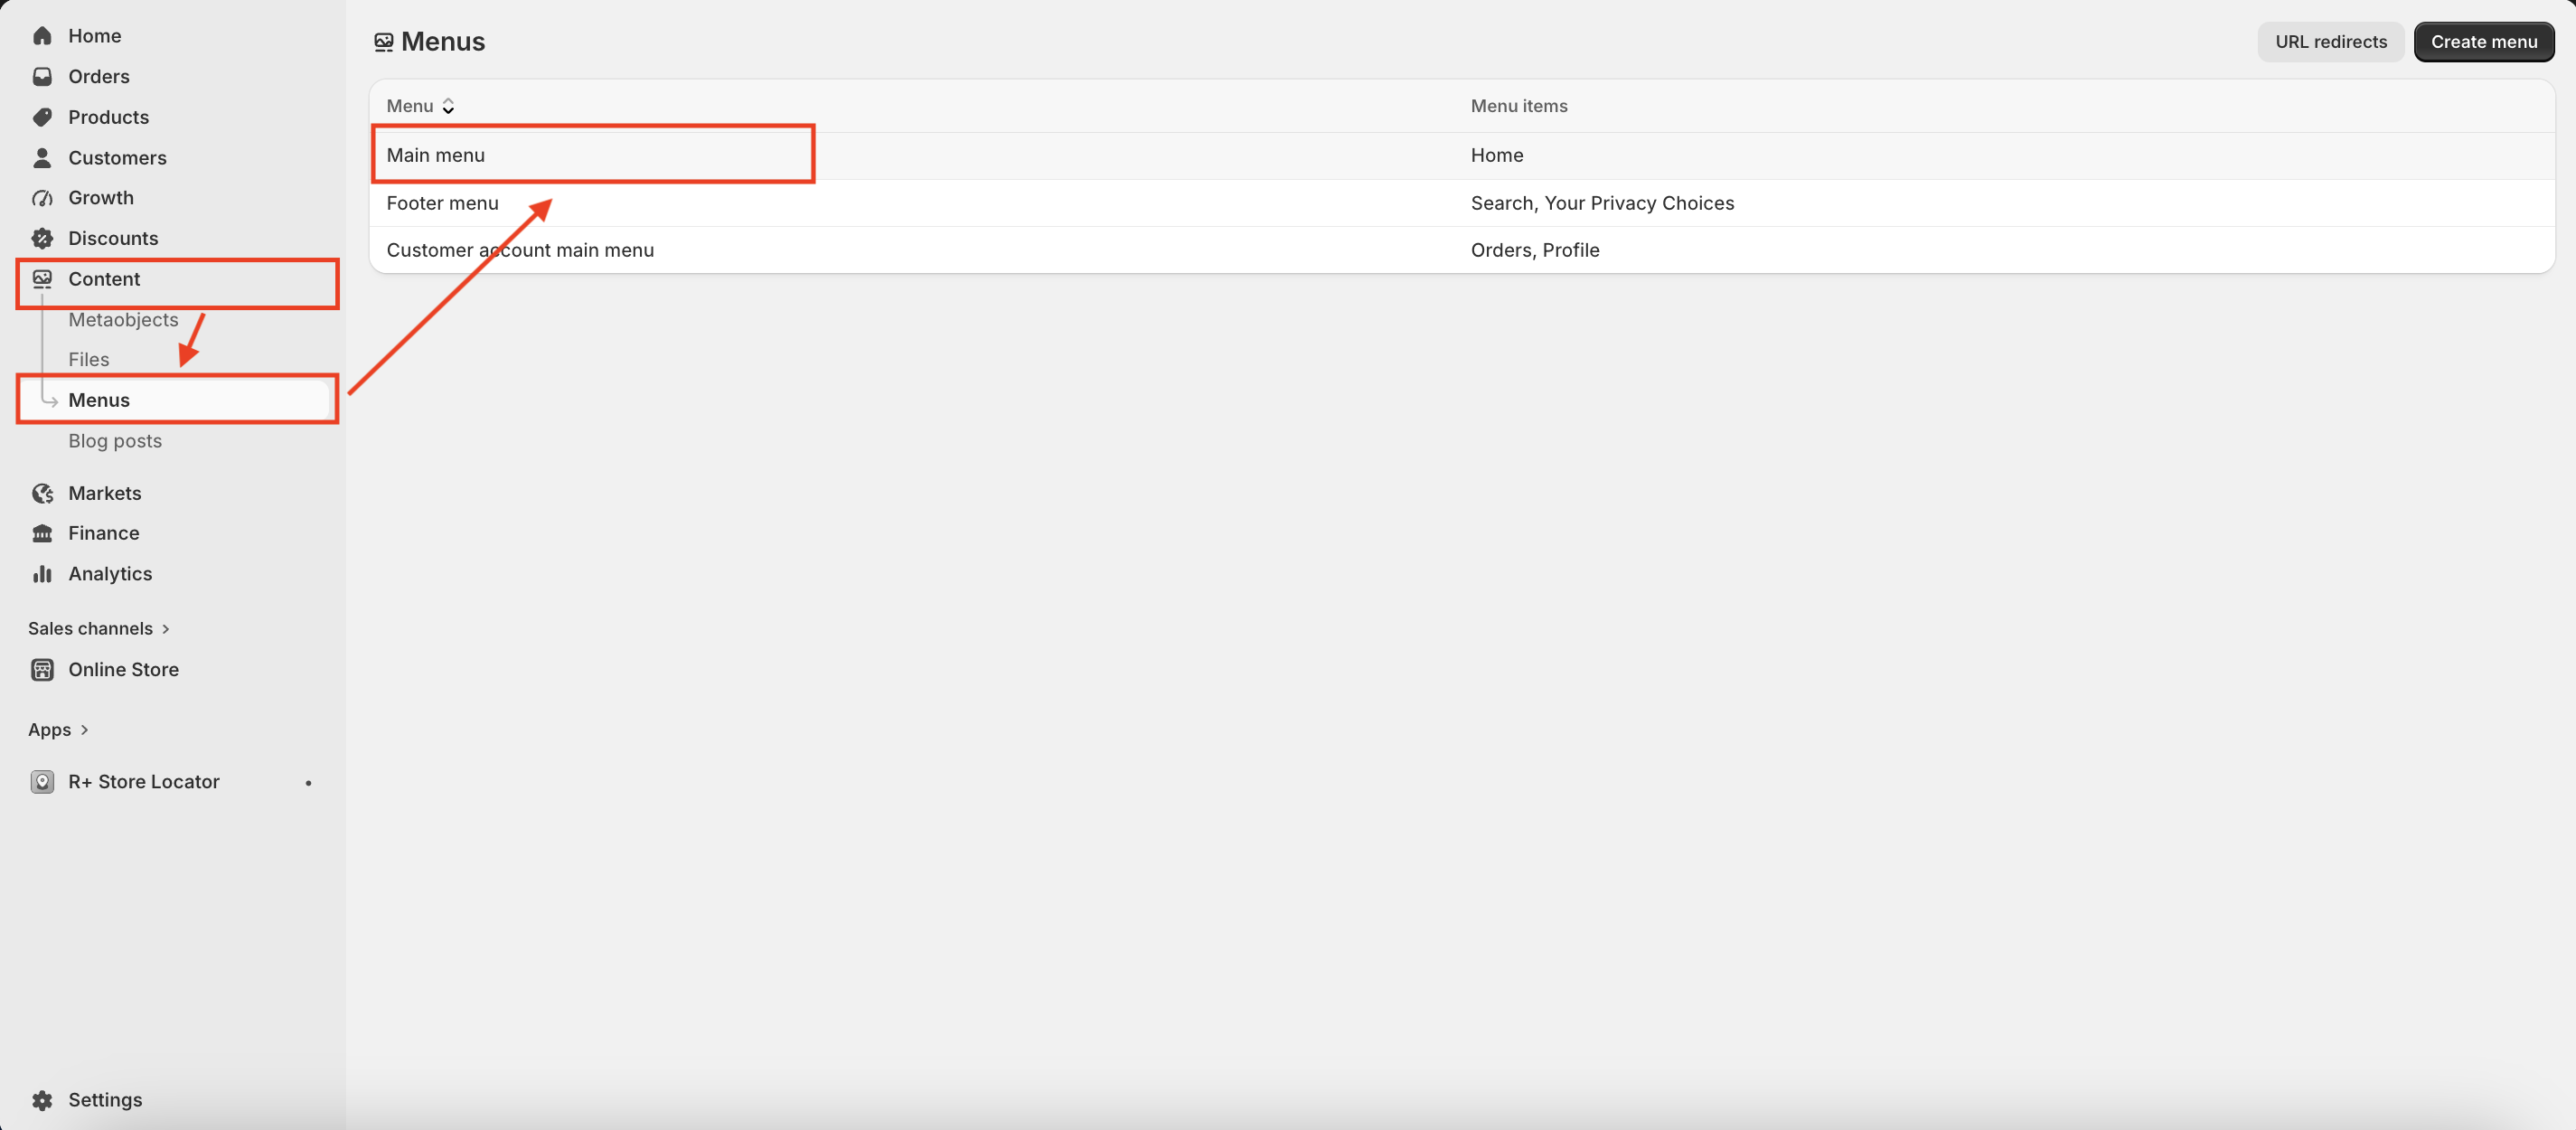
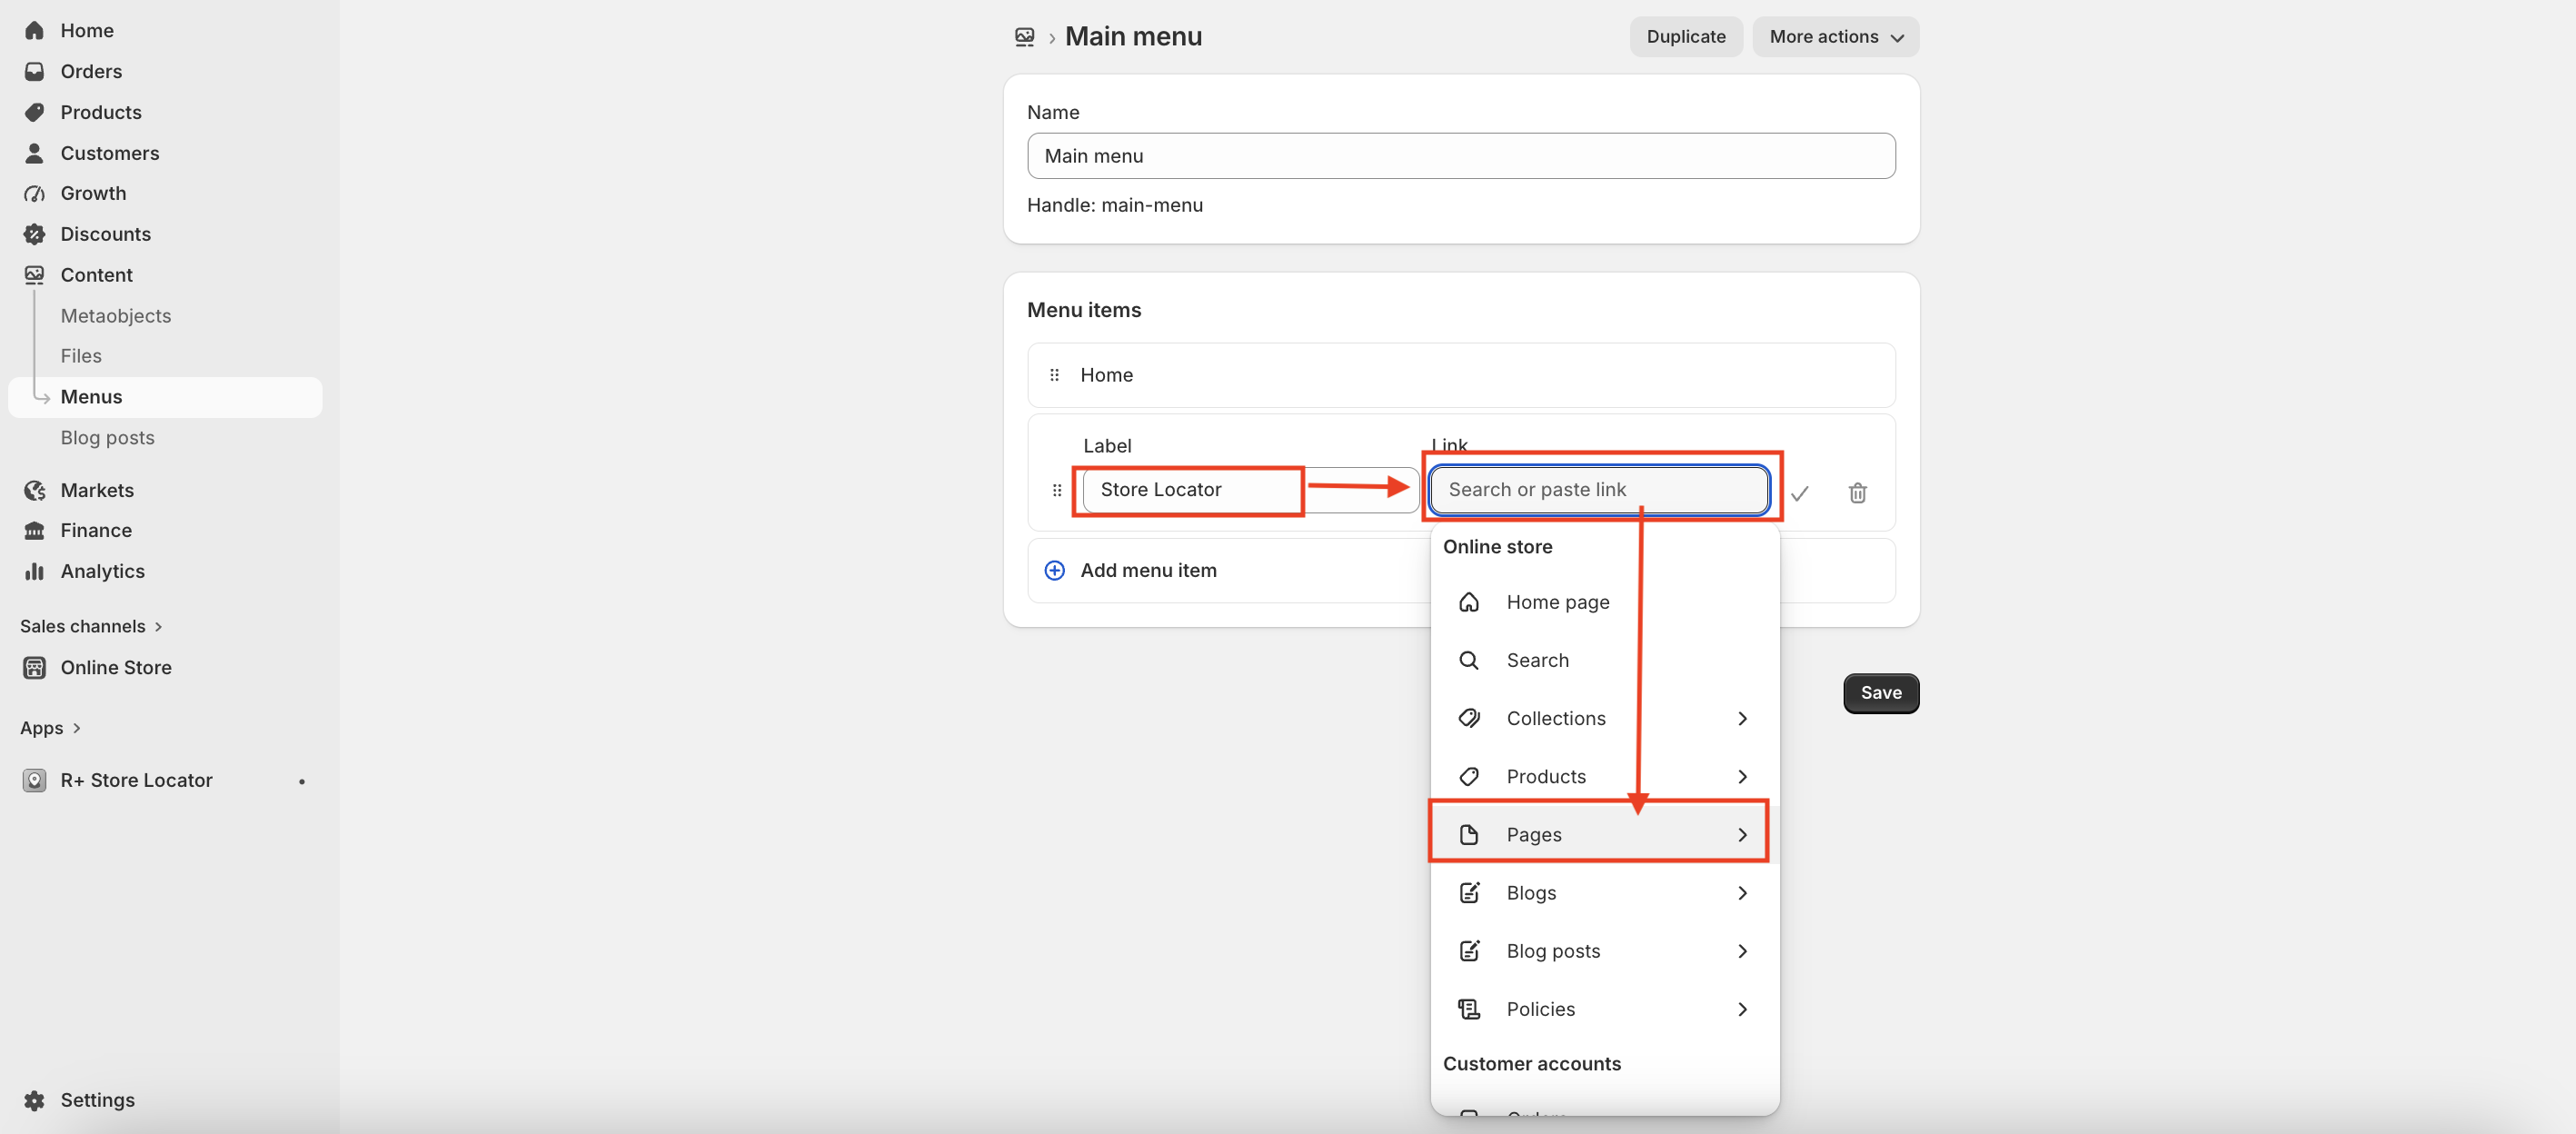
- Click Add menu item.
- Enter the menu item name (for example, Store Locator).
- Select your Store Locator page as the link destination.
-
Click V button, then click Save.
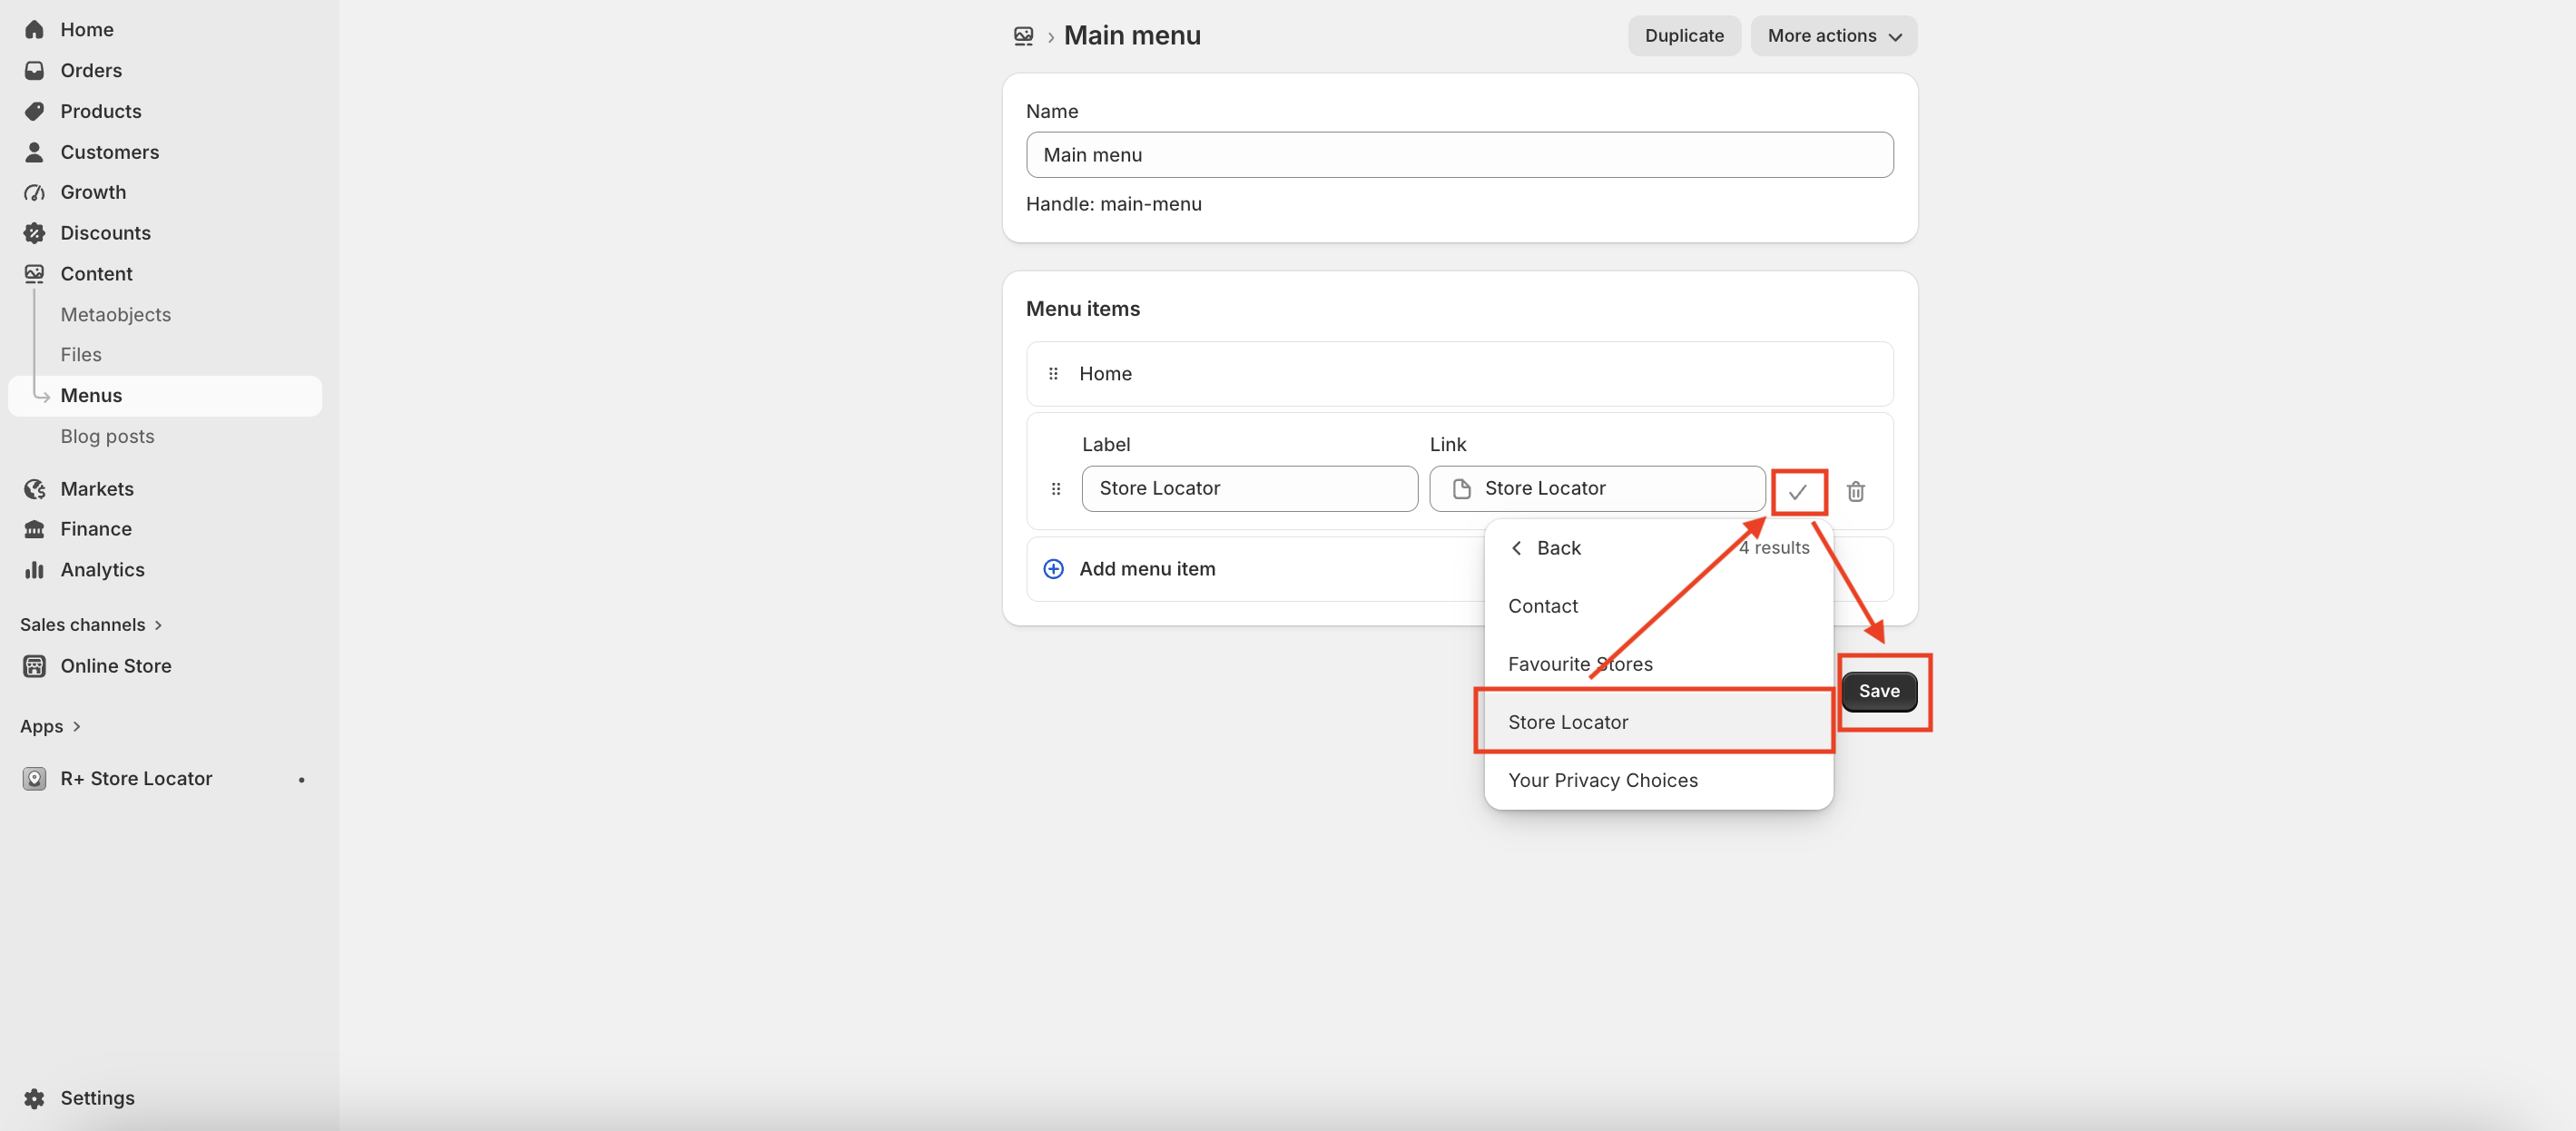
Your Store Locator page will now be accessible through your store's navigation menu.
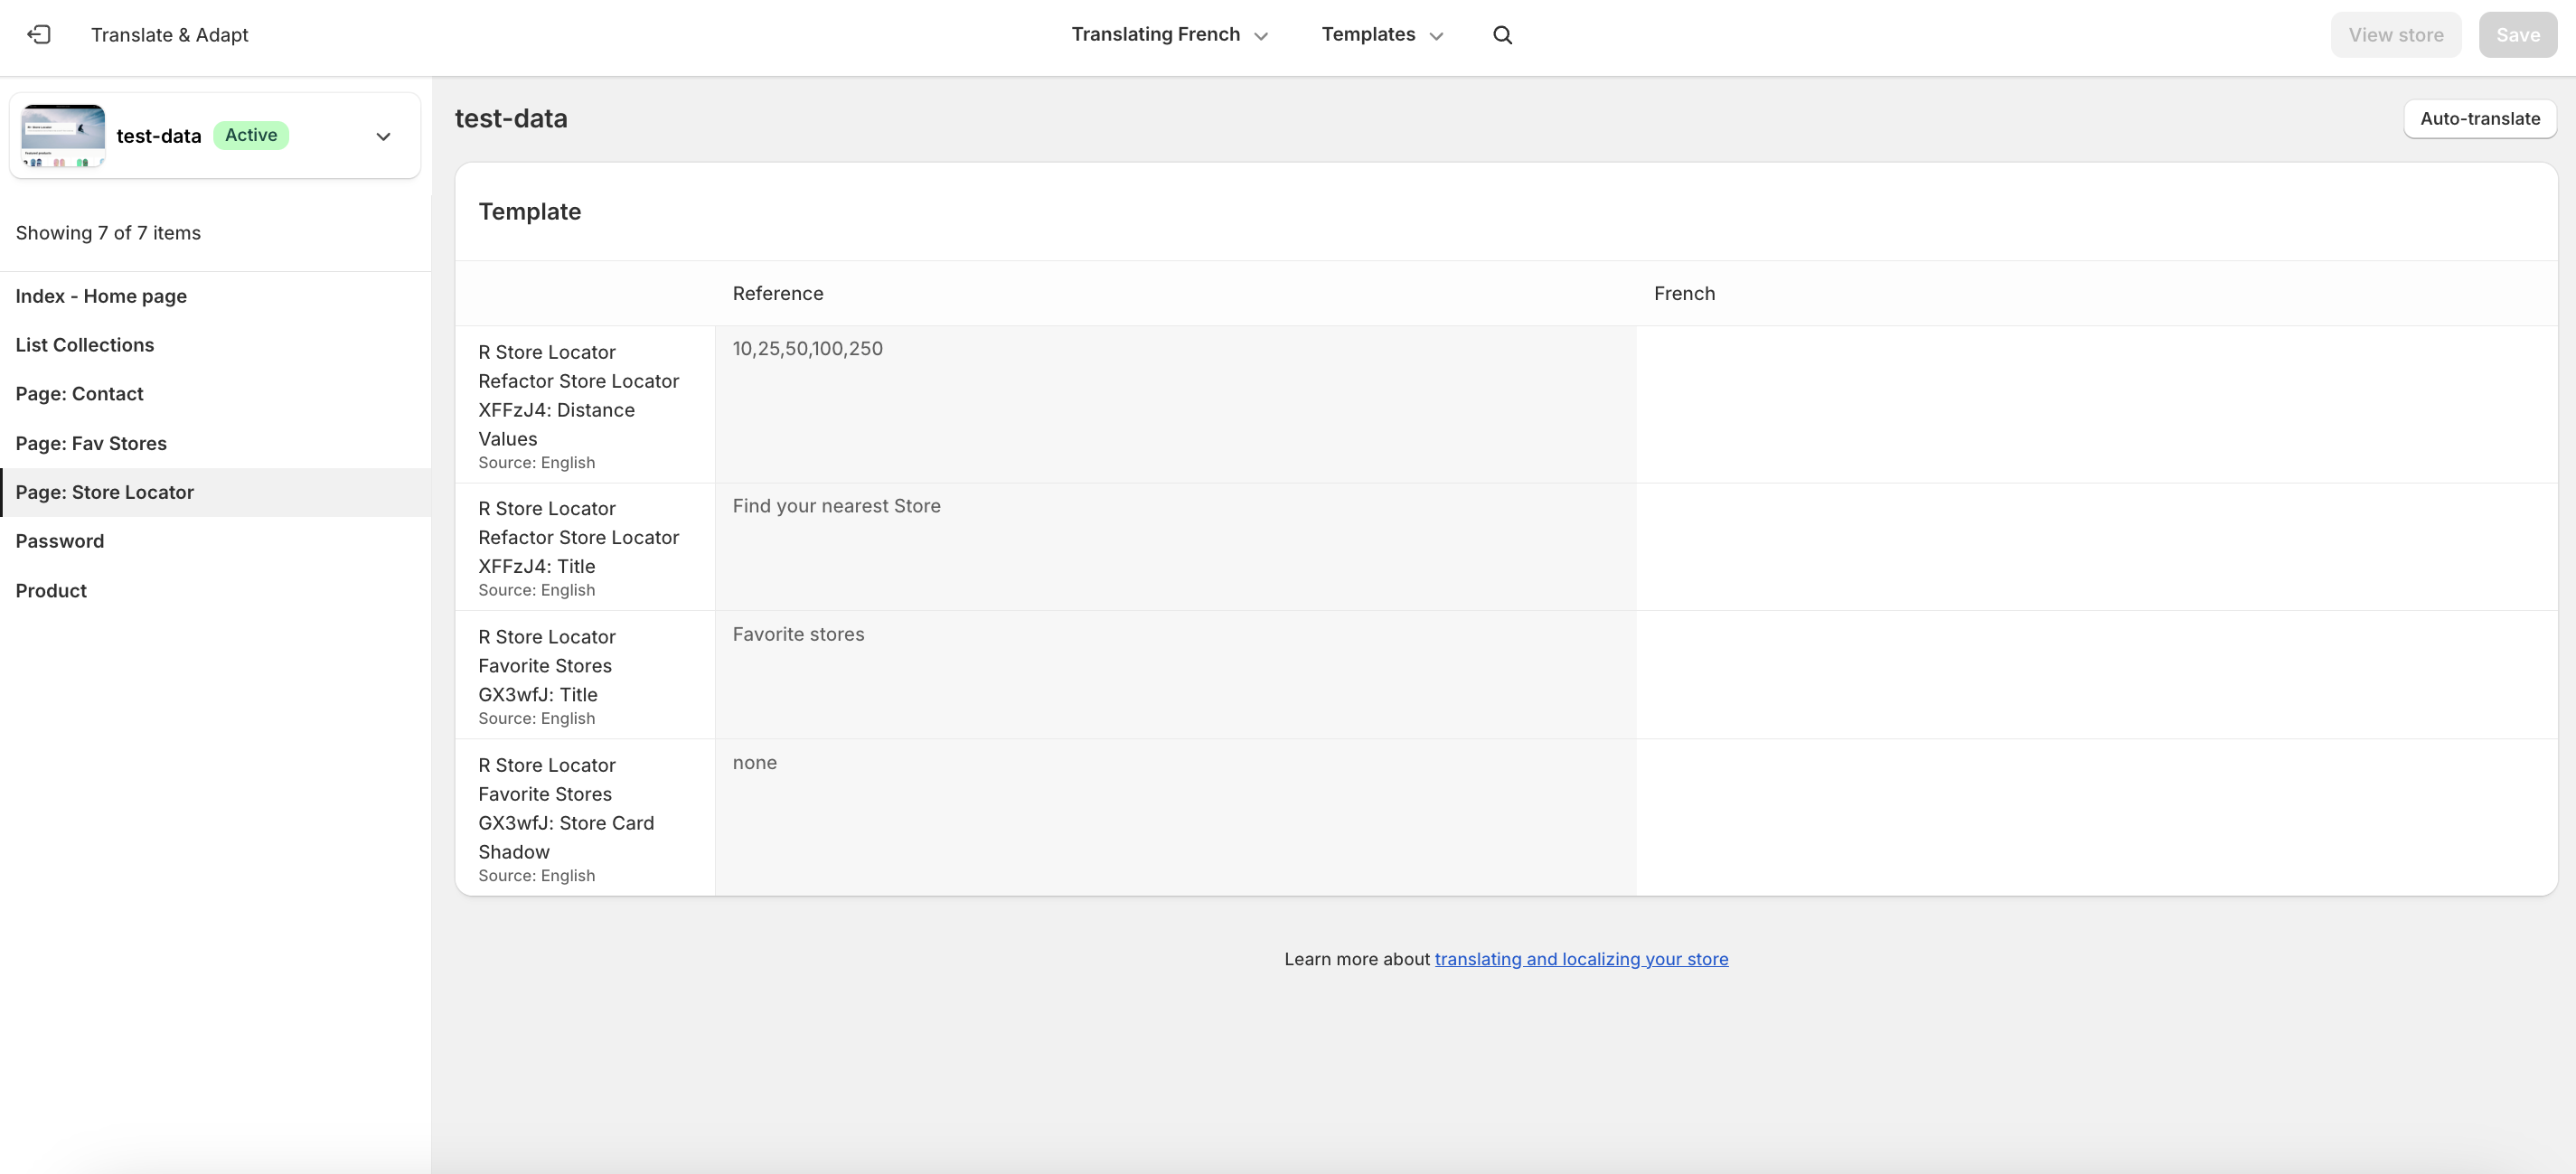
Step 4: Add Translations for Your Store Locator Block
To add translations, follow these steps:
- In the theme editor, navigate to R+ Store Locator Block, click the (...) menu at the top right corner.
- Select Localize.
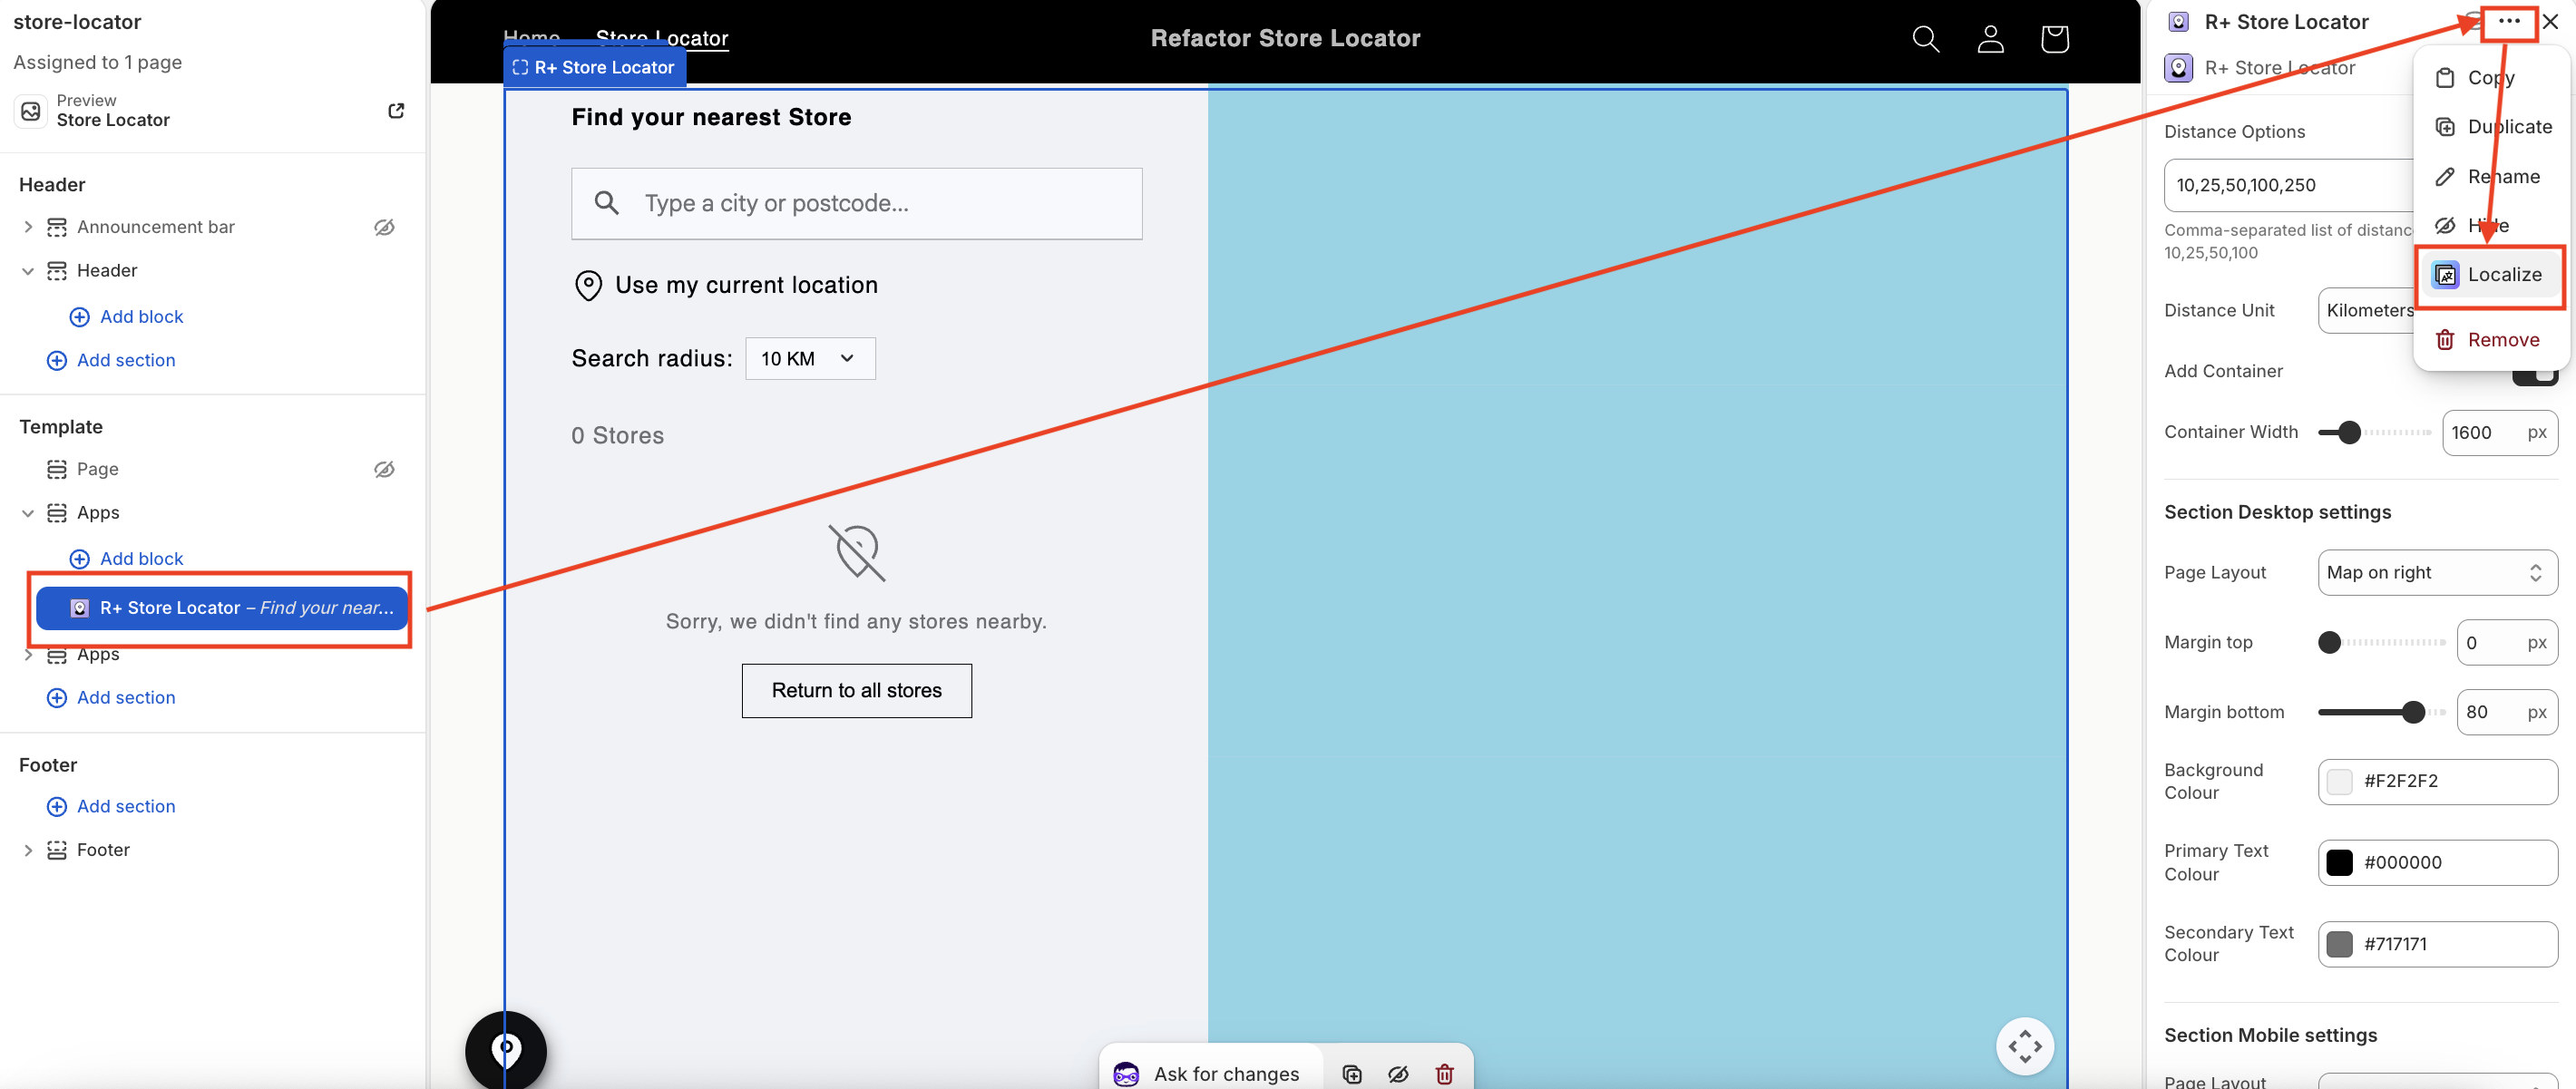
3. You will be redirected to the Translate & Adapt app, where you can edit translations for the languages used in your store.
Do you need help?
If you have any questions or run into issues, please contact us — we’re happy to help.